Category Archives: Fly tying Materials

Where to find them cheaply

Part 1: The Timid Fellow’s Guide to Dyeing

The next time the wife complains of gray hair or dark roots you can leap to your feet and assist. Fiddling with Madam’s hair being a case of “come back with your shield, or on it” –  so you may want to practice a wee bit before restoring her lost youth …

Dyeing materials can be the easiest thing you’ve ever attempted, but it can also be the end of your relationship and the complete destruction of considerable high quality tying materials.

Despite all the complexity, coloration can be broken down into two real requirements, the first is easy – I need some red hackle. The second is incredibly difficult – I need some more of the same color.

Dyeing a primary color is easy. Buy the dye in the color you need, follow the labeled instructions, add fixative, and dry the mess out. Matching a color is much more difficult. The fellow that made it may have used a different vendor for his dye, dipped it for an unknown length of time, and you’ve got to reverse engineer that color back out of your pot – which is not trivial.

The Big Two:

For animal parts, furs, feathers, hides, and anything else natural (except plant fiber), you can use the commonplace dyes available in your supermarket, like powdered or liquid RIT – or you can use coal tar dyes – also known as “acid” or “protein dyes.

Each has its preferred fixative, RIT uses table salt – and protein dyes use any weak solution of acid. Muriatic and Acetic acid are the most common fixatives, you know them as white vinegar (5% solution of Acetic acid), and Muriatic is (a 10% solution of Hydrochloric) sold to properly PH your swimming pool. Both are readily available and cheap.

A whiff of Muriatic is most memorable, the inhale starts and the body instantly overrides the mind. If you don’t already have a swimming pool (and don’t care for noxious chemicals) stick with the plain white vinegar.

Each dye vendor has a completely different range of colors and compounds used to make them, which can add some unneccesary complexity when mixing and matching. It’s best to  pick one as the source of all your colors, relying on a combination of written notes and familiarity with his colors to breed consistency quickly.

I’ve recently changed to Pro Chemical & Dye as my protein source. I can buy dye in pounds or ounces, and the prices vary by color. If you remember your history books, different colors are the result of different rare earths and minerals, some being more expensive than others like Cobalt, which is why their pricing is disjoint.

… and the range can be significant. Coral Pink is $2.40 per ounce, and Yellow is $9.00 an ounce. They also have a full range of odd fixatives, dyes for synthetic fibers, instructions on use, and a great complement of detergents and degreasers.

RIT is somewhat self explanatory. You get what the supermarket or craft store stocks. Most salt fixed dyes recommend non-Iodized salt, but they plainly state that table salt works just fine.

The Strong and the Weak

Each of these types of dye have strong and weak points – and rules that you must follow religiously.

Rule #1: Salt-fixed dyes (RIT, Tintex) should only be used for earthen or pastel colors – never used to make bright or vibrant color.

There’s good reason for the above. RIT is a weak fabric dye and salt isn’t much of a fixative. If you think of the molecular level, the pigment has to “stick” to the filaments you’re dyeing, and the fixative is largely there to “score” the fibers and let the dye attach itself permanently.

Salt is really quite toxic in high concentrations so it acts like an acid, it’s just not a very good one.

Tan, Light Brown, Pale Yellow, imitation Wood Duck, gray, light Olive – any of the lighter shades of natural colors will allow RIT to do a serviceable job. It’s quite capable of dark colors as well – but stick to the Brown’s, Yellow’s, some Olives, and the warm end of the spectrum.

It also helps to use pure white materials when using RIT as it lacks the muscle to overpower tinted or off-white materials. In more advanced processes we can use this to our advantage, as in the Bronze Blue Dun neck -which is largely medium gray with a brown tint.

Rule #2: Bright, vibrant, or fluorescent, should always be Protein dyes.

Largely for the reasons stated above. Weak solutions of acid can better penetrate fibers and therefore deposit more pigment. If you’re after the steelhead colors; Purple, Red, Orange, and Green, and you need them vivid – stick to the protein flavor.

The Hidden Color Story

Rule #3: The color on the package is called a “reference color.”

This is where most of you will make the first hundred dollar mistake. You’ll dye a little rabbit fur or marabou and have some success. Emboldened, you’ll reach for an immaculate #1 Whiting Cream neck and match it with a medium Gray dye …

… and tears are the result.

The package is labeled with one of the many possible colors you may get. It’s not the color achieved by flinging the entire box into the water followed by a shovel-full of salt.

In my experience the reference color, that displayed on the packaging, is about halfway down the possible spectrum. That’s why your Whiting neck is now a rare color of soot…

Rule #4: Meathead, Read the Goddamn label.

RIT dyes plainly state, “this approximates the color achieved when adding one pound of fabric to the dye bath.” As your precious $75 is now soot-black, it’s your own damn fault.

Think about the weight of the material you’re about to dye and contrast that to the “one pound of fabric” that small package is intended to color. Adding a single box (or bottle) to the pot is about 6 times too much dye, giving you four seconds where the color was acceptable, and you missed it and it’s enroute to Ebony.

Let’s blacken Mama’s Kitchen shall we?

As the principal cook and bottle washer I’m allowed special dispensation in my kitchen – and can extricate myself from Hell’s fiery grip with the next gourmet meal…

If you aren’t similarly situated then you’ll just have to be cleaner than most.

All dyeing should be done in porcelain lined pots or stainless steel. There’s plenty of sour, odiferous, and caustic elements you’ll be juggling – so you’ll be buying these pots rather than using Mama’s.

You’ll need wooden spoons, Barbeque tongs, a Chinese deep fry strainer, and perhaps later – a candy thermometer. Most of this stuff can be scored at garage sales, so while walking the dog keep your eyes peeled. The above links are reference only, not a recommendation.

The deep fry strainer is for loose fur and feathers. You could also use a permeable bag of some sort – but this is how you’ll remove all the individual items from the dye bath. Tongs are needed for the larger single pieces – like chicken necks and saddles, or chunks of dyed hides. Remember all this stuff will be hot, so try to get wooden handles on everything.

A candy thermometer is needed for synthetics mostly. Most of them melt over a certain temperature, so you’ll need to constantly adjust flame to avoid exceeding the temp listed in the material data sheet.

Many vendors provide material data sheets on their web sites, and you can look up the melt point on a yarn or synthetic fabric easily. As most of the synthetics in fly shops are “super secret” – stolen from another industry and relabeled … well, good luck.

My entire kit cost me about nine dollars, as I’m the Scourge of the local Goodwill franchise.

You’ll use plenty of paper towels, a little dish detergent, and you’ll want hand sponges to mop up the slurps and spills, so lay in a different color than you use around dishes and food.

Rule #5: Hide all this from your spouse. If she sees all those cleaning products she’ll take it as proof that “love can change him” – so she’ll redouble her efforts after she recovers from her faint …

The Mark of the Professional is not success, it’s pink fingers

I’m going to leave the simple colors for your experimentation and head straight for the difficult and frustrating. We’re going to attempt the dreaded, “Lemon dyed Wood Duck” with only the Medium Bronze Blue Dun killing more quality feathers …

The Color Theory Component: Lemon Wood Duck can actually be dyed more than one way which shouldn’t be too surprising. Complex colors offer multiple paths to a single shade.
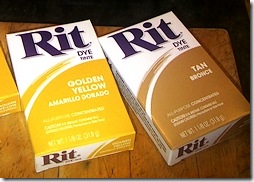
Golden Yellow and Tan is our starting point As Lemon Wood Duck is a tan/yellow tint we can start with tan and add yellow, or start with yellow and add tan. Pretty simple sounding, but dye concentration and timing are still wild cards.

I’ve selected RIT for the task. RIT does good pastels and earth tones, and it’ll allow you to put the “death rattle” in your relationship if you wish to follow along.

I chose Golden Yellow as there’s a hint of amber to some flank feathers, and a hint of orange is in the dye to assist me in that effect.

Feather Preparation: I’ve got a Blue Winged Teal and Gadwall mix left from last season. Both have the beautiful dark markings I like, and as a bonus I can use these feathers to make Bird’s Nest’s as well.

Waterfowl are one of the hideous feathers to dye. They’re full of grit, blood, and natural oils, and should be thoroughly soaked to get them cleansed and waterlogged. (I’ll cover the water logged component in the next installment when we do animal fur)
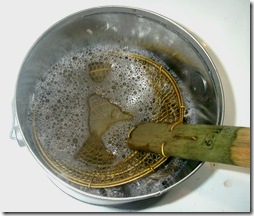
Soak and wash Prepare a bowl deep enough to get the feathers submerged using cold water and about half a teaspoon of regular dish detergent.

For added realism you can use Lemon Scented …

Once you given the feathers a vigorous wash (evidenced by the detergent bubbles at left) lay the deep fry strainer over them and let steep. The more water we can soak into the feathers the better.

After about 30 minutes of soaking rinse the feathers clean with about three passes of clean water.

Now we’re ready to get dirty.

In your porcelain pot add enough water to cover the amount of feathers you’ll be dyeing. You’ll want enough to keep them underwater as much as is possible.

Get the water hot enough so there’s plenty of steam coming off yet no evidence of boil. Set your flame on low from here on.

Drain the water from the feather soaking bowl and refill it with hot water from the tap. This ensures the feathers are hot when moved into the dye pot and reduces any shock to them caused by the move from cold to red hot.

Do not drain the feather water, we’ll pull them out of the water and plop them straight into the pot completely soaked.

Both writing and dyeing proves Less is More

We’re not dyeing a solid color, rather it’s more of a tint. We’ll use a “less is more” approach identical to the coffee brewed at your workplace. We’ll start with a woefully inadequate amount of coffee dye and gradually strengthen it to what’s needed. It allows us pinpoint control over the mixture because too little dye won’t color anything – and more importantly, it won’t color anything quickly.

Your starting amounts are dependent on the amount of feathers being dyed and the volume of water used. As you are likely doing a different amount start stingy, add more as I will.
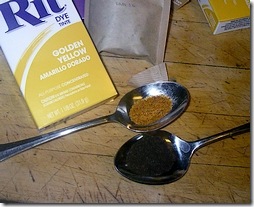
One teaspoon of each, those are food spoons I’m starting with a tiny amount, one teaspoon of powdered RIT tan, and one of the Golden Yellow.

Mix the colors in your water and add about 1/2 cup salt as fixative, swirl until everything has dissolved cleanly. The dye bath is weak so chances are you can still see the bottom of the pot.

With the deep fry strainer, remove all the feathers from the soaking bowl and get them into the dye bath. As the feathers are pre-heated the tips won’t curl when the hot water hits them.

Pick a good reference point, and consider the Physics

The softest material of the feather will pick up the dye first, and the Physics of wet feathers means they’ll be two to three shades darker when wet than when they’re dry.

I’ll watch the duck “marabou” at the base of each feather as my initial color indicator as it will absorb color before any other element of the feather. This will be my clue that the feather portion is starting to take on color.
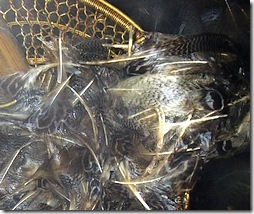
The marabou is no longer white I’ll shift the color watch to the feather tips once I see the marabou start to darken, as the tip is the portion I need to match to the real duck. Once the tip starts taking color, I’ll pull all the feathers when they’re about 3 shades too dark.

Sounds pretty simple.

Start adding more dye. Add one more teaspoon of tan, and one more teaspoon of golden yellow. Keep the feathers agitated and off the bottom of the pot. Anything touching the bottom of the pot for any length of time will curl or burn, so make sure you pull the stirring spoons out of the pot when not in use.

At intervals pull the strainer through and examine the effects.

After a couple minutes with little effect, add another teaspoon of each color. Mix each addition thoroughly to ensure consistency of color, while keeping your eyes peeled on the marabou.

The picture at right, above – shows the marabou starting to take on the tan color, not the yellow. We can’t afford to add anymore tan – so we’ll match the color by adding more yellow.

Add teaspoon of yellow. Marabou still tan. Add another teaspoon of yellow, marabou shows warming trend – so we’ll add one more teaspoon of yellow, and add nothing more. This eliminates all variables save the immersion time.

The Kid’s Hammy Hands were a blur in the Noonday sun
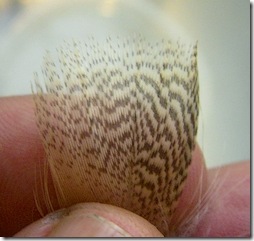
Test feather Yank a test feather from the dye bath and dry it by mashing it between paper towels, move quickly to fluff the feather out for inspection – as color is still darkening on the pot contents.

Looks good, but damp (nearly dry) feathers are one shade darker than bone dry.

We can see from the picture at left that the yellow is deepening and the tan has remained constant.

Pull another feather every minute until the nearly dry version is exactly one shade too dark. Refill the soaking pot with cold fresh water in the meantime. We’ll be yanking the feathers from the dye bath and dumping them straight into the soak bowl. The fresh water will dilute any dye remaining on the feather and they’ll cease the coloration process.

The all-important Yank and Cleanse

Kill the fire under the pot and with the deep fry strainer gather everything and immerse it into the soaking bowl. It’s critical not to chase the few feathers left in the pot, since every moment you’re fiddling the mass of feathers can be darkening. Grab the easy stuff and start the rinsing process.

Like the detergent wash, you’ll want to run about three passes of fresh clean water through the soak bowl. Agitate and squeeze the feathers until the water ceases to yellow.

Now wash one more time because salt really sucks.

Salt fixed dyes can be an irritant to the tyer if the feathers are not cleansed enough. You’re busy tying Quill Gordon’s and wipe the back of your fingers across your eyes – leaving just enough salt to irritate them. Three passes for the dye, and a fourth for salt.
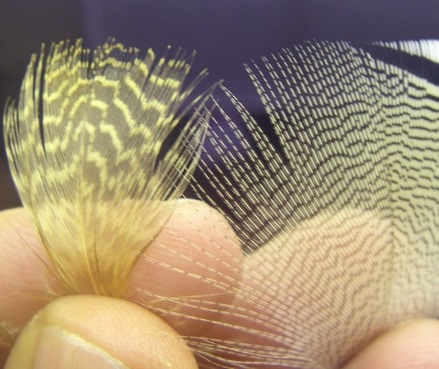
The final damp product, your monitor may vary

After all that pain and suffering here’s the final result. The feather on the left is damp and should lighten about one more shade when bone dry.

… and if my count is accurate the final formula was 5 teaspoons of golden yellow and 3 teaspoons of tan RIT.

Remember that each computer monitor will render a color palette differently, so I can’t promise what you’ll see. From my perspective I’m looking at a near match (once completely dry).

Dyeing your own materials is one of those final hurdles for any tyer aspiring to great things. If hurried it can also be the source of massive pocketbook destruction.

Many years ago I had the responsibility for dyeing most of the materials that the different shops stocked, and my scorched and maimed mistakes hidden in the trash where the Boss never looked. Most shops no longer do their own work, relying instead on prepackaged vendor colors instead of the fellow in a back room screaming from the dye bath emptied on his crotch.

Little wonder, that.

In the next installment we’ll cover acid dyes and animal fur, and while most of the preparation is identical there’s still a few tweaks you’ll need to know unique to hair and its coloration.

… and as this was in response to a reader request, if you have anything else you’d like me to cover, be sure to ask.
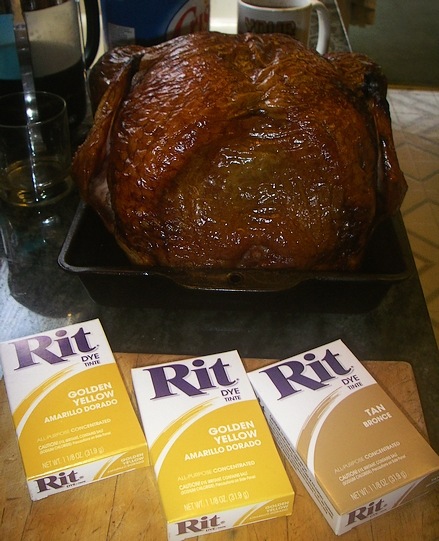
The "Get Out of Jail Free" card

This is the “get out of Jail free” card, less you think I was emboldened to the point of invulnerability. One careless misstep with the dye bath, one slopped pot of duck feathers on the kitchen floor and the “Grim Sweeper” will come off that couch like a Thunderbolt ….

The recipe is more like 50-50 tan versus golden brown, and yields mostly dark meat – jaundiced actually, but she saw the detergent and sponges and has big stars in her eyes …

Tags: Lemon dyed Wood duck, RIT dyes, how to dye fly tying materials, how to enrage your spouse, Tintex, Teal flank, Gadwall flank, deep fat strainer, porcelain dye pots, coal tar dyes, acid dyes, pro chemical & dye, bulk fly tying materials, feather preparation, dyeing feathers
Cal Bird’s Modified distribution wrap, for Monty Montana

In last Monday’s post we described the distribution wrap, a method to make feathers that were oversized act as hackle on smaller hooks. That post described how a single segment of even flank feather could be spun around the shank as hackle.

One of the more popular flies that Cal originated was the Bird’s Nest, where he’d use Tintex Maple Sugar dye to color heavily barred teal flank – and then use a modified distribution wrap to use feathers whose tips were crooked but whose sides were even.

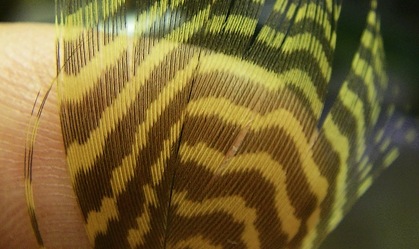
Tintex Maple Sugar dyed teal flank

The above is a reference color from a batch of teal flank that Cal dyed for me. Tintex “Maple Sugar” is no longer made but the color can be reproduced with a good warm amber or imitation wood duck dye.

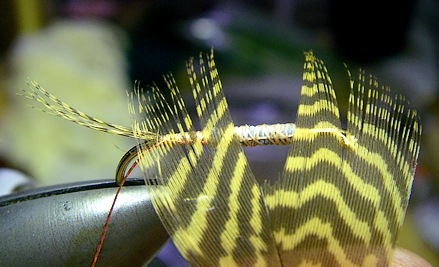
Tip clipped and used for the tail

Clip the tip and center stem of the feather and mount that fragment as the tail. The width of the sides sections determine whether the fly is lightly or heavily hackled. For the hook shown (#8) you will need about 3/8” segments on either side – about half of what’s shown.

Measure the teal against the tail

The front hackle should extend half way down the tail. This is a reference measurement before clamping the near side of the feather to the hook shank with my thumb (to freeze the movement).

Near side clamped to shank with left thumb

Left thumb clamps the fibers to the hook shank to prevent movement. The left forefinger will come down on the far side clump and pinch it to the far side of the fly.

The forefinger squeezes the other segment to the far side of the fly

Now that both segments are measured and secured with finger pressure, bring the thread up to roll them around the shank and even out the fibers.

Near side has thread, far side is coming around the belly of the fly

The thread is shown distributing the feathers. The near side clump becomes the top half of the fly, the far side clump wraps the fibers around the belly of the fly.

hackle collar complete

The hackle collar is anchored. Like the original distribution wrap you can wind back towards the body to redistribute the fibers any way you like. Clip off the remainder of the feather once you’ve finalized the hackle placement.

Completed Olive Bird's Nest

The completed #8 Olive Bird’s Nest. Cal preferred the old Mustad 7957BX hook which was 1X long, 1X heavy, forged model Perfect bend.

Woodcock & Orange

Here’s the same wrap done on a #14 Woodcock & Orange. A collaborative effort; seal provided by [Unknown], Woodcock arrived at Christmas – compliments of the Roughfisher – and glue lump assisted by a holiday sugar rush coupled with unsteady hands.

For Monty Montana.

Tags: Woodcock, seal fur, maple sugar Tintex, teal flank, Cal Bird, Bird’s Nest, soft hackle, Roughfisher.com, Christmas sugar rush, distribution wrap

In the rare case when “inmate” coffee is an asset

It was a cup of coffee that fixed my issues with upland birds and waterfowl feathers. Cal Bird had a taste for strong brew and the shop’s pot was always bubbling ..

I was usually the first person at the store and figured that if one of those neatly trimmed Styrofoam cups made the brownish “ick” we drank yesterday, three or four of them should make real coffee, the kind that explodes a sleepy employee into a dynamo…

… like Popeye and spinach, only warmer.

Cal would show on Saturdays with a wreath cake and watch me struggling with some small bit of dander, and in between my fits of childlike petulance would show me the better way of doing things.

Cal was inordinately fond of upland birds and waterfowl as they possessed the most desirable color schemes and mottle effects, yet  Mother Nature never saw fit to size them to suit our needs. All the best markings and coloration tend to be on the larger flank feathers which are much too long for small flies. Breast feathers are smaller, but small being synonymous with fragile – and markings are much lighter and can be indistinct.

I’d be struggling trying to fit a #6 partridge hackle on a #14 hook, with him smiling and offering encouragement, and as I mangled the feather into a semblance of functionality he’d point out how I could do so with less cursing. Part and parcel of the Consummate Gentleman, as he always had a kind word for everyone.

On one such Saturday he showed me what he called a “distribution wrap” – making no claim to its invention, but making my use of upland birds and waterfowl feathers much less formidable…

Single Segment: If you’ve got a feather with only a single side that has roughly equal length, you can trim that segment from the feather to make your hackle.

Single segment of feather trimmed from the stem

Just measure the length you want the body hackle and press the segment against the hook shank with your left thumb. See below.

Fibers pressed against the shank, thread poised to move them

The thread will be our instrument to move the fibers around the shank. We’ve a tenuous hold on them and will allow the thread to take them completely around the shank. If we using the three-turn anchor, we can wrap those turns loosely, and position fibers to cover the bare spots before securing the material tightly.

I've dropped the forefinger onto the material to guide it

I’ve dropped the forefinger on the top to start the material curling around the shank. Take a slow loose turn with the thread to complete.

Wrapping the back side, thread moving around to the front

The thread has trapped fibers at the top and is moving around the far side to populate the hackle. My fingers are there only to stop the motion and hold everything for the camera.

Three turn anchor holds everything, but you can still move it around

Once the fibers are mounted and anchored, if you take additional slow turns in the direction of the body, you can redistribute the hackle with each turn. Once the coverage is to your liking, wind only toward the eye.

Additional wraps towards the body has moved the fibers around

After taking additional wraps towards the body (and redistributing the material) I have the hackle to my liking. Now I’ll dub the thorax and finish the fly.

The finished fly

The finished teal hackle. Mother Nature doesn’t always assist us with small hackles, sometimes we have to get “medieval” on the raw materials to yield what’s useful.

This same technique can be used on most upland bird hackles and all species of waterfowl, but a lot also depends on the kind of hackle you’re attempting. The above fly has the luxury of a dubbed head which hides all my thread. I’d be much more precise with my thread if the hackle was the last thing on the fly.

Tags: Cal Bird, distribution wrap, teal hackle, soft hackle, strong coffee, wreath cake, fly tying, fly tying materials, teal flank

From the mouths of Babes comes Thread Wisdom

With the casting club some four miles distant the round trip on a stingray was reserved for weekends. Weekdays it was the bathtub as trout stream surrogate.

A young lad learning to tie flies has to make due. Each time the UPS truck squealed to a stop out front it disgorged some new material from Dan Bailey’s or Kaufmann’s Streamborne, and I’d start the bathtub going to see why marabou was such a big deal, or determine whether a fly tied of polypropylene could survive the eddy between spigot and drain.

In those days everything was tied with Size A Black Nymo unless I was feeling gaudy and opted for white.

Six feet of monofilament tippet and a handful of experimentals tugged through the water using “hand-twist” retrieve. I learned which materials caused flies to ride sideways, upside down, and how stiff materials assisted by head cement spun the fly uncontrollably …

… but most importantly I learned what not to do, and how to make a shortcoming an asset.

Upper_Sac_Parachute

… above are a couple Creamy-Orange Paraduns that I attribute to the Gary Warren – Chuck Stranahan – Hat Creek brain trust. Are the two shown the same?

Wet_Creamy_Orange_Top

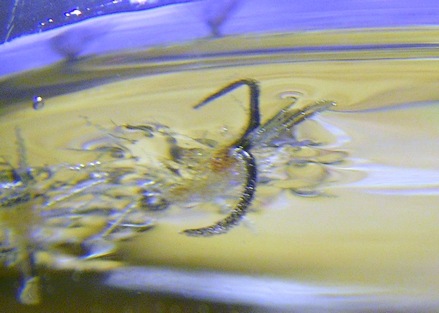
The “Bath Tub” test shows the same two flies riding nicely. The left fly is starting to show it’s true colors …

Upper_Sac_Creamy_bottom

The underwater view of the left fly shows a pronounced orange-red butt section by the tail. It’s revealed to be the Upper Sacramento variant of the Creamy-Orange with a butt of blood red thread underneath the dubbing.

Thread choice isn’t pronounced on the dry version of the fly, but all my “wet testing” of years ago confirmed that Black Nymo overwhelmed every color of dry fly dubbing tested.

Now I knew why Art Flick, Roy Steenrod, and Walt Dette, as well as every other past master of the dry fly used neutral gray thread.

The ensuing month saw me delivering papers frantically, husbanding tips while looking predaciously at the UPS truck and the inevitable squeal that would announce a gleaming 12-pack of gray 3/0 Monocord.

Thread can be many things – a boon as well as a detractor. It acts as a hidden color layer influencing the body color of the fly. In this case, the Upper Sacramento is home to a dusky red-bodied mayfly whose abdomen fades into a creamy orange color up by the wing roots.

Wrapping red thread under a lightly dubbed body gives me precise control over how that color bleeds through the dubbing, and how much it influences the body color of the fly. A light dusting of dubbing will bleed red, a little more dubbing will bleed less (dusky red).

Creamy Orange Damp Underbody

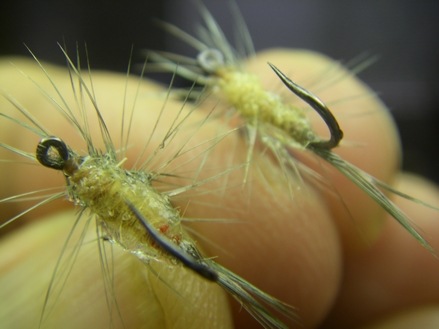
Here’s the same two flies removed from the glass; the left fly shows a pronounced red butt, and the fly on the right has none. Both flies were tied with a neutral tan thread so as not to influence the dubbing color on the remainder of the fly.

Fish never see a dry fly, they only see floating flies that are wet.

Water has a tendency to darken every color one or two shades, and rather than spend all your efforts matching the natural with dry dubbing – doesn’t it make more sense to test the colors wet?

It may well have been the only wisdom learned in the ensuing couple of decades, if you believe my parents …

Tags: dry fly, thread as color, dubbing techniques, upper Sacramento river, Monocord, Nymo thread, butt section, Chuck Stranahan, Gary Warren, Roy Steenrod, Art Flick, Walt Dette, Catskill dry fly, hand twist retrieve, Dan bailey’s, Kaufmann’s Streamborne fly shop

Singlebarbed Reviews the Ultimate Stocking Stuffer: The New Scientific Angling, Trout and Ultraviolet Vision

With our faddish nature I’m always surprised fishermen aren’t more fashion conscious. Our weakness has always revolved around something new as a wholesale fix for all our fishing ailments.

In the Eighties it was Polypropylene – lighter than air and a couple of turns on a hook shank would make a fly float all day. The Nineties were typified by gummy latex and a veritable flotilla of eye catching synthetics.

The last decade was dominated by pearlescent, opalescent, and oily duck’s arse – and the renewed promise that only a couple strands would make a fly unsinkable.

Now it’s the Ultraviolet spectrum and every vendor is hell-bent on squirting chemicals we can’t detect (and of dubious UV qualities) on everything from salmon eggs to dry fly hackle, claiming the “fish killing qualities of the ultraviolet are virtually infinite.”

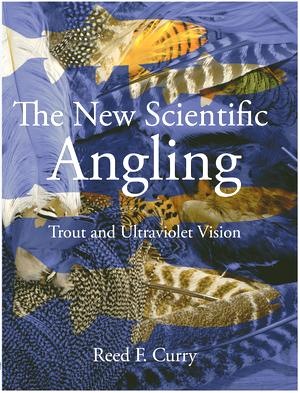
… and in all this frenzy, Reed F. Curry’s book –  “The New Scientific Angling, Trout and Ultraviolet Vision” makes it’s debut.

FrontCover3in

Reed’s task is Herculean. Bring the stuffy lab-coated world of ocular physics out of its chaste mathematical surroundings, remove the obfuscation of scientific jargon, and adapt the material for fishermen, then drop the polished treatise onto the coffee table – there to compete with Playboy, People, and Guns N’ Ammo.

It’s a singular work, and his timing is impeccable.

Those of you familiar with The Contemplative Angler recognize that Reed’s quiet and biting humor is a common thread throughout his work; how he could remain stiff-lipped and scholarly was surely going to be a trial … and I was pleased he failed … miserably.

The book is reminiscent of a High School science text with the salient points highlighted by color in the margins. In this case, Reed spills both wit and angling reality into the colored boxes, a clear demark between the Science and Angler-humorist.

Fly tiers will read it like Playboy. Pictures first and text second – and the concepts of UVA (Ultraviolet absorption), UVR (Ultraviolet refection), and VIS (visible light) are featured in multiple pictures per page – which keeps the scholarly segments easy to absorb and engaging.

There is an enormous amount of real meat for the angler, and the segment of greatest interest to me was the discussion of “pattern matching” that answers that most elemental of all questions, “Why do fish think this is food?”

As the Quill Gordon floats within the trout’s range of vision – and here I am going to avoid the complex issues of Snel’s Circle, reflection and refraction and simply assume that the visual sensory input is very detailed and complete – the trout’s brain receives input of the fly exactly as it appears from below, in the full trout spectrum. VIS and UVR. The trout brain now gathers the elements that are attached to each other – hackle, body, wings, tail – ignoring floating particles of foam nearby, and assumes that it forms the whole unit. Against this gestalt the trout brain uses pattern matching, just as we would. The order of conditions is presumably the same:

  • First, check for danger. Is the object a known threat? “No.”
  • Next , check for food. Is the object a food item? “Yes,” “No,” “Maybe.”

And that is the crux of it. If as anglers we can establish “Maybe,” we have won the first part of the game. “Maybe” can indicate insufficient information which may lead to further investigation through other trout senses – Taste and Touch. In order for the fish to touch and taste, he takes an object in his mouth, hands being in short supply.

The section on “the composite insect” and how it fits into a fish’s pattern recognition “database” is enough to send any fly tyer into a reproductive frenzy.

Schweibert, Flick, and Swisher & Richards all gave us wonderful tomes about mayflies, most with wings intact and inviolate. Reed suggests that the all important “Maybe” that spurs trout to eat – may lie in the thousands of images of mayflies (caddis, etc) stored in memory.

Crippled, in the water and out, half in, struggling, fluttering, landing – double the images to account for the broadside view, quadruple that to take in the fore and aft of all the above, and you quickly get to millions of possible watery lumps that “maybe” food.

Which is why those old archaic flies we know don’t work like the McGinty, the Royal Coachman, and the Trude – all non-scientific flies, get eaten, and often.

“The trout’s pattern for mayfly wings, therefore, must be quite vague, perhaps simply a small extension from the body, light in color and displaying a hint of UVR. A trout that only eats mayflies with perfectly formed wings is missing a lot of food.”

As humans we view insects and their imitations with only the visible spectrum (VIS). Fish can use both visible and UV light to recognize prey, and at depth or during low light conditions where both are active, a mixed image is likely.

“Through UVR in combination with VIS, trout have an opportunity to see fine details of the chitin, the outer surface of an insect’s body and wings. How deep this vision goes depends, of course, on the individual trout, the conditions, and the insect.

… (trimmed by KB)

So, surface texture is significant because, despite what we see with our more limited vision, the trout can detect in the UV that natural flies are not perfectly smooth.”

The book’s photography covers the full gamut of angling gear as well as specific sections dealing with insects, fly tying materials, and the UV signature of colors in general.

Baitfish get some UV love as well. Rather than pile on more UV materials onto a hook shank – knowing which components of smaller fish are most visible in the UV spectrum suggests a thoughtful placement of materials – versus the “more is better” broad paintbrush.

… and while Reed answers more questions than he poses, it’s plain that both vision and perception suggest there is a great deal of unexplored territory left in the classic stalk and seduction of trout – and any other UV equipped gamefish.

This is a wonderful reference work for all anglers, likely to turn some of your notions about fly fishing on their ear. Careful study of the colors and their qualities under UV will assist in fly selection, clothing choice, and fishing qualities like retrieve and how depth may play into fly selection.

… and for the fly tier the color plates alone justify inclusion into your reference library. An essential book if you’re attempting to navigate the vendor offerings and add UV aids in insect imitations.

Me? My next fishing vest will be Bright Yellow … waders painted with a similar retina scorching disjointed color pattern – a not so subtle mix of the Bismarck and Elvis.

Pikeminnow rolling lazily between my feet as I’m completely invisible …

Amazon lists the book at $27.95, with only two copies left. Jump on it.

Full Disclosure: Singlebarbed did trade two (2) pairs of Sixth Finger Scissors to Messr. Curry for the privilege of owning such a superb reference work. Tears were involved … his mostly.

Tags: Reed Curry, The New Scientific Angling Trout and Ultraviolet Vision, Overmywaders.com, The Contemplative Angler, trout vision, ultraviolet spectrum, visible light, baitfish, insects, fly tying materials,

Big on Yarn but even bigger on frugal

I see one of those “coat of many colors” yarns and I can’t dig the pocketbook out fast enough. The Good News is these mixed-color yarns are all the rage, the Bad News is fashion is capable of turning on its heel quicker than we can respond.

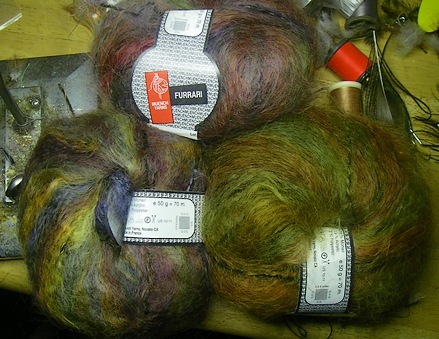
Furrari Mohair

I use a lot of mohair because it’s a cheap and plentiful “filler” for dubbing blends. Lots of sparkle and plenty of spike –  important qualities for big nymphs and steelhead flies, and especially Spey flies – which translate “scruffy” and long fibered into fly movement.

Detail view It’s the Poor Man’s Seal substitute, offering the same loft and spike yet absent the transparency and guilt associated with clubbed orphans.
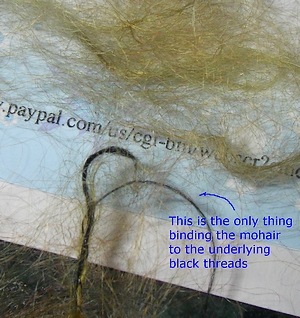
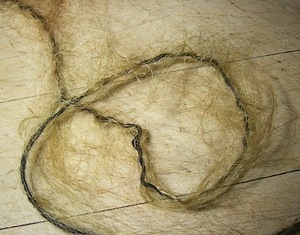
This is Muench “Furrari” (France) and each skein is a blend of a dozen colors. It also boasts an extremely loose weave; two strands of black thread are the core, with a single strand of black spiraled around the mohair to keep it tight to the center threads.

It can be transformed into loose fur by yanking out the black threads and sliding the fibers off the center element. The mohair will collapse into loose fur that can be dubbed or added into something else.

Mohair Thread View The range of colors is the real bargain. Each color is about a foot long before transitioning to the next, plenty to wind a large fly body or yank off as a handful of dubbing.
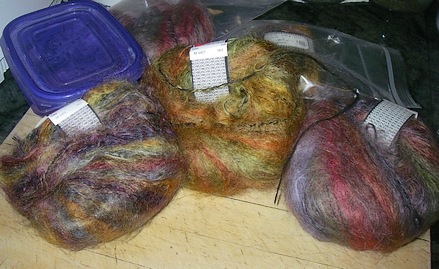
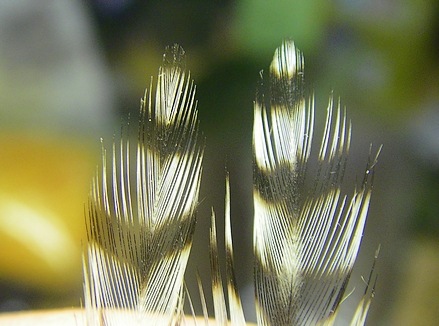
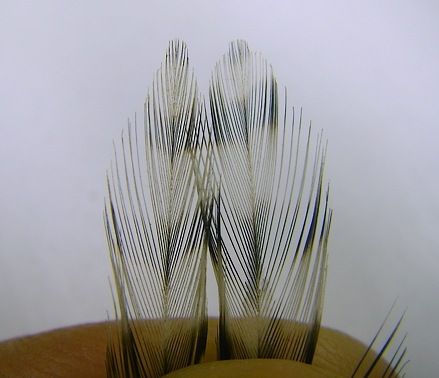
If left intact the black threads offer the ability to wind it as a coarse, spiky yarn – with much of the black obscured by the trailing fibers. It’s perfect for the Jay Fair nymphs or anything else using mohair as a wound yarn.

It retails at nearly eight dollars a skein, but I got it off of eBay for five dollars. There’s quite a selection of colors offered by yarn stores selling their stock on eBay, most have priced it at six bucks per 80 meter skein.

Having a dozen colors in all the right Olives and Browns is a real boon for the frugal. It beats buying those three yard cards (x12) to realize the same color palette.

Colors shown below: Left (Purple, Green, Blue, Yellow) #4401, Center (Olive and Browns) #4407, Right (Grey, Brown, Claret,Green) #4401.

Furrari under incandescent light

The same colors shown under natural light. Makes a big difference.

Tags: Muench Furrari mohair, dubbing blend, filler for dubbing, eBay, J Fair Wiggletail, spey fly, combed fur, mohair, fly tying materials. mohair yarn

It’s like mascara, color can enhance and detract

My first commercial order was for two dozen Adams. I was 16 at the time, and quality control was letting the glue dry and giving it a couple of half hearted tugs – followed by a rigorous review of proportions.

By the time I’d completed 24 flies that passed muster I’d actually tied about 60 – and suffering through 60 flies of the same size and pattern was pure torture to a fellow that tied something different everytime he sat down.

It would be the better part of a decade before I could face the Adams without cringing, which is why the Mosquito figured so prominently in my angling development.

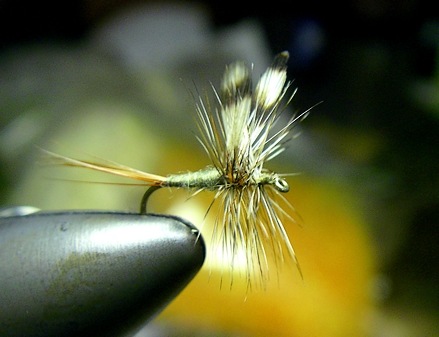
Hackle tip wings were my undoing. Grizzly specifically, and the lessons learned on that first order apply to the many flies since. Thousands of patterns pair materials for wings, cheeks, or body components – and attention has to be paid to the coloration of the pair chosen, as their mottling and coloration can make a perfect fly look less so.

Color can visually deceive the eye into thinking your proportions are wrong.

A bad pair for an Adams wing

The above picture shows us a “bad pairing.” The hackles themselves are fine – their coloration is good, but using the above pair will make the fly’s left wing appear shorter than the right.

It’s the tips of the feather that cause the issue. The left feather is tipped in black, the right feather is tipped in white; using the two together will make the left wing appear shorter. Add in the hackle in front of the wings – a mixture of brown and grizzly that will bust up the barring of the wing segments and exaggerate the color difference further.

Proper pairing

Here’s another pairing that will eliminate this simple problem. This “right” feather was next to the other “righty” above, yet has a black tip. Note how the bars are matched exactly with the left feather. This pairing will yield an Adams where the colors don’t upset the balance.

Side View of the finished Adams

From the quarter view above, nothing really looks amiss. Wings are cocked and extend above the hackle, both look equal length, and proportions look solid.

Front view of the poor feather pairing

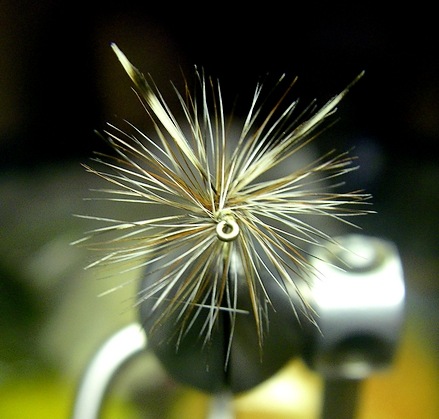
Here is where the problem displays itself nicely. The black tipped wing (right) vanishes leaving only the last white segment visible. The white tipped wing (left) is strident and obvious, making the left look much too short.

Color. Normally it’s your friend but occasionally it can diminish or enhance a feature and throw your nicely tied fly into a tizzy. It’s the last thing to check before wrenching those precious hackles off the hide.

Tags: Adams, dry fly wing, grizzly hackle, fly tying tips, dry fly proportion, Mosquito,

The next Great Fingernail Removal System

My lampooning of dry fly fishermen is well documented, so I thought I’d take my comeuppance like a Man…

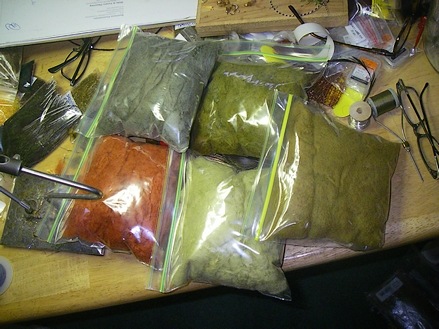
I’ve got a half dozen experimental colors of “Dubbing X” made, about an ounce of each, all hand made at the cost of most of my fingernails, lots of swearing, and the skin of both forefingers…

Dubbing "X"

A medium gray (Adam’s), a Blue Wing Olive, Pale Morning Dun, Upper Sacramento Pink, and an Ocher. The above are the California colors for those insects and may not be correct for your local watershed.

An “accidental color” is one that occurs while learning an unfamiliar dye process, where you’ve written the material off thinking nothing good could come of it – didn’t write down the formula, so you can’t reliably make it again … and it turned out pretty darn good – which was a complete shock.

… and then you destroy both fingernails and flesh in a series of ill advised attempts to render it to base fur before finding some process that partially works.

I could use a little feedback on the next Great Dry Fly Dubbing, drop me a note and I’ll toss some in the mail.

This is only for dry fly use. The material floats without assistance (specific gravity less than 1), and is a micro-filament – or “Nano-dubbing” as OldTrout58 calls it.

… while supplies last – I’ll need time to regrow some fingernails before the next batch.

Tags: Dubbing X, dry fly dubbing, Blue Wing Olive, gray, Pale Morning Dun, fly tying materials, Upper Sacramento pink,

Steely resolve in the face of the Perfect Feather

Per request I’ll continue to post additional fly beautification tips in a weekly format. These will comprise hardscrabble lessons learned somewhere after beginner and before complete mastery.

Most tiers that tiptoe around the craft use their fishing instincts when no instructor or book is available. Most of us started as dry fly fishermen and it’s not surprising that most new fly tiers attempt the dry fly more often than nymphs.

… which is too bad. Tying nymphs is far more forgiving than the delicate and strictly proportioned Catskill dry. A novice tier can hold up some lumpy looking stonefly and if critiqued can respond with “ … well, all the stoneflies in _____ Creek are fat.”

… and if I had been the unfortunate to task the fellow – I’d blush like hell and backpedal in a hurry – never having fished over “fatty” Plecoptera …

The Catskill dry is completely unforgiving. It’s territory and techniques have been practiced for more than a hundred years – and artistic license must be defended, even for expert tiers.

One of those oft-mentioned-quickly-forgotten principles is made more difficult in the presence of the Perfect Feather …

Beware the Perfect Feather

Above are two examples of the Perfect Feather; a foot long #16 grizzly saddle hackle, and a well marked (lefty) Wood duck flank feather with perfect tips. Both are treated with awe by the owning fly tier – and both can cause your fly to suffer cruelly if you’re not diligent…

Wooduck flank prepped

You’re a kid in a candy store, all those precious tips are in a straight line and unbroken. Giddy, you fail to clip the center stem because it’s perfect too.

You forgot that all feathers are either a left or a right, even foot long saddles and untouched Wood duck flank.

The wood duck will be your undoing twice. In the first case the stem will cock one wing to the left, and in the second, the stem center will retain 9 or 10 fibers attached and you’ll have to compensate by yanking fibers from the far wing to the near side to equalize that natural bulk.

Stem does not appear to affect the wing, everything is straight

The picture at right shows the Perfect feather now clumped together with the center stem included. Note how all’s well – there’s no clue that anything is other than perfectly straight.

You’re thinking of dumping all your “lemon-dyed mallard” – as the sight of the wood duck with its pristine coloration, fine markings, and perfect tips – make it so much more pleasurable to work with – even justifying the hideous cost to lay in a goodly supply.

Unfortunately like Ulysses and the Sirens – their song is so beautiful, you’re ignoring the approaching rocks …

Now you're undone

Now you can see why you remove the center stem. The left side is thin and has a different angle than the right wing.

The cause is simple. You had to pull the loose fibers over to the right side to balance the two clumps – leaving the left, just the stem section. It’s thin because the fibers are attached to the center spine and have no “give” to move around.

We were lured onto those rocks consciously …

Same clump stem removed

The picture at right shows the same wing as before. I’ve removed the wing from the shank, clipped out the center stem and retied it back on.

Note the difference with the picture above. the left wing is  relaxed, the right wing is less dense and tighter – as you didn’t have to pull everything to that side to compensate for the stem on the left.

That foot-long Grizzly saddle is just as bad. You’re used to applying six or eight turns of hackle to your dry flies, but the lure of virtually unlimited hackle means you add four or five extra wraps and crowd the head. Crowding means fibers trapped in the knot that’ll wick the head cement right into the eye.

It’s the lure of the Perfect Feather. You won’t find it mentioned in any tome or DVD, and only your steely resolve to overcome it’s sweet song …

Tags: wood duck flank, grizzly saddle, upright and divided wing, center stem, lure of the Perfect Feather, steely resolve, fly tying

Part Last – Singlebarbed teaches the beauty secrets of the Shao-Lin Masters

As we mentioned in Parts 1 & 2, the measure of true fly beauty is held by fish not humans. Unfortunately only averaging  9 days afield your flies are viewed most by people, and suffering their continual criticisms can make a fly tyer resign himself to please both anglers and quarry.

… and in the doing, gain the precision to make his flies sturdier.

We’re down to the final three, each so hideous and daunting as to cause fly tiers to scream, gnash teeth, or give up the craft entirely. Three crucial steps that professional tiers do subconsciously, that plague beginners for decades, are rarely mentioned, and completed so quickly you’ll miss it on a video or live demonstration because you’re drawn to more glamorous materials and technique.

Watching a talented tier can be mesmerizing. A crowd of fellows inching forward looking at some vindictive SOB who’s just palmed a couple ounces of yard-long #16 saddle hackle in Coral Pink. You’re trying to stammer the question, “… Wh … where’d you get that?” – and you miss a half dozen gems of technique while he pretends he’s got a closet full of the material and doesn’t.

Here’s what you missed:

three In prior posts we mentioned the difficulty of keeping materials from moving around the shank – either via thread torque, bulk, or method of attachment.
I’ll ask a simple question;

Which holds the tail of a nymph onto the shank, the six turns of thread you used to tie it on, or the forty turns of thread that come with adding ribbing, body, and all remaining steps?

Light bulb.

Thread management is part art form and part physics. Thread is your enemy and we use it as sparingly as is possible. It’s heavy, lifeless, and is always applied in great quantities where it’s least useful.

A tail isn’t “lashed” onto a hook with tight concentric turns, it doesn’t require taming where all traces of it are buried under thread, it’s anchored with three tight consecutive turns of thread at the tie-in point, and then the thread is spiraled to the next step.

That’s true of wings, wingcases, ribbing, bead chain eyes … and everything else.

The anchor wraps occur at the last portion of shank before the fibers become tail. The butt ends will be bound securely by the thread used to dub the body and attach the ribbing, and we don’t need any additional turns to hold them mid-shank. Any tail movement will occur at the anchor point – not in the middle of the fly.

Understanding the physics behind this practice is the hard part, execution is much easier. “Anchor points” exist where the stress will occur – and the thread wraps and tension used are critical only at that spot – all other wraps position the bobbin for the next step.

Less thread pays off in slim profiles, small heads, and buoyant dry flies – and is as memorable to the critiquing angler as is the curves of a Supermodel.

two

Hand in hand with the notion of “anchor” is the tapered cut. As described above the anchor is needed to hold the material firmly to the shank. Once the three wraps of the anchor are in place, it’s an automatic trigger for the cut.

New tiers are still unfamiliar with everything; small hooks, tiny scissors, unfamiliar materials, and insecure grasp of proportions. They’re thrilled to cut the material at all – and usually after securing it with 46 turns of thread.

Often they’ll “blunt cut” the item, scissors held at right angles to the hook shank so they can square cut the wing or tail butts – leaving a promiscuous gap between material and shank that will have to be addressed by subsequent materials.

Intermediate tiers will have learned the horrors of the lump left by the blunt cut, and will taper their cuts – scissors parallel with the hook shank – cutting downwards at the shank.

… after they’ve secured the item with 26 turns of thread.

A blunt cut can only be used when the material covers the entire body area of the fly.

All that’s needed to attach any part of a fly to the hook shank is three turns of thread.

Bold words, and you’ll note I didn’t say it was attached permanently. If the anchor is the only thread needed to hold the material stationary – and subsequent steps will add more thread to lock down the butts that extend over the body area, than those three anchor turns will hold the material well enough for us to cut the taper – yet will be loose enough so if torque has carried the fibers too far to one side, we can straighten them with finger pressure.

Which is why the Golden Rule applies: Nothing on a fly can be fixed by laying more crap down – because the “three-turn-anchor-tapered-cut” allows us to reposition it before we move to the next step.

We fix as we tie, because we’re learning thread management.

The taper we induce as part of the cut is every bit as important as the anchor and the three-turn trigger cut. For flies that please humans, only two kinds of cut are permitted; the blunt cut when the material covers the entire body area – as in the tail of a dry fly – where it’s trimmed behind the wing, or the tapered cut – which produces the finished body contour.

Using cuts to define body shape is easier than adding the right amount of dubbing to thread to have a thin arse and thicker middle. Beginners and Intermediate tiers haven’t mastered dubbing yet, asking them to be doubly clever in its application will not work.

… and tapered cuts have to be learned anyways – as not all flies have dubbing to make contour. The Quill Gordon is a classic example, it’s body is the stripped quill from a center strand of Peacock eye and the taper of the body is caused by the cuts made on the prior materials.

It’s easiest for a new tier to learn to dub “level” – that’s something he can gauge easily as it’s the same thickness of fur over the length of thread used.

… later, after he finishes digesting the three parts of this post, he’ll be able to master a tapered dub consistently – and will have an additional tool at his disposal.

one

Nothing gives the prospective fly tyer more trouble than dubbing. It’s deceptively simple, a simple twist between thumb and forefinger – nothing devious or hidden, no wrist motion or hidden timing.

It’s “mash crap on thread” – yet the proper technique of this routine task eludes most tiers for decades.

That’s because there is no technique.

It’s no different than loading a paint brush. A tiny thread, whether it’s waxed or no, can only trap a certain amount of fur tightly. Anything more than that will be trapped loosely – and if you add more will degenerate into a lump of sodden crap that resists your saliva, glue, hammy hands, and everything else you throw at it.

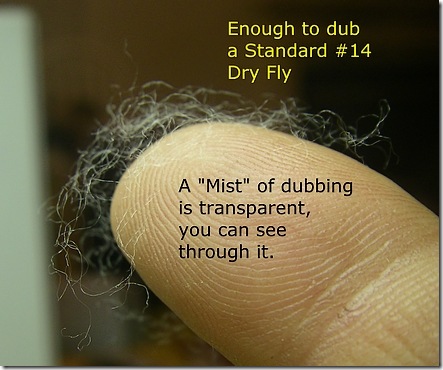
Golden Rule of Dubbing: if you can’t see through it, you’ve got too much.

I like to use “mist” to describe the dubbing process to students, as all mists whether water, vapor, or solid, are transparent.

The average #16 dry fly uses so little fur that you could snort it without sneezing … but the gag reflex is horrid.

The inability to apply the correct amount of dubbing, and the myriad of issues it raises, adds a common visual roughness to all your flies – as it’s among the most common tasks performed, and is so very visible.

It will not matter how many videos and demonstrations you’ll watch, the right amount of dubbing is an afterthought to the presenter – he’s mastered dubbing and is busy explaining why you want to fish his Hopper over someone else’s. “Mist” isn’t visible to the camera lens unless it’s within inches of the fly, and much of the action is off screen.

Dubbing can be a very deep subject to us reformed-whore-nutcases, that two percent of fly tiers that go where others fear to tread. We blend fur types and textures, layer colors, give it loft and sparkle, or shape it to replace traditional fly components. But the average tyer still struggles with loading it on the thread, and his Messiah is strict adherence to the Golden Rule of Dubbing above.

Once mastered you’ll realize there are many kinds of dubbing, some are well suited for the task, and others are very poor dubbing choices – but are endured due to the color or sparkle they offer, some quality not found in traditional fur bearers. Baby seal is a great example. A transparent sheath surrounding a white inner core, designed to reflect sunlight away from the animal so it doesn’t burn to death while waiting for that insensitive Canuck to mash its life out with a club.

… sure, you’re all tears now, but that’ll change once someone offers you a nickel bag.

Dubbing that’s suited for dry flies are usually the waterborne mammals, fine filaments and soft to the touch. Nymph dubbing can range from fine to coarse, often contains a goodly component of guard hair, and may contain synthetics to offer sparkle or other qualities.

Just because it’s the right color doesn’t mean it’s the proper tool for the job. Store bought dubbing is simplistic generalist dubbing, not the premier designed-for-dry-flies that us nutcases are fond of …

Putting it all Together:

Let’s put these hideous lessons together in an assault on the traditional Catskill dry, a magnet for criticism whose light coloration shows every lump, knot, and tear stain:

Light Cahill 1: What I see that you don’t

This is what I see, and you probably don't

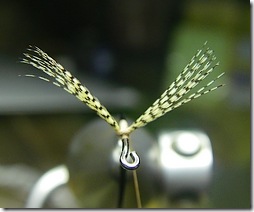
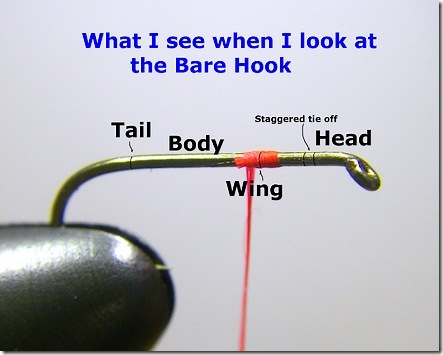
I can’t help it, I see all the tie-in and tie-off points, where I’m going to put the wings, tie everything off, start the head, where the body ends, the entire fly just by looking at the hook shank.

With this “tie by the numbers” approach coupled with thread management, I know when I’ve strayed over a boundary line – and correct it right then, rather than let the problem slowly compound.

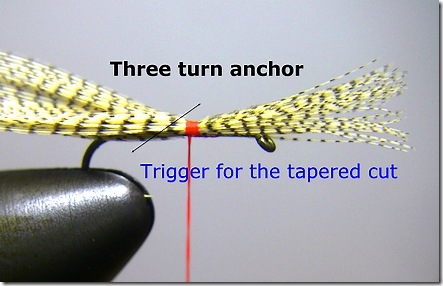
Light Cahill 2: Three turn anchor, trigger for the tapered cut

Three Turn Anchor

I’ve attached the Woodduck with three turns of 6/0 Danville. I’ve tied them in about two turns of thread past the mark where I want the wings to stand – this space will be consumed by me folding the material upright, something that most beginner and intermediate tiers forget. Transitioning anything from horizontal to vertical will consume space on the hook shank – and if the heads of your dry flies are perennially crowded, you may be forgetting that critical physics lesson.

Three turns is my trigger for the tapered cut. I’ll come in from the wing side and cut downwards towards the shank. If you have tungsten tipped scissors, it’s the most dangerous cut possible, as tungsten is extremely brittle and you can chip or remove the points if you catch the hook shank in your cut.

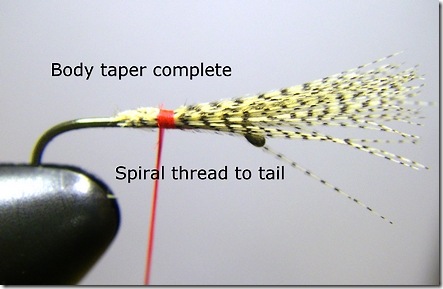
Light Cahill 3: Body taper complete

Body Taper compliments of a scissors cut

The tapered cut is complete and my body taper established. The anchor point holds the materials firmly so I’ll spiral the thread to the tail position and mount the tail now.

Note: Us old geezers that used Nymo thread in the 70’s and 80’s recognize that nylon thread can be used in two manners. Spinning the bobbin will essentially turn the filament flat (which is why my thread appears so wide) and will create less bulk than a normal strand of 6/0. Spinning the bobbin again will restore the spun flat fiber to round – best used for the anchor wraps themselves as they can bite into the material.

It’s all part of the art of thread management. Thread is a lot more than it seems…

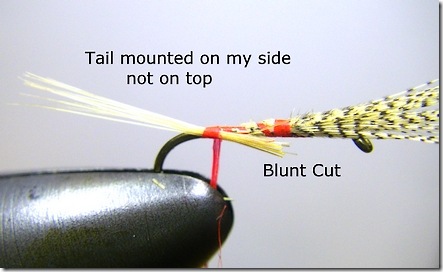
Light Cahill 4: Tail anchor

Tail anchored

There’s a lot to see in this picture, as this is where a lot of techniques start to pay off.

The thread has been spiraled from the wing anchor to the tail mount point. The tail has been mounted on my side (thread torque) with a three turn anchor. The tips of the tail have had a blunt cut (scissors at right angles to the hook shank) but are long enough to traverse the entire body of the fly.

A blunt cut can only be used when the material covers the entire body area of the fly.

… so we have adhered to the rule as stated above … and now we’ll begin to see the reward.

Light Cahill 5: Token Blurry Picture

Taper preserved

Because the tail butts are uniform thickness and cover the entire body, the taper induced by our scissor cut has been preserved.

Note the spirals of thread as it was moved from tail mount to the base of the wing. That’s not 56 turns of thread, or even 24 – it’s exactly three. Also notice the tail as compared to the picture above; we’ve only wrapped three turns of thread since the anchor, but note how far towards top-dead-center the thread torque has moved it.

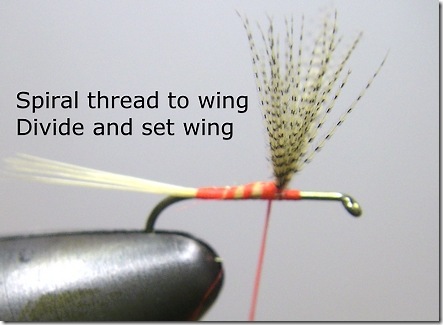
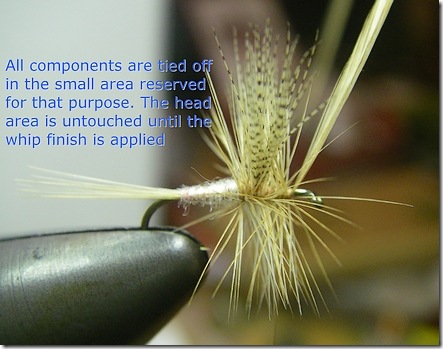
I’ve lifted the wings (consuming some horizontal shank) and divided them, the tie-off and head area remain untouched.

Light Cahill 6: A Mist of dubbing

Mist of Dubbing

A mist of dubbing is transparent and even at its thickest point you can see right through it. It will lock onto thread like a fat kid on a candy bar, it will do anything you ask it without complaint, with little coaxing.

Your dry flies will be buoyant and float twice as long as there is so little water absorption, and they’ll dry with a flick or two of the rod. Beauty, with good physical properties to back your play.

Light Cahill 7: A mist on thread

Mist on Thread

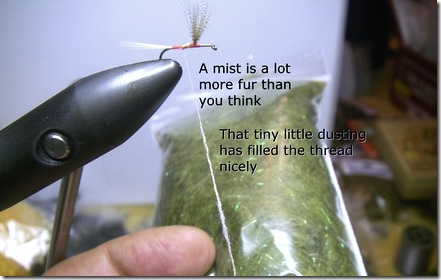
That’s the same small dusting you saw on Step 7 above. It doesn’t look so small anymore. I’ve switched to tan thread (which is what I use on the Light Cahill) so the thread color won’t overwhelm the dubbing I’ve added.

Note the tail, it is now top-dead-center … bloody miraculous.

Light Cahill 8: The final dubbed body

The dubbed body with hackle tied in

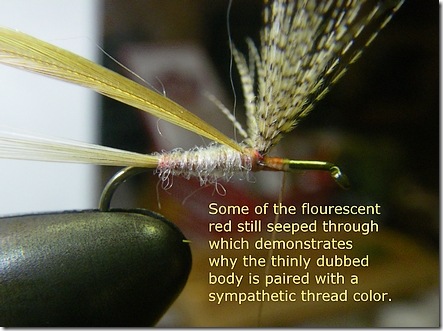
A bit of the tail anchor florescence has peaked through – partly because of my reluctance to cover absolutely all of it with tan thread. Thread is always your enemy even when you’re demonstrating what not to do.

The staggered tie off area and head are untouched. I’ll put 1/3 of the hackle behind the wing, 2/3rd’s in front. It’ll be “westernized” – we use a bit more hackle than our eastern brethren due to the brawling nature of our rivers.

Light Cahill 9: Tie off

The tie-off area gets thread

The hackle has been applied and the reserved area for tieing off the final materials has been intruded upon. The head, which we planned since the bare hook shank, has its area yet untouched.

Light Cahill 10: The finished “westernized” Light Cahill

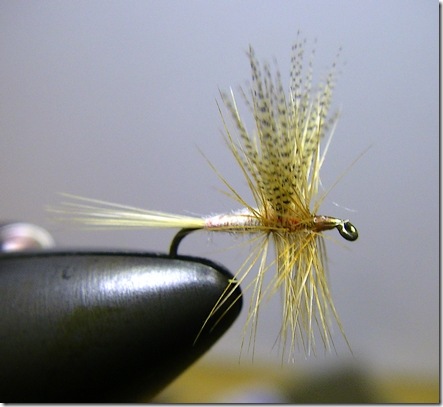
The Finished Light Cahill

The finished Light Cahill using most of the lessons we’ve described in the past three posts. This magnified version shows all my foibles – which I’ll gladly admit to while pretending I didn’t see you add it to your fly box.

I’ll do better on the next hundred dozen, honest.

Tags: Light Cahill, Catskill dry fly, small tapered head, fly tying tips, thread anchor, dubbing, tapered cut, tungsten fly tying scissors, beauty as perceived by anglers, fly box, hackle, vindictive fly tyer