Category Archives: Fly tying Materials

Where to find them cheaply

Following my advice was the real mistake

Singlebarbed reader Spencer has trod where only the crazed and obsessed have dared and in traditional fashion I’ve started making excuses while flailing about trying to help.

“ … you mean you actually took my advice? That was your first mistake.”

The issue is simple.  A dye manufacturer boasts of an olive or brown and both are complex colors made of multiple sub-colors. From your watercolor days, brown can be made a thousand different ways (usually by all the colors running together), but most vendors use a combination of reds and blues or orange and purple to get brown.

Spencer dutifully tossed in his really expensive Whiting neck he hasn’t owned up to inexpensive rabbit fur test chunk and wound up with a nice purple for his trouble.

Been there. Spent most of last weekend in the exact same place with RIT dye. If I knew more of what comprised color on the mineral side I might have a definitive answer, right now it’s lumped under “sucks to be you.”

Dyeing destroys a lot of materials during the learning process but over time you can handle certain types of calamities, the rest you dry and do your best to find a use for – the material hasn’t been destroyed, it’s just not the awesome medium olive you’d hoped it would become.

If you can’t get a brown to dye brown , there’s little you can do to fix it – and the only variables are listed below:

1) Heat – make the dye bath hotter or colder from the failed temperature. Some minerals may only dissolve at certain temperatures, so if you dye brown and get bluish purple, it could be the red is activated only by higher temperatures than the blue. Purple means that some red and blue fired, but blue-ish purple suggests more blue than red fired.

2) Over-dye or tint the color back into the acceptable range. It works best for lighter colors as you’re adding additional color to an already dyed material. Dyeing dark purple with yellow will have no effect, but dyeing a light green with some brown and yellow will yield an olive or olive tint.

3) Time – leave the mess in the pot overnight. This should only be done on the darkest colors as even Tan left overnight will yield a brown feather. Perhaps time is required to get the other color(s) to precipitate onto the feathers.

Over-dyeing is also not for the faint of heart, but it’s one of the ways you can get the rarified colors like bronze blue dun or a multi-colored feather.

Last weekend I’d agreed to reproduce some of Cal Bird’s teal colors and had approached the issue with great trepidation – Cal being a trained artist and therefore fully fluent in the manipulation of colors and tints.
Left overnight RIT Tan yielded Dark BrownI’d dutifully followed the vendor’s color guide and built an olive and a brown from other colors. RIT lacks an olive, and their brown was too dark, so I mixed the custom colors in a proportion that I thought would yield something close…

It didn’t, and I was left scratching my head like friend Spencer.

The dye was largely RIT forest green with about 10% RIT tan, but the green vanished no matter what temperature was used.

I yanked the feathers before they became too dark, but left a pinch ofGreen rinse water them in the pot to test the overnight method. The result is above, a rich dark brown.
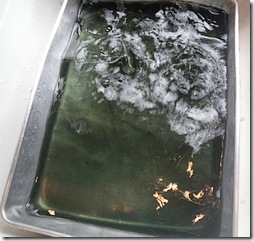
It didn’t matter what I tried, more heat, fixative, or dye yielded a pan full of forest green water and tan feathers. Over-dyeing was the only option, as I’d run out of suggestions from the manufacturer – who insisted I’d get an olive with the two colors mixed.

This drab, cold tan is shown below. It was yanked from the 90% green bath earlier – at the point when it had added all the tan needed to make the base color.
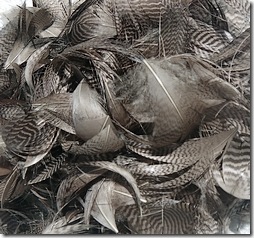
The "Cold" tan fellows yanked earlier

It has a miniscule amount of green in the feathers – just enough to turn the color cold.

I lump quasi-colors, those that I wasn’t expecting, under the destroyed feathers outcome;  the colors are useful and the feathers are undamaged – only the end result is unexpected.

A couple days later I subjected the now dry “cold tan” feathers I’d pulled early, to a bath containing only green and a bit of yellow. I needed only the smallest tint of color added to warm it to the sample color.
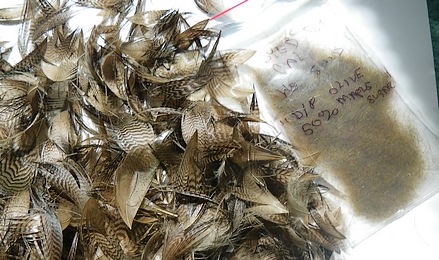
Sample shown with the feathers after the overdye process

The second bath applied what was missing to alter the color into the successful range. Green being equal parts yellow and blue and adding additional yellow – allowed the color to “warm” the feathers without obscuring the tan. There are hints of green in the feather duff at the base of each feather, but this is a brown-olive as dictated by the sample on the right.

Cal’s instructions are shown on the envelope, “olive and maple sugar.”

You can destroy feathers in millions of ways, with only a couple options to salvage the result. Consulting the color often allows you to pull the feathers when the unexpected results – and alters the problem from imbuing a light item with the finished color, to altering the existing color to match a desirable range.

Sorry, Spencer. It’s all part of the craft.

Tags: RIT, Cal Bird, teal, over-dyeing, tint, brown olive, bulk fly tying materials, custom dyed feathers, TINTEX maple sugar, whitefishcantjump.com, feather dyeing
Thirty Six miles of Maybe

Sure I was moving a little fast for my own good, but I was convinced I’d discovered the Holy Grail of Cloisonné (klaus-un-nay), that multifilament braided mylar tinsel we’ve adopted for steelhead flies. It is great stuff, available in silver and gold, never tarnishes and was a fly tier’s dream compared to all the thread-cored mylar tinsels of recent manufacture.

My $39.95 covered a lifetime supply plus postage from Asia.

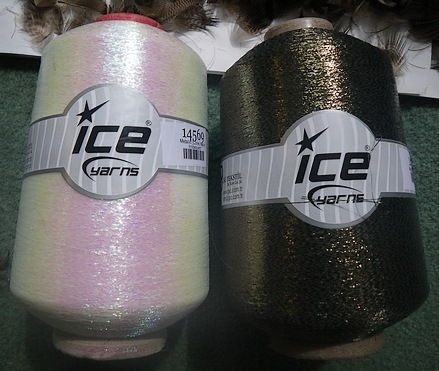
… Oh, it’s a lifetime supply sure enough, only I missed the yarn sizing and wound up with 45000 yards each of Dark Olive and Pearlescent superfine tinsel-thread

Imagination meets Desperation, the one pounder

… that’s eighteen miles of each color.

Now I’ve got to figure something that uses a ^%$# ton of it.

It runs contrary to my ethics to invent a couple dozen patented killers, then claim how much of a favor I’m doing you by selling you some teensy dust mote of the stuff … the fly shops have plowed that ground thoroughly.

But it does represent the last unspeakable variant of fly tying creativity, the collision of Imagination and Desperation. Us “scroungers” have been here many times and can only be thankful it’s not a full Bull Elk hide dripping in my driveway.

It’s too wide and breaks too easily to use as thread, but it would lend itself to being doubled over and used to replace all the other pearlescent components we’ve accumulated over the last couple of years. I could make a spun round tinsel, shellbacks for nymphs, wingcases, Easter basket dressing …

DkOlive_Tinsel

… or I could tie the entire blessed imitation out of the stuff and hope for the best.

It’s dry, doesn’t stink, and can be stashed away from prying feminine eyes eager to pounce on my mistakes (after the obligatory lecture or two).

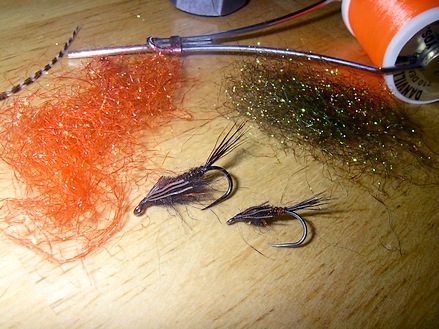
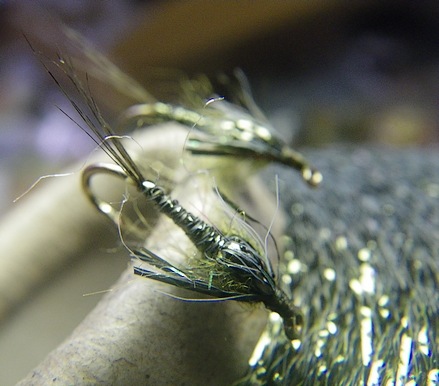
Trout flies come to mind and I managed to burn a foot building the little mayfly nymph above … 149,000 more and I’ll wish I’d bought two cones instead of the single …

I prefer the term unrepentant – society locks up those other fellows.

Tags: mylar thread, bulk fly tying materials, ice yarns, Turkey, mayfly nymph, Cloisonné, tinsel, fly tying

Sulky Holoshimmer, holographic tinsel by another name

I was reminded last night that I hadn’t been completely forthcoming. The fly shops call it “holographic tinsel” – typically charging between $1.50 and $2 for a small spool.

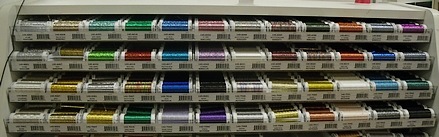
Joanne’s Craft’s calls it “Sulky Holoshimmer” and rather than the traditional size spool, sells it in the elongated bindle for $3.95 for 250 yards. It’s only available in the fine trout sizes (1/32”) under that label – but a little digging will likely find our medium and large variant.

That’s nearly seven spools of the fly shop size, which cuts your cost down to fifty seven cents per spool (30m).

sulky_holoshimmer

I took the above picture at Joann’s showing 48 different colors. On closer examination I see duplicates, so it appears more than one size is available from the craft store. I was harried – and throwing elbows to keep the mob back, and may have missed this important detail …

Sulky_holoshimmer2

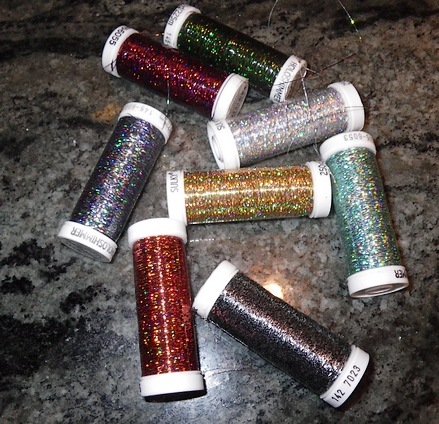
Here’s the life-size view so you can see the pattern and effects. Copper (bottom left), Cranberry, and dark Green (top two) are especially suited for those oddball trout patterns that require a little flash.

I love these spools. The top lifts up exposing a small track that the tag end can be wound around – once the top is pressed down your the tag end is completely secure. Consider saving these spools once the tinsel is exhausted – I’d decant other tinsels or chenille onto them so you don’t tarnish the old metal style (with rubberbands)  – and you can avoid the unfettered “mylar explosion” of the newer tinsels.

In this economy we’re making war on the two dollar item …

Tags: Holographic Tinsel, Sulky Holoshimmer, fly tying materials, bulk fly tying materials, war on two dollar items, fly tying

You can use the extra on your underwear

Satin Finish 2 mil elastic Singlebarbed readerTwoRod” has pointed us all towards saving a few bucks. His comment about 1/4” clear elastic as a substitute for the commercial “Super Shrimp Foil / Scud Back” products is the best replacement I’ve seen yet.

I went to eBay to see whether it can be purchased cheaper than the retail link Tworod included – and there’s a couple of truckloads available from a vendor (eBay store link) in New York.

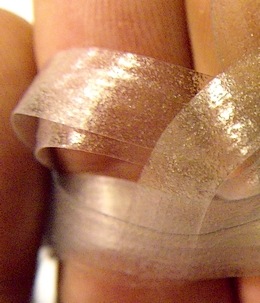
Six bucks for 50 yards (auction link) with a satin finish. It appears tougher and much longer lived than the commercial products I’ve tried – and may last multiple seasons. The satin finish takes permanent felt pen quite well, allowing you to fiddle with colors and patterns with minimal fuss.

100 yards is a couple of lifetimes supply

I picked up a 100 yards of the material hoping I wouldn’t have to purchase it every season like the finer tippets.

Even that may have been a little ambitious as the resulting pile is about the size of half a loaf of bread.

I’ll string a hank on a tree limb to gauge its resistance to sunlight degradation, then hope I can impart some of that zeal to some fishing buddies to relieve me of a goodly chunk.

50 yards is plenty, and if prone to significant oxidation you’ll wish you bought half that. The eBay flavor is closer to 3/8” or 1/2” in width – slice it down the middle and it’ll make two strips of the appropriate width.

Tags: Czech nymphs, Scud Back, Super Shrimp Foil, fly tying materials, fly fishing, oxidation, clear elastic strip, eBay

Possession, tunnel vision, and cheapskate, all the trappings of greatness

Most of you swore next season would see you with fly boxes bulging – and absolutely nothing has been accomplished despite the mighty oaths to the contrary.

I’ve always used the Exorcist model of offseason restock – wherein book or article induced “possessions” fight over my immortal soul, and the result is one less agonizing chore.

The last two were induced by Reed Curry and the Czech Nymphing tome. Reed’s stimulus I’ve not yet shown as I’m in no mood to be laughed at – and while some of Czech patterns have been revealed, it’s some of the materials that caused my jaw to grow stern …

Scud Back or Magic Shrimp Skin is a material that costs ungodly coin, and simply needs to have its source identified before I can sleep nights. Small packs costing $5 or $10 are the bane of fly tying – and while I substitute vinyl sandwich bags freely – I’m still tormented by the search.

The material is a 2 mil vinyl tape (or sheet) that is quite stretchy, semi transparent, and possesses a gloss finish on one side and dull on the other.

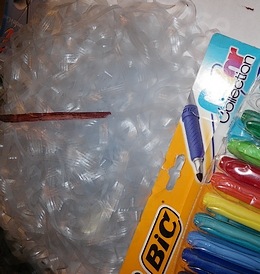
Permanent felt pens and a Glad sandwich bag are my favorite substitute – just sneak into the mail room and use their paper cutter to make all the strips you need for less than penny…

Sandwich bags are about 2 mil thick, and the larger Zip Loc flavors are about 3 mil, either works wonderfully.

Teflon tape (for wrapping plumbing pipe threads) works elegantly, but it’s a might slippery and comes only in white.

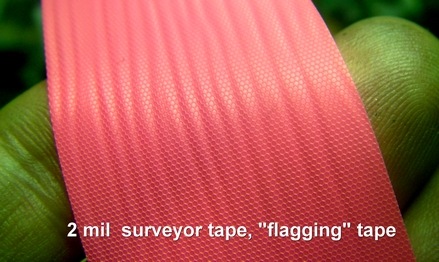
Construction flagging tape is 2 mil and has all the florescent colors. It’s the tape tied to the surveyor stakes – and depending on roll size and width it’s about $2 for a couple hundred feet. It also has no adhesive backing – which is a plus…

2 mil flagging tape for surveyors

Vinyl tape is mostly solid colors (link is to 6 mil to show colors) – but transparent solids are available. Sold in many thicknesses it’s available in 2 mil and used to mark electrical wires, adorn hula hoops, and a wide variety of other uses. The adhesive can be removed with toluene or alcohol (depends on the type of adhesive used) and yields shiny on one side and dull on the reverse.

Available in sizes from 1/16” to 3” wide. It may be best suited as the strips only need to be about two inches long for a completed fly. A wide tape would allow you to cut each strip across the tape rather than lengthwise and

Electrician’s tape comes in a dozen colors besides black, and while mostly sold in 7 mil, other sizes are available. It works admirably as a Czech nymph carapace, as will the transparent Kapton tape – used to insulate circuit boards from solder.

Shad_Hydropsyche

Most of these tapes are made for outdoor use and are UV treated to resist the effects of sunlight. Magic Shrimp Foil and their ilk strike me as having the same issue as latex, a one season fly. Open your box the following winter to find the material cracked and in little pieces.

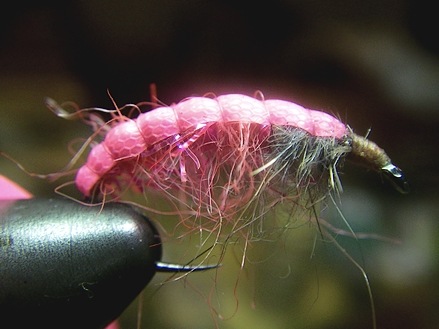
Above is florescent pink surveyor’s tape tied as a large caddis pupa. You’ll be giggling no doubt – but once Shad season starts in earnest it may dawn on you that the Czech style may be used for something other than trout …

… it’s all part of the Exorcist method, get possessed then tie everything that way including dry flies …

I may run this through the American to see what them steelhead think …

Tags: flagging tape, Czech nymph, cheapskate, magic shrimp skin, scud back, vinyl tape, fly tying materials, glad sandwich bags,

The Dyna-King cement reservoir, it’s either that or enduring a bikini wax

It’s unfamiliar ground for a fellow that shops with coupons, but after suffering another glue-based indignity, it was time to plow some dollars into the problem.

Head cement. Thinned to penetrate, odiferous, and requiring equally caustic thinners to remove  from things it wasn’t meant to glue …

… because eventually you’ll get cocky. Coaxing a feather to remain in a certain position, you uncork the cement to lay in a generous dollop, using the tingle of “spider-sense” to replace the stopper.

It’s not so bad when the entire bottle empties into your crotch. It’s mostly room temperature and your careful thinning is rewarded by an even saturation of the pants enroute to a better bond with those sensitive areas below.

No sudden chill or shock to the system, no nerve ending screaming in torture – all that comes later when you’re attempting to separate undergarments from everything nearby …

… all of which are hairy and sensitive.

It’s job induced peril. If you tie this will happen. You will regret it.

Dynaking Cement After the top two layers of skin return, I’ll be in a better mood – in the meantime I’ll marvel at my gleaming technological cement reservoir (and the hole it left in my pocketbook) – and consider its purchase cheap.
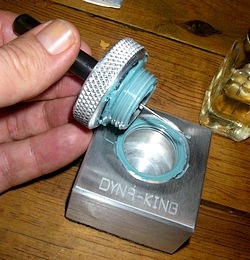
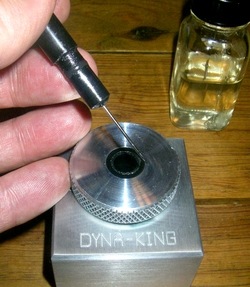
It’s a Dyna-King cement reservoir, and has lifetime written all over it.

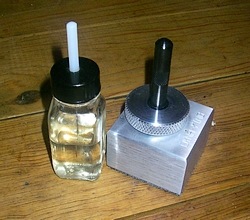
Milled from a single block of Aluminum it’s weighty enough to avoid tipping over, holds about half a bottle of cement, and has an “O-ring” seal on the bodkin to prevent leaks or air penetration.

The cost is $39.95, which is steep – but after I bench tested the shape with my hammy hands, I’m positive that I won’t be able to tip the cement jug with a careless or hurried move.

The reservoir ready for filling

The picture at right shows the reservoir ready for filling. Grease has been applied to the thread to prevent cement from penetrating into the threads and sealing the unit.

They suggest periodically replenishing the barrier with petroleum jelly or light grease.

The below picture describes its intended use. The loaded bodkin is pulled from the top assembly and returned for refill or until its next use.

The O-ring provides the tension for removal and replacement and ensures an airtight seal when the bodkin is in place.

Bodkin removed for application of cement

This is one of those niggling long term issues that’s not enough of a problem to warrant an immediate fix, and just enough of a disaster that you curse yourself for not addressing sooner.

I’ve used a variety of hollowed out wooden blocks that were eventually pressed into a multi purpose role. Great for drying flies – but to avoid clippings raining down onto fresh cement, the tendency was to move the block further away.

Guaranteeing you’ll slurp cement on the desk surface as the loaded bodkin traveled between reservoir and fly.

Getting the container too close meant banging it while spiraling a long segment of chenille or hackle – which was just as bad.

The Dyna-King cement reservoir is about 3/8” shorter than the glass bottle flavor, and quite a bit heavier than wood. It may survive close to the vise base without discharging the contents accidentally. The tension on the O-ring is sufficient to hold the bodkin firmly in place when upended, and you can knock over the entire assembly with bodkin in place without a spill.

… which may buy me enough time to regrow some hair, and allow the swelling from the mixture of toluene and pumice to subside a bit.

Full Disclosure:  I paid full retail for the device.

Tags: Dyna-King cement reservoir, toluene, head cement, lacquer, bodkin, fly tying misery, The Fly Shop, fly tying tools

There’s always some fellow that wants to paint outside the lines

Hot Orange isn’t high on the list of trout colors, so it’s only natural you suspect I’m up to something gaudy. Not the case, us Impressionists are freed of the narrow confines of caddis larvae and Giant Stone dry flies and recognize Orange isn’t really Orange if you don’t want it to be …

I’m still smarting from the “Polyester Sink Strainer” episode, wherein I subjected the kitchen to hideous odors and obscene colors, just to garner a couple of new halo colors to try.

Being a fan of the “Chaos Theory” of fly coloration, and believing that Mother Nature’s bugs are never a uniform coloration – and there’s always an inherent mottle effect besides the very obvious color difference between belly and back.

Angling books love to describe the “ … mayfly tumbling in the current” representation of nymphing, which I don’t subscribe to either. Throw a cat off the garage roof and he lands on his feet, ditto for dogs and in-laws, so invertebrates likely tumble briefly to regain balance, then swim like hell for safety, or the surface.

Colors can dampen as well as provide highlight or halo effects. My earlier example of adding neutral gray squirrel to yarn blends shows the “dampening” effect of gray, how it can take the bright edge off of the yarn dander and make it an earth tone of the original.

Highlights and halos are often wildly different colors added to dubbing to offer a flash or hint of color to the fly. A bit of boldness on the choice of accent can yield some surprising effects.

Like Hot Orange becoming muted and obvious and all at the same time.

An example of highlights or halo dubbing

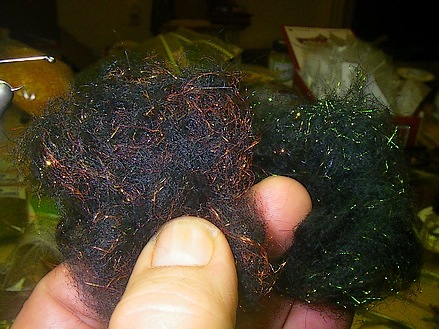
Above are two examples of marrying odd colors together to seem much less so. Black and Hot Orange Angelina, and Black mixed with the Grannom Green. (Original colors shown here)

The bright portion of both has been overwhelmed by the surrounding black, and Hot Orange is now coppery colored, and most of the green has vanished.

My war on monochromatic is well documented. I have a goodly supply of the time-honored traditional colors, but most of the unique flies I use each season are a mixture of effects – but almost always polychromatic.

Which isn’t saying much, as any guide can tell you of the client that scoffs at the flies offered him, loudly proclaiming, “I catch all my fish on an Adams” – and if that’s the only thing the gentlemen uses, it becomes a self fulfilling prophecy.

Real differences in flies can only detected when pals are present. Count the number of outstretched palms, and figure you’re onto something.

Impressionists aren’t limited to flights of fancy, despite our being able to list a hundred great uses for Claret. We can use the scientific method when it suits us  – or succumb to the inner child as we deem fit.

Glance at a natural then immediately glance away. What color was it?

Likely you’ll say brown, or dark, or olive-black – you’ll retain a distinct impression of the predominant color and identify it. Flip the bug on its belly and do the same thing. Now it’s tan, or olive, or another color, Mother Nature always provides a light belly and dark back.

The back color is your base – and make the belly color the halo. It’s quite possible that fish on an intercept may get a glimpse of both – and a foraging fish that’s uprooted the insect from instream vegetation or the bottom will see the tumbling variant – guaranteeing both.

AP Black with Halo colors

Above is the traditional AP Black tied with the mixed black/green on the body, and mixed black/hot orange for the thorax. Those Angelina fibers that are visible are quite muted, but also very obvious.

They look black to me

Moving the perspective a couple inches further away and we’d call both flies … black.

Fish vision and perception are still hotly debated topics, far above our pay grade. What I do recognize is that most artificials are largely stiff compared to the wild gyrations of real insects – and anything I can add that implies motion is as good as the motion itself.

… and Science be Damned, the real fun is in spattering the canvas with Puce, Mauve, and Day Glo yellow, as it upsets conventional bug theory and masks the fact I’ve never been much good at painting within lines …

Tags: Soft Crimp Angelina, AP Black nymph, dubbing highlights, halo dubbing, fish vision, Chaos Theory, Impressionism, evangelical fly tyer

That was some of the best flying I’ve seen yet, right up to the point where you got killed

I didn't do itHer icy gaze punctuated by the bony digit pointed in my direction …
Naturally, I tried the First Law of Backpedalling, innocence.

“ … What?”

I gazed around studiously avoiding That Which She Held, but I guess my look of innocence wasn’t quite up to par – or I’d gone to that well too many times …

I was Flat Busted.

I had counted on her being dazed by the glitzy neon of the Las Vegas strip. A whirlwind of shows, drinking, and pulling handles – and the ensuing hangover would buy me enough time to replace the sink strainer.

Umm, No.

Instead I’m in my kitchen looking “hang dog” while the Gestapo asks me to collaborate.

… and I’ve warned you often enough. Make sure you clean all evidence of dye from the important fixtures and linoleum – so you aren’t pinched in your first attempt.

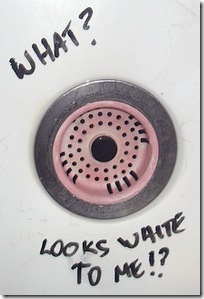
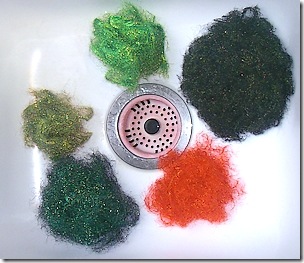
Angelina & Sink discolor Me, thinking I was a Ninja Master was part of my undoing. The rest was the horrifying discovery that sink strainers contain Polyester.
… there’s no label on the damn things, how was I to know?

The Olive and Peacock blends strained fine. The Grannom Green didn’t leave a mark, imagine my surprise when the Scarlet (which looks very Orange) left a calling card.

Our modern everyday sink strainer appears to have about 10% polyester – just enough to revoke my parole, and land me in the crosshairs yet again.

I’ve mentioned the destroyed feathers, hinted at the strain in relationships, insisted that you’d be a Past Master within minutes – and even tried the Manhood angle.

But you fellows were smarter than I was, and while I’m watching the next nine sappy romantic comedies with one star or less, understand that dinner works – but hell hath no fury like a woman wanting popcorn.

… and I’ll be fishing quite a few Angelina equipped flies this year hoping to get the taste out of my mouth.

Tags: dyeing polyester, soft crimp Angelina, grannom green, fly tying materials, peacock, damsel olive, sink strainer, Las Vegas, flat busted

Part 2: The timid fellows guide to dyeing hair

In Part 1 we covered most of the dyeing process – and the difficulty associated with matching a known color.  The steps are the same for dyeing anything; first a cleanse and prep of the original material, followed by immersion in hot water so the shock of the dye bath doesn’t induce physical change.

Feathers are difficult because much of the time you’re dyeing loose materials, which can cause problems with their tendency to float – and your tendency to chase every last one, while the mass continues to darken even though its been removed from the dye itself.

By comparison chunks of hide are much easier. Furbearer’s may have some natural oils that prove resistant, but as you’re dealing with a single swatch you can pull it and rinse it as often as you like.

In essence, the hide chunk itself becomes the “test feather” – pulled routinely and rinsed until you have the desired color.

Big animals contain all manner of dirt, nettles, and dried guts or blood. If you’ve been gifted by a hunting buddy, you may have a lot more preparation work to get the hide suitable for coloration. This may include scraping all flesh and fat off the hide with a grapefruit spoon (serrated) before adding Borax or cornmeal and stretching the hide to dry.

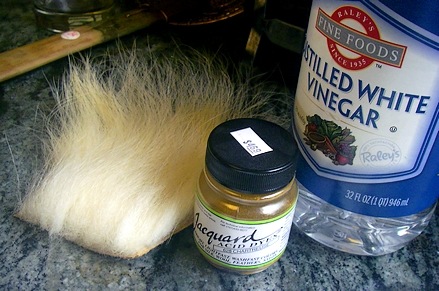
We'll start with Polar Bear, Acid dye, and White Vinegar as fixative 

Other concerns are the age of the hide and its integrity. A hot dye bath and a vigorous clean and dry can be enough to break apart an old hide – especially Polar Bear, whose last legal importation was in the 1970’s.

We’ll repeat the process used on the feathers for the Polar Bear shown above, and in doing so – I’ll get to test a new color of Jacquard acid dye to get some familiarity with the vendor and their idea of Chartreuse.

As mentioned in Part 1, each vendor has a different palette and the label is a reference color – not a guarantee of the outcome. Chartreuse being a yellow tinged with green, I’m going to test their dye on a small piece prior to dyeing a larger amount.

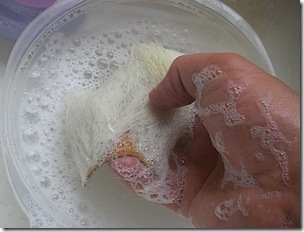
Dish Detergent and agitation

The cleaning process is identical to feathers. A little dish detergent into the soak bowl, followed by agitation to remove any dirt particles at the base of the hair.

Always handle the item by the hide. Most hair is dyed for the tips and not the underfur. Gripping the hide will allow you to feel it break up, if it’s an old hide, and will not bust up the tips which is the portion we’ll be using on completed flies.

Rinse the completed section two or three times to remove the soap. Refill the soaking bowl with clean water and return the section of hide to it.

The Fur Difference:

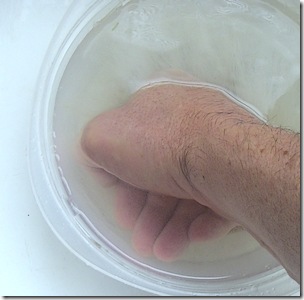
Rythmic pressing against the bowl to remove oxygen Where dyeing feathers and fur differ, is that hides trap lots of oxygen in the underfur and matted hair. All of which must be removed before we can insert the piece in the dye bath.
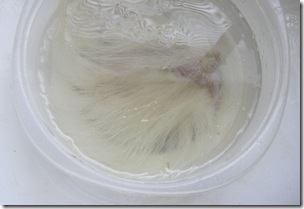
Arrange the section “fur side down” and press your knuckles against the back of the hide to force out the oxygen. Do not allow the piece to surface. Rhythmically press down firmly and release (leaving the piece completely submerged) until no more bubbles escape.

It’s no different than loading a sponge. By pumping the back of the hide we’re pulling in water to replace the released oxygen, super-saturating the entire piece.

We do this to ensure that when the hide is placed in the dye bath, the pigment can reach all of the fur simultaneously. If it can’t, some sections will be darker than others.

Super-Saturated, note how it no longer floats Similar to those strung saddle hackles or Marabou you buy in the store. The tops are nicely dyed Purple, or whatever color purchased, but the butts are mottled with undyed sections of white. This is a result of not supersaturating the material. The dye hit the top three-quarters of the hackle while the butts retained oxygen, preventing color from soaking into the feathery marabou at their base.
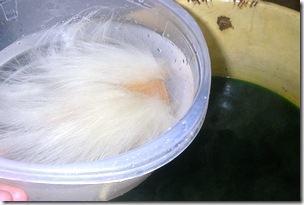
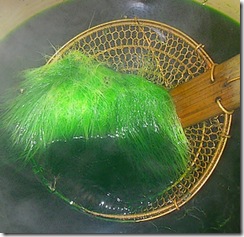
The piece above is now supersaturated, note how it remains on the bottom.

Like the feathers we’ll add the piece to the dye bath without draining it. That will allow the dye to replace the fresh water uniformly, and the piece will be the same tint in both underfur and guard hair.

Adding to the dye without draining

At right, we’re adding the Polar bear into the dye undrained.

Chartreuse being a mixture of yellow and green, I will expect to see the material yellow immediately and the green to alter the shade over time.

Yellow is one of the rare colors that’s nearly impossible to screw up. It can be too dark or too light, but always “yellows” successfully. Because this is a new vendor and a dye I’ve not tried before, I’ll be alert to color change. If anything goes wrong the piece won’t be ruined, I can use green or yellow in flies, so there’s little risk.

Polar_Allatonce

It’s been in the bath less than thirty seconds, yet I’ll it to measure absorption. The super-saturation is evident by all parts of the hide, underfur, and tips, are receiving color.

A bit scary to see so much green”? No.

Many complex colors are a mixture crafted to deliver pigment over time. Most would think a Chartreuse dye would be predominantly yellow, yet it’s the opposite – a Kelly Green color.

I’ve always assumed it was the absorption rate that dictated mixtures and bath color. Yellow absorbs instantly, green having to fight its way past the yellow to lay itself down. Hence the Kelly green is added to overpower yellow.

Unless it’s Rinsed it ain’t that color

Polar Bear is a unique fiber, essentially a hint of color surrounded by a transparent sheath. Like most guard hair it’s a really tough material, and will take color slower than underfur, which is similar to feathers in absorption.

Color can only be confirmed after a rinse. Like our pulling of sample feathers to check the coloration, hair must be removed and rinsed to confirm its hue – as the fibers themselves are much tougher and resistant to color absorption. 

Polar_Drained

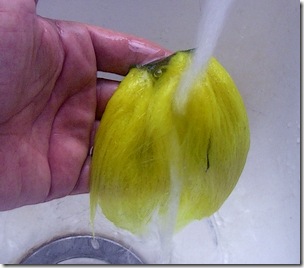
I’ve held the piece above the bath allowing the dye to drain out. It looks like a good chartreuse (note the underfur is dyed completely down to the hide – no white “roots”).

Rinsing will determine whether I’m done.

Holding the hair so the water is going in the same direction as the grain of fur, rinse it under cold tap water while alternately squeezing until the water runs clear.

Rinse in cold water

Cold water will close the pores of the material and the steady stream of water will cease coloration.

I have a nicely dyed piece of Yellow Polar bear, the chartreuse is largely gone.

Note how all the green seen in the above slides has vanished. Also note the fur is dyed completely, all the way to the hide.

Did I screw up the dye bath? Should I add more dye, more heat, or more fixative?

The answer is found on the back of the hide. Remember, we’re dealing with a vendor unfamiliar to us, likewise with a color of his we’ve never attempted …

The back of the piece, and the clue

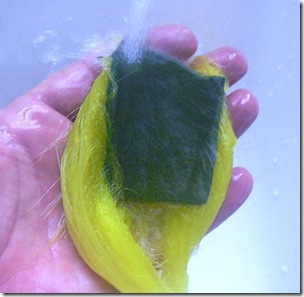
Shown at right is the back of the hide, which has the telltale clue.

The hide itself is green, not yellow. That tells us that all colors of the dye were activated properly, and the result is likely what the vendor has chosen as Chartreuse.

There is a tiny hint of green in the color (your monitor may show it differently), given the material is soaking wet I’ll dry it completely and assess the color tomorrow, when all the variables will have been eliminated.

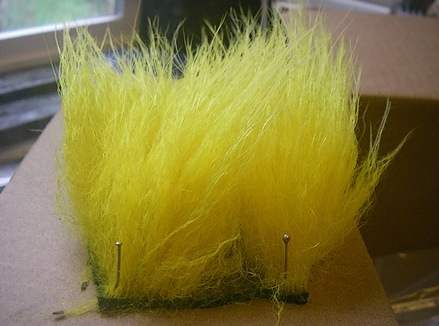
Polar bear, dyed and staked down on cardboard

Hides curl when dried – and it won’t matter whether the skin was naturally cured or tanned, it’ll roll up like a potato chip if you let it. Always tack the piece down on the corners using pins and cardboard so that it will dry evenly and remain flat.

Cardboard will wick water from the hide and assist the drying process better than wood. I’ll cut up a box and stake out all the pieces before taking them into the garage (or outside) to dry.

Note the uniformity of color in both guard hairs and underfur. No white splotches at the base, no slop.

… and the sign of success? Those nice pink fingers shown in all the illustrations above. Skin is protein, and will take the dye really well, expertise is judged by the color of your fingers – as that determines the color of your spouse’s kitchen and her precious linoleum.

Always wipe down the countertops and sink area. Dry dye powder can occasionally escape – and won’t become activated until something wet hits it. Better you to find it now than eating jaundiced Cheerios …

Tags: Chartreuse acid dye, dyeing polar bear, protein dye, dye bath, dyeing fly tying materials, marabou, strung saddle hackle, fly tying materials, fly tying

By God it’s Wood Duck …

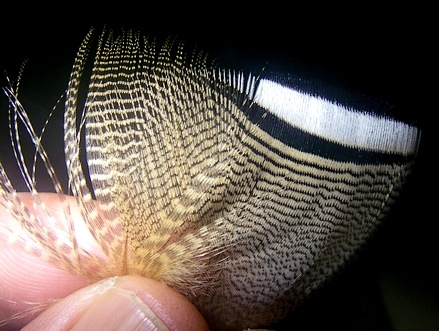
As a follow up to this morning’s post, here is the final feather coloration after it’s been dried completely.

The completely dry feather

That’s a superb match. The real lesson is compensating for water’s darkening effect, the extra shades you allow knowing how much lighter the color will be the morning.

There’s only one real way to learn how to avoid a three-shade mistake and it involves destroying an awful lot of Mallard flank.

Like I did.

It’s cheap so it shouldn’t give you much pause. Stick to inexpensive materials to learn the craft, and remember that “less is more” when it comes to matching Mother Nature. You need weak dye baths that buy you the time to watch the feather color.

Tags: Wood Duck flank, lemon yellow, Mallard, weak dye bath