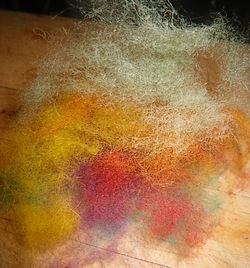
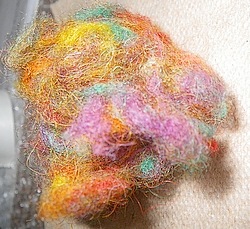
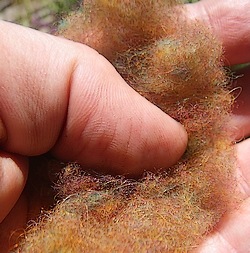
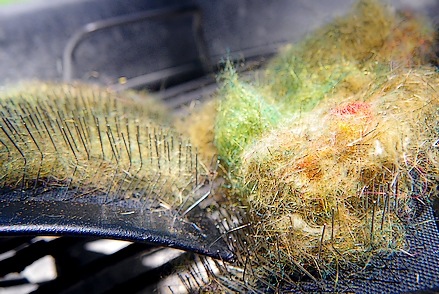
Category Archives: Fly tying Materials

Where to find them cheaply

It’s like mascara, color can enhance and detract

My first commercial order was for two dozen Adams. I was 16 at the time, and quality control was letting the glue dry and giving it a couple of half hearted tugs – followed by a rigorous review of proportions.

By the time I’d completed 24 flies that passed muster I’d actually tied about 60 – and suffering through 60 flies of the same size and pattern was pure torture to a fellow that tied something different everytime he sat down.

It would be the better part of a decade before I could face the Adams without cringing, which is why the Mosquito figured so prominently in my angling development.

Hackle tip wings were my undoing. Grizzly specifically, and the lessons learned on that first order apply to the many flies since. Thousands of patterns pair materials for wings, cheeks, or body components – and attention has to be paid to the coloration of the pair chosen, as their mottling and coloration can make a perfect fly look less so.

Color can visually deceive the eye into thinking your proportions are wrong.

A bad pair for an Adams wing

The above picture shows us a “bad pairing.” The hackles themselves are fine – their coloration is good, but using the above pair will make the fly’s left wing appear shorter than the right.

It’s the tips of the feather that cause the issue. The left feather is tipped in black, the right feather is tipped in white; using the two together will make the left wing appear shorter. Add in the hackle in front of the wings – a mixture of brown and grizzly that will bust up the barring of the wing segments and exaggerate the color difference further.

Proper pairing

Here’s another pairing that will eliminate this simple problem. This “right” feather was next to the other “righty” above, yet has a black tip. Note how the bars are matched exactly with the left feather. This pairing will yield an Adams where the colors don’t upset the balance.

Side View of the finished Adams

From the quarter view above, nothing really looks amiss. Wings are cocked and extend above the hackle, both look equal length, and proportions look solid.

Front view of the poor feather pairing

Here is where the problem displays itself nicely. The black tipped wing (right) vanishes leaving only the last white segment visible. The white tipped wing (left) is strident and obvious, making the left look much too short.

Color. Normally it’s your friend but occasionally it can diminish or enhance a feature and throw your nicely tied fly into a tizzy. It’s the last thing to check before wrenching those precious hackles off the hide.

Tags: Adams, dry fly wing, grizzly hackle, fly tying tips, dry fly proportion, Mosquito,

The next Great Fingernail Removal System

My lampooning of dry fly fishermen is well documented, so I thought I’d take my comeuppance like a Man…

I’ve got a half dozen experimental colors of “Dubbing X” made, about an ounce of each, all hand made at the cost of most of my fingernails, lots of swearing, and the skin of both forefingers…

Dubbing "X"

A medium gray (Adam’s), a Blue Wing Olive, Pale Morning Dun, Upper Sacramento Pink, and an Ocher. The above are the California colors for those insects and may not be correct for your local watershed.

An “accidental color” is one that occurs while learning an unfamiliar dye process, where you’ve written the material off thinking nothing good could come of it – didn’t write down the formula, so you can’t reliably make it again … and it turned out pretty darn good – which was a complete shock.

… and then you destroy both fingernails and flesh in a series of ill advised attempts to render it to base fur before finding some process that partially works.

I could use a little feedback on the next Great Dry Fly Dubbing, drop me a note and I’ll toss some in the mail.

This is only for dry fly use. The material floats without assistance (specific gravity less than 1), and is a micro-filament – or “Nano-dubbing” as OldTrout58 calls it.

… while supplies last – I’ll need time to regrow some fingernails before the next batch.

Tags: Dubbing X, dry fly dubbing, Blue Wing Olive, gray, Pale Morning Dun, fly tying materials, Upper Sacramento pink,

Steely resolve in the face of the Perfect Feather

Per request I’ll continue to post additional fly beautification tips in a weekly format. These will comprise hardscrabble lessons learned somewhere after beginner and before complete mastery.

Most tiers that tiptoe around the craft use their fishing instincts when no instructor or book is available. Most of us started as dry fly fishermen and it’s not surprising that most new fly tiers attempt the dry fly more often than nymphs.

… which is too bad. Tying nymphs is far more forgiving than the delicate and strictly proportioned Catskill dry. A novice tier can hold up some lumpy looking stonefly and if critiqued can respond with “ … well, all the stoneflies in _____ Creek are fat.”

… and if I had been the unfortunate to task the fellow – I’d blush like hell and backpedal in a hurry – never having fished over “fatty” Plecoptera …

The Catskill dry is completely unforgiving. It’s territory and techniques have been practiced for more than a hundred years – and artistic license must be defended, even for expert tiers.

One of those oft-mentioned-quickly-forgotten principles is made more difficult in the presence of the Perfect Feather …

Beware the Perfect Feather

Above are two examples of the Perfect Feather; a foot long #16 grizzly saddle hackle, and a well marked (lefty) Wood duck flank feather with perfect tips. Both are treated with awe by the owning fly tier – and both can cause your fly to suffer cruelly if you’re not diligent…

Wooduck flank prepped

You’re a kid in a candy store, all those precious tips are in a straight line and unbroken. Giddy, you fail to clip the center stem because it’s perfect too.

You forgot that all feathers are either a left or a right, even foot long saddles and untouched Wood duck flank.

The wood duck will be your undoing twice. In the first case the stem will cock one wing to the left, and in the second, the stem center will retain 9 or 10 fibers attached and you’ll have to compensate by yanking fibers from the far wing to the near side to equalize that natural bulk.

Stem does not appear to affect the wing, everything is straight

The picture at right shows the Perfect feather now clumped together with the center stem included. Note how all’s well – there’s no clue that anything is other than perfectly straight.

You’re thinking of dumping all your “lemon-dyed mallard” – as the sight of the wood duck with its pristine coloration, fine markings, and perfect tips – make it so much more pleasurable to work with – even justifying the hideous cost to lay in a goodly supply.

Unfortunately like Ulysses and the Sirens – their song is so beautiful, you’re ignoring the approaching rocks …

Now you're undone

Now you can see why you remove the center stem. The left side is thin and has a different angle than the right wing.

The cause is simple. You had to pull the loose fibers over to the right side to balance the two clumps – leaving the left, just the stem section. It’s thin because the fibers are attached to the center spine and have no “give” to move around.

We were lured onto those rocks consciously …

Same clump stem removed

The picture at right shows the same wing as before. I’ve removed the wing from the shank, clipped out the center stem and retied it back on.

Note the difference with the picture above. the left wing is  relaxed, the right wing is less dense and tighter – as you didn’t have to pull everything to that side to compensate for the stem on the left.

That foot-long Grizzly saddle is just as bad. You’re used to applying six or eight turns of hackle to your dry flies, but the lure of virtually unlimited hackle means you add four or five extra wraps and crowd the head. Crowding means fibers trapped in the knot that’ll wick the head cement right into the eye.

It’s the lure of the Perfect Feather. You won’t find it mentioned in any tome or DVD, and only your steely resolve to overcome it’s sweet song …

Tags: wood duck flank, grizzly saddle, upright and divided wing, center stem, lure of the Perfect Feather, steely resolve, fly tying

Part Last – Singlebarbed teaches the beauty secrets of the Shao-Lin Masters

As we mentioned in Parts 1 & 2, the measure of true fly beauty is held by fish not humans. Unfortunately only averaging  9 days afield your flies are viewed most by people, and suffering their continual criticisms can make a fly tyer resign himself to please both anglers and quarry.

… and in the doing, gain the precision to make his flies sturdier.

We’re down to the final three, each so hideous and daunting as to cause fly tiers to scream, gnash teeth, or give up the craft entirely. Three crucial steps that professional tiers do subconsciously, that plague beginners for decades, are rarely mentioned, and completed so quickly you’ll miss it on a video or live demonstration because you’re drawn to more glamorous materials and technique.

Watching a talented tier can be mesmerizing. A crowd of fellows inching forward looking at some vindictive SOB who’s just palmed a couple ounces of yard-long #16 saddle hackle in Coral Pink. You’re trying to stammer the question, “… Wh … where’d you get that?” – and you miss a half dozen gems of technique while he pretends he’s got a closet full of the material and doesn’t.

Here’s what you missed:

three In prior posts we mentioned the difficulty of keeping materials from moving around the shank – either via thread torque, bulk, or method of attachment.

I’ll ask a simple question;

Which holds the tail of a nymph onto the shank, the six turns of thread you used to tie it on, or the forty turns of thread that come with adding ribbing, body, and all remaining steps?

Light bulb.

Thread management is part art form and part physics. Thread is your enemy and we use it as sparingly as is possible. It’s heavy, lifeless, and is always applied in great quantities where it’s least useful.

A tail isn’t “lashed” onto a hook with tight concentric turns, it doesn’t require taming where all traces of it are buried under thread, it’s anchored with three tight consecutive turns of thread at the tie-in point, and then the thread is spiraled to the next step.

That’s true of wings, wingcases, ribbing, bead chain eyes … and everything else.

The anchor wraps occur at the last portion of shank before the fibers become tail. The butt ends will be bound securely by the thread used to dub the body and attach the ribbing, and we don’t need any additional turns to hold them mid-shank. Any tail movement will occur at the anchor point – not in the middle of the fly.

Understanding the physics behind this practice is the hard part, execution is much easier. “Anchor points” exist where the stress will occur – and the thread wraps and tension used are critical only at that spot – all other wraps position the bobbin for the next step.

Less thread pays off in slim profiles, small heads, and buoyant dry flies – and is as memorable to the critiquing angler as is the curves of a Supermodel.

two

Hand in hand with the notion of “anchor” is the tapered cut. As described above the anchor is needed to hold the material firmly to the shank. Once the three wraps of the anchor are in place, it’s an automatic trigger for the cut.

New tiers are still unfamiliar with everything; small hooks, tiny scissors, unfamiliar materials, and insecure grasp of proportions. They’re thrilled to cut the material at all – and usually after securing it with 46 turns of thread.

Often they’ll “blunt cut” the item, scissors held at right angles to the hook shank so they can square cut the wing or tail butts – leaving a promiscuous gap between material and shank that will have to be addressed by subsequent materials.

Intermediate tiers will have learned the horrors of the lump left by the blunt cut, and will taper their cuts – scissors parallel with the hook shank – cutting downwards at the shank.

… after they’ve secured the item with 26 turns of thread.

A blunt cut can only be used when the material covers the entire body area of the fly.

All that’s needed to attach any part of a fly to the hook shank is three turns of thread.

Bold words, and you’ll note I didn’t say it was attached permanently. If the anchor is the only thread needed to hold the material stationary – and subsequent steps will add more thread to lock down the butts that extend over the body area, than those three anchor turns will hold the material well enough for us to cut the taper – yet will be loose enough so if torque has carried the fibers too far to one side, we can straighten them with finger pressure.

Which is why the Golden Rule applies: Nothing on a fly can be fixed by laying more crap down – because the “three-turn-anchor-tapered-cut” allows us to reposition it before we move to the next step.

We fix as we tie, because we’re learning thread management.

The taper we induce as part of the cut is every bit as important as the anchor and the three-turn trigger cut. For flies that please humans, only two kinds of cut are permitted; the blunt cut when the material covers the entire body area – as in the tail of a dry fly – where it’s trimmed behind the wing, or the tapered cut – which produces the finished body contour.

Using cuts to define body shape is easier than adding the right amount of dubbing to thread to have a thin arse and thicker middle. Beginners and Intermediate tiers haven’t mastered dubbing yet, asking them to be doubly clever in its application will not work.

… and tapered cuts have to be learned anyways – as not all flies have dubbing to make contour. The Quill Gordon is a classic example, it’s body is the stripped quill from a center strand of Peacock eye and the taper of the body is caused by the cuts made on the prior materials.

It’s easiest for a new tier to learn to dub “level” – that’s something he can gauge easily as it’s the same thickness of fur over the length of thread used.

… later, after he finishes digesting the three parts of this post, he’ll be able to master a tapered dub consistently – and will have an additional tool at his disposal.

one

Nothing gives the prospective fly tyer more trouble than dubbing. It’s deceptively simple, a simple twist between thumb and forefinger – nothing devious or hidden, no wrist motion or hidden timing.

It’s “mash crap on thread” – yet the proper technique of this routine task eludes most tiers for decades.

That’s because there is no technique.

It’s no different than loading a paint brush. A tiny thread, whether it’s waxed or no, can only trap a certain amount of fur tightly. Anything more than that will be trapped loosely – and if you add more will degenerate into a lump of sodden crap that resists your saliva, glue, hammy hands, and everything else you throw at it.

Golden Rule of Dubbing: if you can’t see through it, you’ve got too much.

I like to use “mist” to describe the dubbing process to students, as all mists whether water, vapor, or solid, are transparent.

The average #16 dry fly uses so little fur that you could snort it without sneezing … but the gag reflex is horrid.

The inability to apply the correct amount of dubbing, and the myriad of issues it raises, adds a common visual roughness to all your flies – as it’s among the most common tasks performed, and is so very visible.

It will not matter how many videos and demonstrations you’ll watch, the right amount of dubbing is an afterthought to the presenter – he’s mastered dubbing and is busy explaining why you want to fish his Hopper over someone else’s. “Mist” isn’t visible to the camera lens unless it’s within inches of the fly, and much of the action is off screen.

Dubbing can be a very deep subject to us reformed-whore-nutcases, that two percent of fly tiers that go where others fear to tread. We blend fur types and textures, layer colors, give it loft and sparkle, or shape it to replace traditional fly components. But the average tyer still struggles with loading it on the thread, and his Messiah is strict adherence to the Golden Rule of Dubbing above.

Once mastered you’ll realize there are many kinds of dubbing, some are well suited for the task, and others are very poor dubbing choices – but are endured due to the color or sparkle they offer, some quality not found in traditional fur bearers. Baby seal is a great example. A transparent sheath surrounding a white inner core, designed to reflect sunlight away from the animal so it doesn’t burn to death while waiting for that insensitive Canuck to mash its life out with a club.

… sure, you’re all tears now, but that’ll change once someone offers you a nickel bag.

Dubbing that’s suited for dry flies are usually the waterborne mammals, fine filaments and soft to the touch. Nymph dubbing can range from fine to coarse, often contains a goodly component of guard hair, and may contain synthetics to offer sparkle or other qualities.

Just because it’s the right color doesn’t mean it’s the proper tool for the job. Store bought dubbing is simplistic generalist dubbing, not the premier designed-for-dry-flies that us nutcases are fond of …

Putting it all Together:

Let’s put these hideous lessons together in an assault on the traditional Catskill dry, a magnet for criticism whose light coloration shows every lump, knot, and tear stain:

Light Cahill 1: What I see that you don’t

This is what I see, and you probably don't

I can’t help it, I see all the tie-in and tie-off points, where I’m going to put the wings, tie everything off, start the head, where the body ends, the entire fly just by looking at the hook shank.

With this “tie by the numbers” approach coupled with thread management, I know when I’ve strayed over a boundary line – and correct it right then, rather than let the problem slowly compound.

Light Cahill 2: Three turn anchor, trigger for the tapered cut

Three Turn Anchor

I’ve attached the Woodduck with three turns of 6/0 Danville. I’ve tied them in about two turns of thread past the mark where I want the wings to stand – this space will be consumed by me folding the material upright, something that most beginner and intermediate tiers forget. Transitioning anything from horizontal to vertical will consume space on the hook shank – and if the heads of your dry flies are perennially crowded, you may be forgetting that critical physics lesson.

Three turns is my trigger for the tapered cut. I’ll come in from the wing side and cut downwards towards the shank. If you have tungsten tipped scissors, it’s the most dangerous cut possible, as tungsten is extremely brittle and you can chip or remove the points if you catch the hook shank in your cut.

Light Cahill 3: Body taper complete

Body Taper compliments of a scissors cut

The tapered cut is complete and my body taper established. The anchor point holds the materials firmly so I’ll spiral the thread to the tail position and mount the tail now.

Note: Us old geezers that used Nymo thread in the 70’s and 80’s recognize that nylon thread can be used in two manners. Spinning the bobbin will essentially turn the filament flat (which is why my thread appears so wide) and will create less bulk than a normal strand of 6/0. Spinning the bobbin again will restore the spun flat fiber to round – best used for the anchor wraps themselves as they can bite into the material.

It’s all part of the art of thread management. Thread is a lot more than it seems…

Light Cahill 4: Tail anchor

Tail anchored

There’s a lot to see in this picture, as this is where a lot of techniques start to pay off.

The thread has been spiraled from the wing anchor to the tail mount point. The tail has been mounted on my side (thread torque) with a three turn anchor. The tips of the tail have had a blunt cut (scissors at right angles to the hook shank) but are long enough to traverse the entire body of the fly.

A blunt cut can only be used when the material covers the entire body area of the fly.

… so we have adhered to the rule as stated above … and now we’ll begin to see the reward.

Light Cahill 5: Token Blurry Picture

Taper preserved

Because the tail butts are uniform thickness and cover the entire body, the taper induced by our scissor cut has been preserved.

Note the spirals of thread as it was moved from tail mount to the base of the wing. That’s not 56 turns of thread, or even 24 – it’s exactly three. Also notice the tail as compared to the picture above; we’ve only wrapped three turns of thread since the anchor, but note how far towards top-dead-center the thread torque has moved it.

I’ve lifted the wings (consuming some horizontal shank) and divided them, the tie-off and head area remain untouched.

Light Cahill 6: A Mist of dubbing

Mist of Dubbing

A mist of dubbing is transparent and even at its thickest point you can see right through it. It will lock onto thread like a fat kid on a candy bar, it will do anything you ask it without complaint, with little coaxing.

Your dry flies will be buoyant and float twice as long as there is so little water absorption, and they’ll dry with a flick or two of the rod. Beauty, with good physical properties to back your play.

Light Cahill 7: A mist on thread

Mist on Thread

That’s the same small dusting you saw on Step 7 above. It doesn’t look so small anymore. I’ve switched to tan thread (which is what I use on the Light Cahill) so the thread color won’t overwhelm the dubbing I’ve added.

Note the tail, it is now top-dead-center … bloody miraculous.

Light Cahill 8: The final dubbed body

The dubbed body with hackle tied in

A bit of the tail anchor florescence has peaked through – partly because of my reluctance to cover absolutely all of it with tan thread. Thread is always your enemy even when you’re demonstrating what not to do.

The staggered tie off area and head are untouched. I’ll put 1/3 of the hackle behind the wing, 2/3rd’s in front. It’ll be “westernized” – we use a bit more hackle than our eastern brethren due to the brawling nature of our rivers.

Light Cahill 9: Tie off

The tie-off area gets thread

The hackle has been applied and the reserved area for tieing off the final materials has been intruded upon. The head, which we planned since the bare hook shank, has its area yet untouched.

Light Cahill 10: The finished “westernized” Light Cahill

The Finished Light Cahill

The finished Light Cahill using most of the lessons we’ve described in the past three posts. This magnified version shows all my foibles – which I’ll gladly admit to while pretending I didn’t see you add it to your fly box.

I’ll do better on the next hundred dozen, honest.

Tags: Light Cahill, Catskill dry fly, small tapered head, fly tying tips, thread anchor, dubbing, tapered cut, tungsten fly tying scissors, beauty as perceived by anglers, fly box, hackle, vindictive fly tyer

Genetic Dry fly hackle meets the Vegi-Matic

If you’ve ever wondered about the inner workings of the genetic hackle business – how years of careful selection and good genes yields those yard-long saddle hackles and expensive rooster necks – you won’t find any of that here…

Instead, we’ll show you how those lengthy saddles are harvested, and how trained specialists size and select feathers destined for a “100 Pack” – and your tying desk.


It’s clever enough to tenderize the bird while coaxing the hackle gently from the skin, and rivaled only by throwing the bird under a bus.

Tags:chicken plucking, dry fly hackle, Whiting “100 pack”, fly tying materials

Part 1 – Singlebarbed teaches the fundamentals of fly beauty, and insists you’re catching fishermen mostly

Fly tying is six weeks thinking of nothing but the fish, tying small stuff to smaller stuff, the shock and awe that all insects don’t suck blood or whine in your ear, the majesty of the first fish caught on your own fly, and the amazing riot of colors and animal parts coveted and purchased …

… and then it’s forty years of attempting to make your flies resemble someone else’s – validation not so much duped fish as successful copy of a book photo, or an appreciative comment from a fellow angler.

You start tying flies for fish – and wind up tying flies for fishermen.

It’s not a conscious decision, but aesthetics and beauty are as insidious in fly tying as they are in life.

The industry has always embraced beginners with great fervor, as they’re the source of a great deal of revenue. They need everything and a canny shop owner loves to host a class as it guarantees commerce. Fly fishing clubs love them as well. It’s a great way to be “hale fellows well met”, attract “lurkers” that don’t show for banquets and Beef au Jus’, and co-sponsor them with local shops happy to provide a small discount for students.

… and six weeks later you’re mounting that gleaming new vise to a table wishing you had someone to ask the hundred-thousand questions that occurred since your final lesson …

Magazines, books, and Youtube provide inspiration but spawn more questions than answers, and despite the fellow at the fly shop claiming “Cree” is nearly as good as Grizzly, your unimpugnable sources are gone and you’re left to figure it out … alone.

Intermediate and Advanced classes are few and far between, as there’s no agreement on what techniques or flies belong to either, there’s little retail traffic, and finding a master-instructor that has all the answers and is sober is more difficult in a club setting.

When offered they’re usually a three-part chain; beginner, intermediate, and advanced – and often filled with recent graduates of the beginner class, who’d be better served if they tied 5 or 6 thousand flies before stepping up the complexity.

If you’ve made it past the beginner class and resolved to master fly tying, knowing full well that further precision is largely vanity as the “well chewed fly” and its effectiveness has debunked taut, tight, and pretty…

… I’ve got nine steps for you to master if you want to catch fishermen.

The “Why” of it all

Refining your tying for the critical gaze of other fishermen will make your flies sturdier. All the painful lessons you’re about to learn are lost on fish, fish are stupid, lack artistic sense, and eat cigarette butts.

If you smoked you’d know this.

“Refinement” is a fancy word for discipline. Holding instincts in check and enduring someone else’s artificial sense of style, proportions, and method.

Beginning tiers lament the movement of materials on completed flies, loose tinsels, flopped over tails, and precarious hackle – and are heavy-handed with thread on all subsequent attempts. Reaching inside that glossy plate to give the author’s fly a twist will yield movement too, but it won’t unravel or fall apart – and yours might.

The difference between 30 years of fly tying and a recent initiate is about 8-9 fish. Even the best flies disintegrate and replacement is required.

In its day the flat tinsel body humbled most tiers. It’s not used as much presently but the lesson learned holds true for all wound body materials, doubly so if they’re shiny.

Dubbing bodies allows a tyer to add a little more or take a little off, but yarns and chenille don’t share that quality. They’re a constant diameter that shows every lump and foible of the materials underneath, and completely unforgiving.

Mastery of these materials is simple if you get to watch someone else do it. For chenille, downsize it one size and tie it in at the front and double wrap the body.

A double wrapped body of small chenille is the same size as a single wrap of medium, yet you can add taper, wrap it tighter, and tie it off with less thread than the larger size.

Flat tinsel and floss are identical. Wrap from the front of the fly backwards to the tail then wrap back up the body to the start. You’ll have a gleaming body absent gaps in the tinsel or “bubbles” – where overlapped tinsel pops out of the turn next to it leaving a small area of underbody and thread showing.

A large area to work with doesn’t make the task easier. Large trout streamers with their 6X long hook actually magnifies the floss or tinsel’s effect on the overall fly – as it’s much more visible. Working with floss requires you to cover your fingers as the sweat of your grip will immediately remove the shine or stain light colors.

Lead wire on nymphs and larger flies dictate the look of rest of the fly. A poor choice in placement or the inability to address the obvious lumps of where it starts and stops, cannot be corrected.

On trout nymphs the lead wire is the thorax – giving you a pronounced lump that ends the body and defines the wingcase. It should be positioned on the fly exactly where the thorax will occur – and the number of turns used should be the exact width of your planned thorax area.

…that’s right, planned. Flies don’t wind up with proper proportions by accident, and tail, body, thorax, and head are all mapped in your mind before thread touches the hook.

On larger flies lead wire may cover most of the shank, or it may be larger diameter, and no amount of thread or glue will keep it from rotating. Bind it as best you can and use the tail and body materials to plug the gap between shank and the rearmost end of the lead.

The mistake most make is not leaving enough room for the forward transition at the eye of the hook. All your materials will be spiraling off the lead coils and secured on the much thinner hook shank. Dubbing can be used to hide many sins, but wound materials like ribbing and chenille will always have trouble on that transition.

Positioning the thorax too close to the eye of the hook will yield a crowded eye – and worse – if a couple of turns of hackle need to be wound in that area to complete the fly. If the tie off area is still abrupt in definition hackle will flair outward away from the body due to the bulge – rather than close as it’s intended.

Lead placement dictates everything – including the hackle shape.

If it’s not dry fly hackle then it’s tied in by the tip and folded, then wound.

… and there’s some very good reasons for that unshakable rule …

Hackle is the most fragile component of any fly, dry or wet. The thin tip gripped by your pliers limits the amount of pressure you can use when hackle is wound around the hook shank. Tying in the tip means the stem gets thicker with every turn and you can apply more force when it’s wound palmer up the body – or used as a collar on nymphs and steelhead flies.

… and at the eye – where it’s tied off, the stem is thickest yet, perhaps enough to withstand being barked on a rock on a low backcast or torn off a tree limb on a misguided forward stroke.

The real value is the effect. Hackle fibers get longer as you move towards the butt of the feather. When winding collars with a folded hackle each turn is longer than the last. Longer fibers obscure the shorter fibers of earlier turns – giving the appearance that all the hackle is a perfect cone of exactly the same length.

It’s beauty were after, remember. Sound science is merely an accidental nicety in our quest to catch fishermen.

“Folding” a hackle is the act of tying it in my the tip and running a right angled object (like your scissors) up the stem to break the fiber’s back and make them slant backwards towards the rear of the fly. This process is shown in all the best fly tying books and is instantly recognizable on the fly itself.

Tying in your hackle by the butts and winding a nymph or steelhead fly’s collar will require you to wrap thread backward onto the hackle to get it to lay down, resulting in a ungainly head that’s got hackle color peeking through – and is prone to damage.

Putting it all together

We started with the least important beautification tips, working our way to the most important. Putting items 9, 8, and 7, together – let’s see how we can use them on a standard #6 Silver Hilton.

Silver Hilton 1: Lead Placement and Downsize

Silver Hilton

Do I use 10 turns of 2 amp lead wire or 20 turns of 1 amp?

Downsize: I opted for the smaller size as I could cover the body completely – guaranteeing the lead is uniform over the entire fly. No lumps or transitions to worry about and I squeezed in 5 extra turns of the smaller wire, making it heavier.

Silver Hilton 2: Gap fill

Silver Hilton 2

Lead is secured with three runs of 6/0 Olive thread (chosen so you can see it). It’s not going to prevent a vigorous twist between thumb and forefinger – but neither will 50 runs of thread. Thread is always your enemy, use what’s needed and nothing more.

Gap Fill: The teal tail is tied onto the hook shank leaving a transition I’ll address with subsequent materials. The balance of the tail material is trimmed at the rear of the lead, about a 1/4” of tie down/transition remains.

Silver Hilton 3: Gap Fill

Silver Hilton 3

Gap Fill: The oval silver tinsel follows the tail, tied in exactly the same spot and trimmed identically. The “gap” is slowly closing so the transition will be imperceptible on the body material.

Silver Hilton 4: Downsize and Double wrap

Silver Hilton 4

Downsize & Double Wrap: Rather than medium chenille I’m using fine velvet chenille. Regular chenille is just as good but I prefer the finer grained Vernille (velvet chenille) to regular rayon. It’s tied in front so I can make a double pass of the fly body; the first offers bulk, and the second will be drawn tightly over the first to give a smooth gap-free look.

Silver Hilton 5: Double wrap

Silver Hilton 5

Double Wrap: A nice plush body with a hint of taper, the result of gap fill and the second “finish” wrap of chenille. The second allows me to fill gaps and address contour, resulting in a “fisherman catching” look – and structural integrity.

Silver Hilton 6: Double wrap

Silver Hilton 6

Because of the fly body being a double wrap of chenille, note how the oval tinsel stays on top of the body versus digging into the material and being lost from view. The extra density of two layers means all subsequent materials will not vanish into the “grain” of the wound chenille.

Likely both fish and fishermen can appreciate that …

Silver Hilton 7: Tied in at the tip and folded

Silver Hilton 7

The hackle has been tied in at the tip and folded. I’ve drawn the right angle of my scissors towards me breaking the spine of each fiber and in so doing they’ll point back toward the tail of the fly naturally.

Silver Hilton 8: Folded hackle

Silver Hilton 8

Folded Hackle: The hackling is complete. Note how the hackle lays back over the fly naturally without being coaxed by 65 wraps of thread. In fact, where’d all that thread go?

Because I can “crank down” on the hackle after the first couple of turns, I’ve laid it exactly where I wanted it – covering the thread tie in area we saw in the previous picture. I’m about to start my whip finish and only two turns of thread are visible.

Silver Hilton 9: The final “fisherman catching Sumbitch”

Silver Hilton Final

The completed fly.

Tiny head. No gaps or foibles noticeable – and the eye is clean of cement and feather dander. It is a fisherman catching SOB, and your buddies will compliment you with great sincerity while palming all of them off your bench.

Small things that seem trivial, yet added together can make a huge difference in the way your flies look, last – and how they’re perceived by others. It’s of little consequence when running the fly through a riffle as only fish are a true test of what looks tasty and what doesn’t.

In the meantime, if you’ve just finished your six lessons of beginner class and are feeling your oats, you may want to commit these simple steps to memory.

Next Week: Three more pearls of wisdom as defined by hisself and his questionable wit…

Tags: Silver Hilton, lead wire, tapered fly body, folded hackle, Vernille, velvet chenille, Mustad 36890, teal flank, oval silver tinsel, beginner fly tying class, intermediate fly tying, advanced fly tying, flies that catch fishermen

My binges at the Yarn aisle are still intact, just less successful

My yarn fetish hasn’t slowed any I’ve just become demure and sensitive to catcalls from the fellows keeping a manly distance from the yarn aisle and fidgeting under the weight of Madam’s purse. My progress through the store monitored closely by a stern female proprietor who always assumes I’m shoplifting.

Can’t blame her much, she’s never seen a fellow fondle a blend of silk, mohair and polyamide with such sexual tension…

I do my best to set them at ease, shifting the subject quickly to how I plan on dismembering some hand dyed woven masterpiece into lint – and all the fish I’m liable to catch in the doing …

… which is why Grandma presses her phone number into my armload of gaily colored skeins – testosterone is in damned short supply and even a portly scowling fisherman makes for a stirring presentation.

The Yarn reject pile, growing larger by the minute Most of the latest batches have found their way to the reject pile. Lured by color and texture and undone by a hidden weave or indestructible fiber that prevents reduction into fur.

I’m still searching for a heavy fibrous yarn that I can get in 20-30 colors that can be torn apart for large trout flies and Steelhead.

… and at the same time I’m practicing with fiber reactive and disperse dyes – so that once I find it I can turn it into any color missing from the vendor’s base compliment.

Which usually means Olive, as it’s quite a rarity to see anything other than a Kelly Green or perhaps an Ocher.

Swimming_Damsel

I’ve got a lot of testing underway and damn few fish to assist. The above is a swimming-style damselfly made of a polyamide eyelash yarn which also contains a sponge segment that I’m attempting to incorporate.

You saw something similar on the mayfly nymphs I’d done earlier, only this time I’m opting to get more of those soft swimming fibers onto the fly to offer a marabou-style swimming motion.

I’m tying them on Knapek and Skalka hooks, part of a larger test of all the high priced competition wire that is becoming commonplace. I’ve laid in supplies of Knapek, Grip, Skalka, and Dohiku dry and nymph hooks to test quality of manufacture, consistency, fishing capabilities, and wire (soft or brittle) – as part of a larger article on the subject.

… in the meantime I’m proving myself a poster child for the Fish Can’t Read article on obsessive fly mongering.

Tags: Knapek, Skalka, Grip, Dohiku, competition hooks, obsessive feather collecting, polyamide yarn, Fishcantread.com, Olive is no longer fashionable, fly tying

That 70’s cloth none of us admit to wearing? That shortened your life too

Darth Polyester

I figure it was some great sin in a past life – nothing newsworthy or famous, just some callous Lothario that fleeced spinsters of their birthright, some real estate wunderkind that unloaded worthless railroad right-of-way by foreclosing on widows and orphans.

Others have a knack for useful things like plumbing or electrical wiring, own a house full of beaming children and spend most of their time basking in the adoring gaze of their spouse.

Me, I wallow in toxins.

I smile as girlfriend backs out of the garage, giving “thumbs up” while waving the list of “honey-do’s” – and as soon as she’s upwind I’m adding a dab of this to a dollop of that, all of which have skulls and crossbones on the label.

… all of which say, “empty into your sink when finished.”

The sport may be “green” but its components are pure death.

With strong winds in the area and “Momma” elsewhere, it was time to explore polyester and the disperse dyes needed to give it lasting color. Synthetics can be made from thousands of polymers, many of the items we use can be derivatives of nylon, polyester, rayon, or even a component of a natural material like viscose, comprised of plant or wood fiber.

All we see is “shiny” or “sparkly” and rarely delve further than shelling out the money for a nickel bag.

The nice folks that make the raw Soft Crimp Angelina material had sent me the Holy Grail of their “doll hair” fiber, a material data sheet that outlined the temperatures the fiber melts at, the temp the fiber loses its iridescence, and similar data that would allow me to dye their product without torching too many Ben Franklin’s …

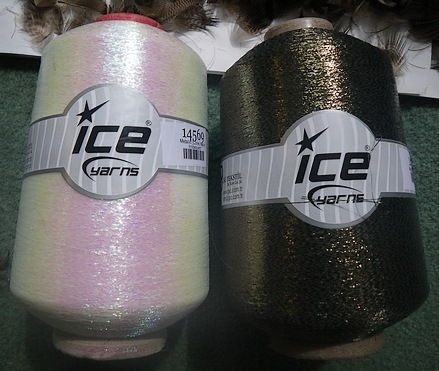
Many of you have asked about the material, which is unavailable anywhere except in tiny little packets labeled, “Ice Dub.” I use it in raw form in countless flies and dubbing blends, but have shied away from coloring it because polyester requires caustic chemicals and plenty of heat.

Tasty Peacock Green  … not to mention the fumes, which is the Shit are pervasive and great odiferous. A well ventilated environment is needed so you can get the entire neighborhood lit and as kitchen cabinets, countertops, and flooring may be unknown material (may contain polyester) you can’t afford to drip the stuff on anything other than porcelain or stainless steel.

Skin is no problem. You could dip your head in it and brush your teeth, and after a couple whiffs you’ll want to …

Pro Chemical & Dye has dyes for every type of fiber you’ll encounter. With only 12 colors available for polyester you’ll need to learn the artist’s color wheel and how to construct complex colors from their components.

Example: Olive, a complex color made of equal parts yellow and green, with 1/2 a part of dark grey or black. Add yellow to make it a “warm” olive, and more green to make it a “cold” olive, and add more black to make it a dark olive (either warm or cold). For the below colors I used equal parts Kelly green and Buttercup yellow, and a half part of Cool Black (Pro Chemical & Dye colors). Using Buttercup versus the Bright Yellow means I’ll err on the side of a warm Olive.

As I’ve had experience in dyeing colors and building shades and tints using their components, my goal was to build a color that resembles a Peacock herl or eye. The iridescence was the easy part – it was built right into the Aurora Soft Crimp Angelina, which has motes of bronze, green, and gold.

Peacock is a double complex color as it would be described as green, olive, dark green, bright green, or bronze, depending on the location of the herl and the genetics of the bird itself.

You can’t dye material “peacock” – instead you dye three or four colors around it and blend them to make the final coloration. This is much easier than it sounds as dye baths will alter shades and color depending on the amount of time the material is left soaking.

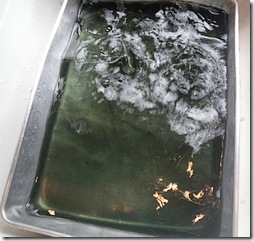
Three shades, one dye bath

Here is the damp material after 3 minutes (left), 6 minutes (top), and 9 minutes (bottom). One dye bath to color all three shades, only immersion time differs.

Blended Angelina under Morning light

Here’s the final blended color seen under morning light. You can pick out the lighter tints and darkened fibers in the aggregate mass – and I still have the three other shades should I want to alter it further. I used the same formula when blending the result; one part green, one part darker olive, half a part of the darkest shade.

Used on a leech

The above shows the mixture used on a traditional leech pattern, note how the florescent light makes the material much more green than the prior photo shot outdoors. Florescent is a “white” light – not blue tinted as is normal sunlight, it always lightens colors by one or more shades.

#14 Zug Bug

I always hated tying Zug Bugs as the peacock has difficulty hiding the bulge of lead wire underneath – plus its fragility. Above is a #14 Zug Bug tied with the blended color, note how the slip of mallard lies flat on the back (as it should). The finer filament coupled with the ability to build the proper taper with dubbing gives much more control over the fly than wound herl, and the durability is increased at the same time.

That's no "dime" bag

I still need a great deal more practice with these new dyes but once I’ve built the formula for colors and immersion times, I’ll be able to reproduce these with reasonable surety. Returning the material to its dry and fluffy state is also quite problematic as I’m still un-matting the fibers by hand.

Knowing my “stay of execution” is limited – I’m hustling the dye pot outside as soon as each color is achieved, there to cool down while fumes exit the house. The ceramic disk attached to the storm drain stares at me accusingly – a large fish with the entreaty, “this empties directly into the river.”

I considered the crime briefly, but opted for the squirrel burrow in the backyard. While the label says it’s safe I’d rather be entertained by a florescent Orange squirrel staggering out of his burrow on unsteady legs.

The kids next door trundle up to investigate and I’m unaware until the little blond angel wrinkles her nose and says, “oOo, what’s that smell?”

They’re peering into the algae colored water with the shiny bits of debris  – and I’m croaking out my best sinister through the rebreather, “ .. in the cauldron boil and bake, eye of newt and toe of frog, wool of bat and tongue of your dog …”

… they screamed appreciatively all the way back to the house. Ma came out to make sure all was well – and fixed me with the obligatory “you are so bad” look as soon as chubby fingers pointed in my direction.

It means visitors next Saturday night requiring a double fistful of Snickers to pay for my sins.

Tags: Peacock, Ice Dub, Soft Crimp Angelina, Pro Chemical & Dye, polyester, disperse dyes, Halloween, little blond angel, toxic chemicals, Leech, Zug Bug, fly tying materials, fly tying

How to torture both cloth and your dog, and not wear the result

Having a eye for the next great fly tying material is one thing, ideas being the easiest part of the larger riddle, it’s the destruction and transformation that is the real test of invention.

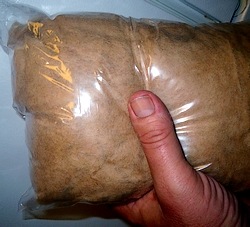
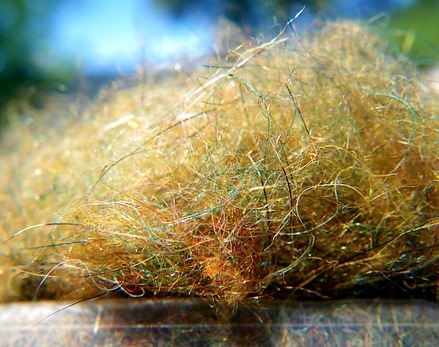
I’ve discovered the next great dry fly dubbing; filament size smaller than the finest materials currently available, specific gravity less than 1.0 – so it floats naturally, and wants to stick to thread so badly that static from your fingers is nearly enough to wind it tightly around unwaxed thread…

The #16 Light Cahill

I’ve got visions of groupies and dinners at the White House, getting the “hale fellow well met” glad-hand from the current anglers of legend, and never having to pay for drinks again…

… there’s just this teensy little problem I have …

I have to destroy it to make it.

Blenders can’t dent it, acid melts it, and dragging it behind my truck works – but I can’t tie enough to the bumper to create a snowstorm of filaments that I can scoop off the neighbor’s lawn.

I’m doing battle with some Ph.D fabric engineer who saw a great cloth and spent months ensuring it’d never unravel. He didn’t realize some idiot fly tyer would delight in destroying his best work for the sake of dampening it in a trout stream.

Old Tailwagger The first sign of progress was the judicious use of “Old Tailwagger.” It’s right after blenders in the fly tying book of mass destruction. Blenders excel on yarn, but fabric requires torture to become fibrous, and the Tailwagger is the tool of choice for stressing tightly woven filaments.

The downside being everything four legged is your new best friend. I use a brown paper bag to smuggle it past the family pets – which possess a sixth sense for leashes, brushes, and trips to the refrigerator.

The above picture shows the results of stressing a “panel” of material and rendering it from flat and lifeless – to a veritable sheepdog of fiber.

Note the fiber at the tail, about 1/5 the thickness of a single hackle

As I’m still possessed by the Catskill dry (due to Mike Valla’s book) the above shows a single filament of the dubbing contrasted against the tail fibers of a Light Cahill. The filament size is only about 1/8 of the width of a single hackle barbule.

That’s nearly microscopic.

That translates into a tiny dry fly body – and much less water absorption than normal. Wings and bodies have always proven the nemesis of dry flies as they’re the only materials that don’t assist in flotation. Smaller amounts of dubbing assists both classic dry and their scientific cousins in remaining afloat.

No build up

For the aspiring dry fly fiend this solves one of the more troublesome problems. How to dub a tight thin body that’s neither lumpy nor absorbs extra water. The above magnification shows the complete dubbed Light Cahill, albeit poorly, there’s almost no build up of material when compared to the raw thread area behind the wing.

… and why I spent the better part of this weekend transforming the material into something usable.

Hell, I got a bag full of the Goodie

Now all the fun starts. Dyeing the material into the most common 15-20 colors used for dry flies – additional tinkering with blended colors – and I may attempt to mix it with larger-fibered beaver or muskrat just to gauge the effect.

Microscopic fibers don’t blend well using machinery. Only water shaken vigorously can act as the blending agent. Blender blades and agitators just clump the fiber like cotton candy.

It’ll take some time to pick the colors and render mass quantities of material, but Winter is plenty long and this type of project is just what’s needed when football grows dull.

Those of you who fancy the dry fly might want to drop me a note. I’d be happy to send out some samples when I get a couple nice Olives and a medium Gray, as I’ll be looking for some feedback on both the material and colors. Refining a raw product takes a great deal of tinkering, patience, and time.

Tags: dubbing, classic dry flies, Light Cahill, dry fly dubbing, fly tying materials, fly tying

How to extinct the San Juan Worm without half trying

I’ve been holding this one close to the vest for fear of upsetting the Roughfisher, knowing once he catches a glimpse of what’s possible, we’ll be seeing “Darth Earthworm” and the San Juan Worm’s days are numbered.

Paton Glittallic yarn

It’s actually two yarns loosely wrapped together. One is best described as a trilobal-polyester that glitters like broken glass, intertwined with a soft synthetic braid that can be used as a flat yarn, or you can stuff things inside it to stretch it into a veined mayfly wing, or seal the ends to make a San Juan Worm-killer.

Pink and Amber

The woven strand looks like a shed reptile skin – and whips around in the water like a snake. I used it for the shellback on the October Caddis earlier, and am converting the old SJW to this – more mobile flavor.

The downside is that not a lot of colors are available, and being polyester, dyeing what’s needed is more work than I care to endure. Special polyester dyes are required as is a chemical fixative and a lot of heat.

SJW Killer

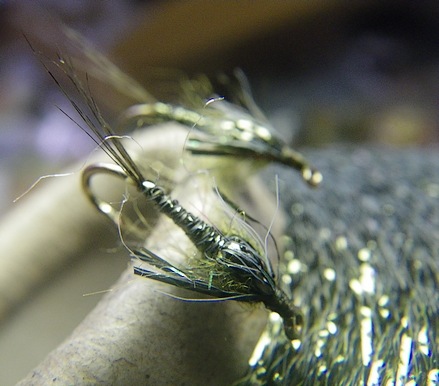
I flamed the end to melt some rigidity into the tube, threaded it over a 4mm gold bead and added the SJW headpiece. Both tubes are sealed with a lighter to complete the fly. The motion is so much more wormlike than the velvet chenille that I’m tempted to eat it.

What’s needed is a good rich Olive, but I’ve only found the material in black, Lilac Lame (pink), Cream Gleam, Blue Flash, and Maroon Shine. It’s about $2 per skein on EBay.

Tags: San Juan Worm, Paton Glittallic, Polyester, Lurex, October Caddis, fly tying material, Roughfisher.com. trilobal yarn,