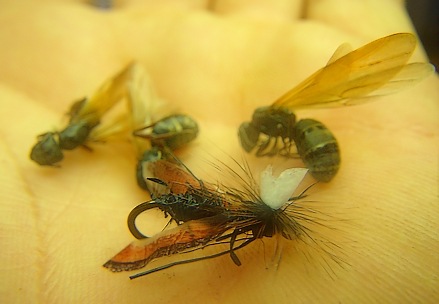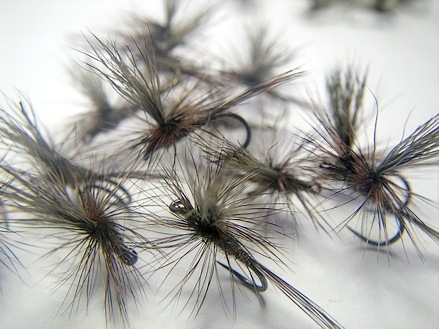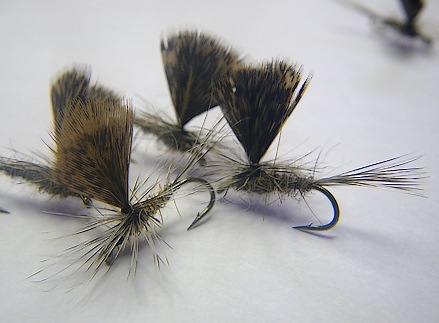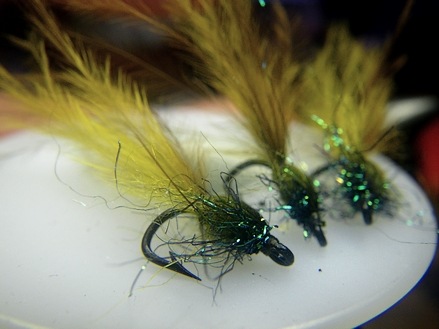
Category Archives: Fly Tying

Something old meets something new

234B With little help forthcoming from you chaps, I took a chance with another double sawbuck to land Coverite Microlite, another model fabric that doubles as our favorite nymph skin.

Coverite stretches nicely unlike the prior mylar variant I tested. Reinforcing the notion that I’ve found the industry, but the exact material remains at large. Coverite Microlite is close enough to the original Magic Shrimp foil that outside of the lack of colors available, my search is over.

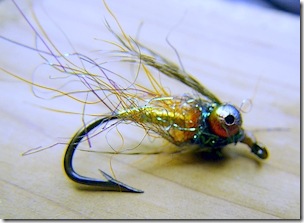
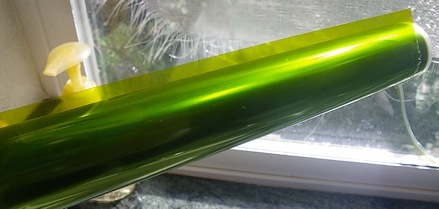
Microlite Transparent Green

I took one look at the Transparent Green and had to own it.

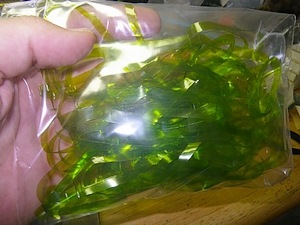
Yank the cardboard tube out of the center, grab a pair of scissors and simply cut the end of the roll in slices. Two minutes later you’ve got a bagful of 72” strands of 1/4″ or 3/8″ wide Czech nymph material. The roll is 6 ft long, 27 inches wide, and runs about $12 retail.

Microlite strips, a two minute task

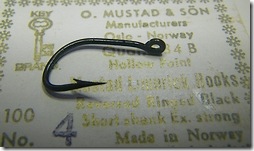
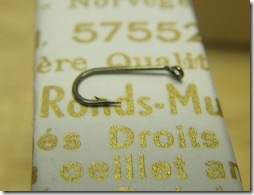
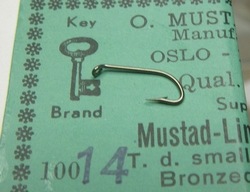
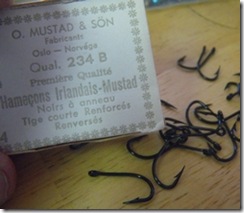
With that last haul of ancient Mustad hooks, I’ve replaced the expensive foreign scud hooks with a 2X strong Mustad 234B.

It’s a Ring eye, Japanned black,  reversed point, and the extra strength is capable of handling a little bending without falling apart like standard wire hooks.

Bottom-bouncing with heavy nymphs means standard wire will be straightened (weakened) on snags – and the unforged extra strong can resist snags much better,  and I can straighten the hook back to original shape without fear of weakening it measurably.

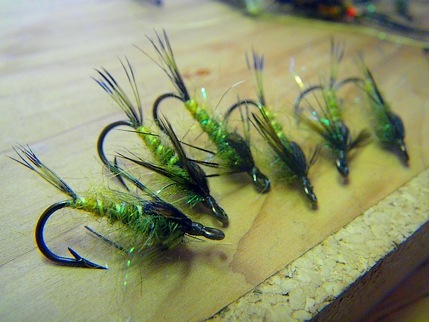
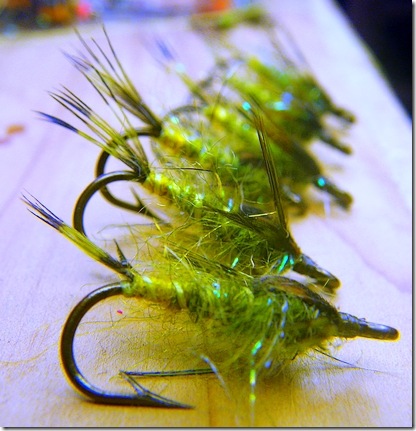
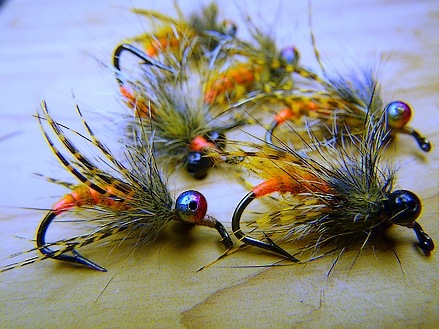
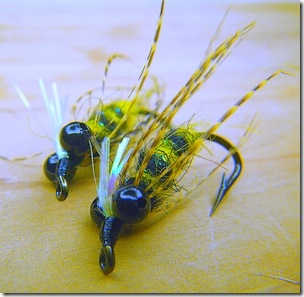
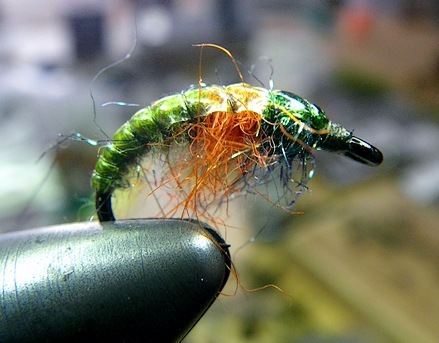
234B Czech Nymph

I bend the last quarter of the shank downward to give it the familiar Czech profile.

It brings back those fond memories from the Eighties; if the right shape wasn’t available we made that too. Thirty years later we’re in the same boat only we lack even the sturdy hooks to bend and twist to our will.

Tags: czech nymphs, mustad hooks, extra strong hooks, magic shrimp foil, vinyl covering, model airplanes, Mustad 234B, reversed point, japanned black, ring eye, short shank, fly tying materials, fly tying blog

Anatomy of a spectral blend

Nothing like having your living room covered in gaily colored mounds of drying fiber. I’ve often wondered whether application of an industrial vacuum wouldn’t make the job easier, just suck everything up and start tying flies out of the contents of the dust trap.

The artist's medium

Above are the raw elements of spectral dubbing, consisting of the primary colors of the color spectrum; red, cyan (Lt. blue), and yellow – and the secondary colors – orange, purple, and green. Only the cyan and yellow are acid dyed, the rest of the colors were built using RIT dye.

I’ve added a pound of Olive on the end as a tertiary color. I’ll add it to natural colored fur blends to make Olive tints to the original color.

It’s a raw mix of of natural fur that will replace the more expensive (and hard to find) Australian Opossum. A mainstay of my custom blends, Australian Opossum is imbued with tiny curls that retain air, adds loft and resists matting. Unfortunately, our American Opossum lacks those qualities and cannot be used as a substitute.

The spectral effect is the addition of all these colors to a base dubbing in small enough amount so as not to be seen until examined closely. At arm’s length, an Olive dubbing looks Olive – until you hold the fly close and can make out the individual colored fibers contained in the mixture.

It’s one of many building blocks of the Impressionist fly tyer, how to make a fly resemble nothing specific, yet look like everything – and all at the same time. Part of that magic is style and form, part is color.

Spectral dubbing blends should follow the 90/10 rule. 90% of the fur is the color you are attempting to imbue and 10% is the brightly colored fibers that will add a bit of deceit to the final product.

Building the Chaos color

Chaos Color Start The simplest way to build a good spectral effect is build the “Chaos” color and simply add it to your base fur in the desired quantity.

Add equal amounts of each of the six primary and secondary colors, and mix it into a single color. This is the Chaos color.

Now you can grab a pack of Hareline dubbing off the vendors wall, pinch in 10% – and blend your final product.

Add a bit of opalescent sparkle or other effects if desired.

Above are equal pinches of the six colors. Because it’s a “sticky” fur due to the tiny curls, this will not blend well using an electric blender. It’ll knot itself into clumps of color rather than mix completely.

Straight out of the blender At right is the knotted mass that came out of the blender. It mixed the colors slightly, but the bulk of the mixture is still clumped color and undesirable.

Non-sticky fibers, those that are straight and lack adhesion, like rabbit – will blend easily, but a good filler candidate is rarely straight, as it’s chosen exactly for this sticky quality.

If you’re building small amounts of fur, a pair of dog grooming wire brushes are needed. Just load both brushes with plenty of fur and pull them in opposite directions numerous times until you approve the result. Larger amounts are better served by mixing them with water, fill a gallon jug about half full and cram the fur inside, shake until it’s a cohesive colored mass.

The completed Chaos color

A well mixed Chaos color; equal parts red, yellow, cyan, green, purple, and orange, creates a red-brown or a “Russet Brown” shown at left.

Tuck that away in a separate bag and add to your base blends to color as needed.

Constructing the Final Blend

The amount shown at left is 10% of what I’ll build, to finish the task we’ll add that handful to 90% more of a standard olive blend.

Because I built both a spectral color and it’s a filler fiber, all I need is binder and wrapper in Olive to make my final mixture.

Dog brushes loaded with fur

I loaded the Chaos color on one brush and a mixture of medium olive beaver (binder) and natural Red Fox squirrel body (guard hairs, wrapper) on the other. Just put the teeth of the combs together and yank in opposite directions enough times to mix the two. Eventually all the hair will wind up on one brush, just pull it off and reload the combs as many times as needed.

The final color, a spectral Olive

Above is a close-up of the final mix. It’s a medium olive imbued with the spectral Chaos color. The natural guard hairs are visible as are individual shafts of component color. At two feet, it’s just another olive, but up close almost any color combination is visible.Just another Olive until you peer closely

… which is the desired effect. A dominant base color and just enough of an accompaniment from the mixed primary and secondary colors to assist without overwhelming everything.

Tags: dubbing blends, bulk fly tying materials, spectral dubbing, Red Fox Squirrel, impressionism, primary and secondary color, artist’s color wheel, fly tying

It can leap tall buildings with a single bound – but landing is hell on the points

I suppose it’s a “proud papa” moment, realizing that your progeny has met expectations, possibly even exceeded some … but I wouldn’t know with certainty as every time I glanced backwards my Poppa was cringing in horror …

… and Ma didn’t see fit to add the long series of mug shots – as the Police never was able to figure which was my good side.

Sixthfinger 4.5" and 5.5"

The “Big Dawg” has finally arrived, equipped with the same adjustable screw, larger and heavier jaw, and the obligatory tungsten carbide edges that allow it to chew through the awkward and ungainly.

Sixthfinger tip detail, 5.5" on right

At left is the tip detail of both the 4.5” (left) and 5.5” (right) showing the extra jaw length and breadth.

We preserved the same sharp tip, which allows the large size to reach and cut with the same delicacy, and added the longer, heavier jaw to resist deflection, and allowing more force on the cleave without tearing up the screw hole.

The fingerhole spacing is identical to the 4.5” scissor ensuring the same amount of scissor protrudes above the hand as its smaller cousin. Interchanging the two models will not require any adjustment in the user’s grip.

Having spent the last four months testing and retesting finger placement, shaft lengths, and “dogfooding” all those really clever ideas that proved less so – I’m very much pleased by the final product.

I call these the “General Purpose” model, 5.5” inches in length and designed to be the scissor for all your flies, not merely the small or delicate. The larger blades allow for larger chunks of material to be cut in a single snip, and should plow through those awkward or large materials that cause the smaller blade to deflect.

I still wouldn’t cut bead chain with them, that’s the job of a heavy shear style scissor – not something with a refined point. Everything else is fair game.

Reminder: Owners of the original surgical stainless Sixth Finger scissor have the right to upgrade to this or the 4.5” tungsten model for $22. By itself the retail on the large size (5.5”) is a dollar more than the 4.5” variant, $28 and $29 respectively.

I’ve updated the ecommerce website to reflect the scissor’s availability, and will be mailing all 5.5” backorders starting tomorrow – after I’ve put these through the quality control process. More information on the scissors can be found in earlier posts, including Mommy’s lecture on proper scissor etiquette, don’t miss it.

Full Disclosure: I am the principal vendor for the Sixth Finger scissor and will benefit monetarily from any sale of this incredibly awesome scissor. All superlatives used to describe the male enhancing qualities and function should therefore be taken with a grain of salt.

Tags: Sixth Finger scissor, tungsten carbide inserts, Big Dawg, proud poppa, ecommerce, fly tying scissors, 5.5” sixth finger, general purpose sixth finger

A 20 inch fish on a 17 shank merits an Asterisk

No Soup For You! I’m a self confessed collector of hooks and a complete snob. Not that they have to be gilt plated or come from some distant clime, I just need them to be as versatile as screwdrivers and socket wrenches, lots of sizes and similar shapes, but there should be one perfectly suited for the task.

I’m a bit of an omnivore where fish are concerned; flirting with one species them the other, and require a larger selection than the average tier. Not merely sizes, it’s the attributes of the hook that I covet most.

I’m the guy that fishes a #12 for Carp – and have landed them on #16’s, but it’s not a testament of skill so much as using the proper hook for that scale of quarry.

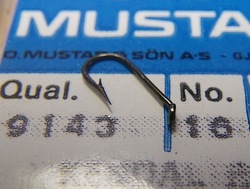
Trying to find an Extra Strong (XS or X-Heavy) or 2XS in trout sizes has been increasingly difficult, despite Mustad’s claim that a S82-3906B is 3X Heavy, it’s not. Now that many of the smaller vendors have been assimilated by the hook-making Borg, I’m dipping into strange bends and stranger points hoping to find replacements for the plethora of styles now vanished. It’s the same for Extra Short, or Nickel plated, and what few new styles crack the fly shop lineup have all been Czech-related or similar specialty.

You’ve endured my high pitched whine in numerous threads…

I’m a snob because I prefer the Redditch hook scale and the size of gapes and shanks that are common to that standard. As Mustad was the fly tying standard for so many years, new companies from China, Korea, and Japan, had to clone their best selling hooks to compete.

Mustad 94840 Our old favorites, the 94840 (R50-94840 – Dry) and 3906B (S82-3906B – Nymph, Wet) were actually extra long shanked – and used to say as much on the label. Now with the economy packaging and terse descriptions – the 94840 is listed as “standard length” and most tiers are unaware that their #18’s and #16’s share a nearly identical shank length.

Mustad 3906BHook makers from Japan have upset Mustad’s domination of the fly hook market, but in doing so they copied the Mustad hooks and preserved the Mustad measurements of gape and shank length, and propagated the differences to Tiemco, Daiichi, Dai-Riki, and all the rest.

… and the differences are readily apparent, as all the hooks below size 16 are disproportionally long shanked.

Slowly we’re sliding back into the Good Old Days, where multiple standards compete and different vendors perpetuate adherence to one or the other, confusing nearly everyone to the point of having to peer at the hook before purchasing.

16 versus 18, TMC

Which was part of the reason for my excitement when I spied a trove of hooks last week, most were old enough to pre-date the drift off-standard that occurred during the Great Shank Expansion of the 70’s.

… and why I leaped in with both feet.

Now that I’ve restocked all the important sizes and styles (paying just over a dollar a box, complements of eBay), and I’m rolling in them like Scrooge McDuck, and differences between the vintages  is quite noticeable.

Considering how far our standard shank has lengthened (above), and realizing that the proportions we teach in fly tying classes and books are all based on the Redditch standard, the dry fly especially is undergoing an evolution.

Extra shank means a longer body, usually fur, and that extra iron are both adding to the weight of the finished fly. Classic books from the turn of the Century describe the (optimal, and yes, fanciful) dry fly riding on the points of the hackle and barbs of the tail – with the hook merely grazing the surface. With the additional length of shank and adherence to proportions, that’s no longer possible even when dry.

… and if Theodore Gordon was in charge of the “20 – 20” club membership, a twenty inch fish taken on a #20 or smaller hook, he’d have them liveried servants toss you out the place.

Those that have learned the craft since the 80’s are going to feel cramped and frustrated. The above photo of the #16’s shows just how much extra real estate you’ve taken for granted.

… and for those learning to tie, consider that age of the book you’re learning from – is that glossy plate from the 40’s or 50’s, and is that the reason your fly looks different or it’s attitude on the table is not the same as yours?

With the disparity in shank length, it’s possible we’re headed into another unsettling period where factions of vendors align themselves into pseudo-standards, with the forums ablaze with opinion.

A good description of the early days of the Fly Hook Wars is available on the fly fishing history site. It’s an interesting read for those afflicted and explains much of what you’ve already encountered and what may result.

Tags: Aberdeen, O’Shaughnessy, Kirby, Kendall, Redditch Standard, O. Mustad & Sons, Tiemco hooks, Dai-Riki hooks, 20-20 club, Theodore Gordon, fly tying materials, fly tying hooks, hook evolution

Well just refine what Mother Nature started

There’s no such thing as a bad Olive. Us fly tiers being overly fond of the color and have two dozen shades isn’t half enough.  While puzzling my way through the RIT Forest Green – Tan – makes – Olive Conundrum, I’d figures out that it was the dye temperature I’d failed to get hot enough, and only the tan had activated.

Now I was admiring another Olive project, a lot bigger – and  I was relieved it wasn’t the unknowns of a balky dye I’d be fighting. I could reproduce the desired color in a single pass through the dye bath, and the target material was fur which is much more friendly than moisture repelling duck feathers.

This time the wrinkle is the material isn’t white, which adds a bit of preplanning when converting one of Mother Nature’s colors into something else.

The starting color is warm brown

I’d describe the starting color as a warm tan to a warm light brown, and the qualities of its existing color needed to be factored into our conversion to make it a warm medium Olive.

Olive is Green, Yellow, and a bit of dark Gray or Black. The original color isn’t white – so I’d have to count some of it as the dark component of Olive, and it’s a warm color – so it’ll count as yellow as well.

(From past posts, remember adding green cools the olive, adding yellow warms it, and adding more black – darkens it.)

If we took the same dye formula used on white materials, and we didn’t watch the color closely, merely exposing the material to the bath for the same length of time, we’d wind up with Olive both darker and warmer than our target color. So we’ll remove some of the yellow and some of the black in the dye mixture to compensate.

If medium Olive is 45% Green, 45% Yellow, and 10% Black – I’d compensate with dye bath comprised of 65% Green, 25% Yellow, and 5% black.

Starting the rinse As my starting dye is not a bright green (like Kelly Green), rather it’s a Forest Green, there’ll be no need to add any black, so the final mix will be 75% Forest Green and 25% Golden Yellow (using RIT colors).

At right shows the initial rinse, most of the water bleeding off is cold Green which is expected.

Getting your Monies Worth

A single box of RIT will dye a pound of material, and simple tasks like chicken necks or a Hare’s mask will have you pouring most of your money into the sink. A couple ounces of teal feathers or saddle hackle doesn’t even scratch the coloring potential of the full RIT package, and having open dye packages laying around your garage is a known hazard. It’ll sift out of the box or get dropped onto the garage floor in dry form, and the next time the car is washed you’ll track it into the house.

As a fly tyer in the tertiary grip of the obsession, whose materials are purchased by the pound, dyeing represents a way of breathing new life into chewed up material, or making a lifetime supply of questionable colors less so.

I’ll dye the target material and take advantage of the remaining color in the pot to dye other feathers or picked-over Whiting capes – those whose  #14, #16, and #18 hackles have already been removed. I’ll use the butt end of the capes for streamers or big dry flies like Green Drakes or Golden Stones.

Having a complimentary shade of Partridge, Guinea Fowl, or that gifted Pheasant your neighbor blew daylight through – lends an extra hide or skin new life, and recoups some of the money you might have paid.

Back to Cow Flop Olive

As I’m already admiring a half pound of cow flop Olive on my carpet, I ran some teal through the dye bath, then followed that with a couple of well chewed Grizzly capes.

Those complimentary colors and dissimilar materials means I’ve got the ability to start tying flies that look cohesive due to color alone. Teal and dubbing is the Bird’s Nest, and dubbing and large Grizzly hackles gives me Green Drakes, Olive Marabou Leeches, and Wooly Buggers.

Two packs of RIT and three batchs of feathers

What most interesting in the picture above is the teal and Grizzly capes. The dye bath was custom built to make a tan into a warm olive, now its true color is revealed to be a cold green. It’s validation of our dye mixture, the tan bleeds through the green to make the fur a warm Olive, and the hackle and teal both started as white/black, and the dye bath builds a colder green absent the warming influence of the tan.

It’s working with Mother Nature’s colors – rather than overpowering them with dye.

… and it’s why you see so many deep dark colors in fly shops and so few pastels. Most commercial vendors use the “overpower” method of dyeing which gut-slams the original color into the background, eliminating the shade it can cast on the final product, and yields dark results.

Working in concert with the original color allows you to build some of the most valuable and sought after colors, like Bronze Blue Dun and the entire Dun family.

The unanswered question is “what am I going to do with half a pound of cow flop Olive?” – mating it with 18 miles of Olive tinsel that I inadvertently purchased is no surprise, but it’s actually a new filler I’m testing – the Poor Man’s Aussie Opossum, only cheaper.

Not to worry, I’ll send samples – once I’ve got the other eight colors dyed.

Tags: dyeing fly tying materials, Olive, colorizing fur, bulk fly tying materials, RIT dyes, teal flank, grizzly hackle, picked over neck, cow flop, fly tying obsession

Where we stumble across the Good Old Days, and buy a couple of armloads of the stuff

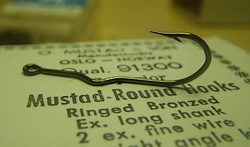
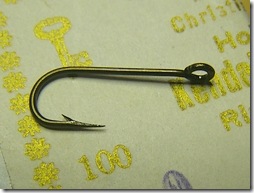
Mustad 3116A As today is the much dreaded “Tax Day” I thought I’d interrupt that lethal mix of sulk and stress with a return to the 1950’s – more importantly, a return to 50’s pricing…

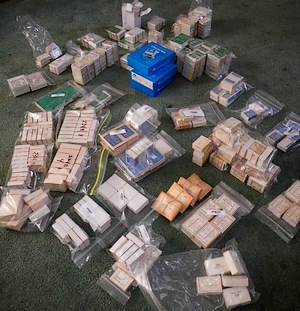
I stumbled on the Motherload of antique Mustad and Sealy Octopus hooks from a vendor on eBay, tracked down his store and wielded MasterCard’s Terrible Swift Sword to lay in a significant supply.

… we’re talking 1950’s Mustad iron; sharp as razors, with long lethal points, strange hook numbers you’ve never heard of and never seen except in picture books featuring flies by Darbee and his ilk, who bemoan the loss of all that quality iron common to the “good old days.”

They’re here, now – and you’d better jump on them before they’re all gone.

The smallest lot the vendor sells is 500 hooks (5 boxes) and the cost ranges from $6 / 500 to about $12 /500, unless you want salmon doubles ($49 /750) or something really large.

Mustad 36712 Grab a cup of coffee and settle in – there are hundreds of variations available and you’ll need to look close and read the description to get what you want – as the hook style numbers will be unfamiliar.

If it says “reversed” or “offset” it’s a Kirbed hook, whose point is offset from the shank (like many of the Czech nymph patterns). “Offset” means the point is 5-10 degrees to the right, and “reversed” means a similar move to the left. As most of you are unfamiliar with Kirbed hooks it’s something you may not appreciate, and therefore should be avoided.

They even have the old “Sneck” bend dry fly hooks (#10, #8) which are the old square bend hook that were popular circa WWII. The hooks and boxes are largely pristine, with no rust – the occasional discoloration of the paper bindle – but even collectors will be enchanted by their condition.

They have a lot of hooks in 2X strong – and I loaded up accordingly. Contemporary hooks have lost so many of the specialty styles used for steelhead and shad that these are completely irresistible. Today’s vendors are nearly mirror images of each other – having dropped the marginally or seasonally popular hooks for the consistent sellers.

Sneck Bend Dry Fly wire (offset) Take a close look at the 3116A, 36712, and 3667 styles, as these are superb hooks.

Many of these have only two or three sizes available – and some of those are the old odd designations; #7, #9, #13. There are plenty of hooks in the 12-13-14 range, so they must’ve found an old warehouse full of hooks, rather than a picked over, former fly shop inventory.

It’s  furrowed brow material. The fellow across the creek inquires what you caught that last fish on and you blow the water off it before busting his bubble, “ … it was a #13 Adams..”

This is one of those finds that isn’t supposed to happen, so look through all those bends and styles and jump on something, hard. It’s 20 twenty-five packs for less than a sawbuck – and I’ll guarantee to use most of them in future posts – insisting the hook is the real difference.

Eyeball the points on the above pictures – it should be enough to make you reach for the wallet. Be sure to look at the Sproat, Limerick, Round, and Viking categories – most of the fly iron is contained there.

Tags: Harlee Rod, antique Mustad hooks, limerick bend, sproat bend, sneck bend, offset point, reverse point, kirbed point, fly tying, bulk fly tying hooks, Harry Darbee, 2X strong, jump on it

The giggles die right about the time the fly gets wet

There was no genius on my part, Gary Warren presses a handful of aesthetically horrid flies into my hand – and while I’m recoiling in abject terror and mock offense, he’s cackling madly “trust me Bubba, you gonna want those..”

Only the best damn stonefly nymph ever

I’ve got a handful of bulky and garish panfish flies and we’re supposed to assaulting one of California’s pristine spring creeks…

I’m thinking my leg’s being pulled. Gossamer and precise I could handle, small and delicate I was expecting, but large-lumpy with a taste of cathouse was what I got.

Chenille has been one of many casualties over the last couple of decades. Once common on all manner of trout flies – wet or dry, it’s now mostly relegated to large flies. Smaller synthetic chenille saw a brief resurgence, but the steady onslaught of synthetics with similar yet more forgiving qualities have eroded its use considerably.

I keep skeins stashed in most of the colors, but my fishing has the diversity that warrants such a collection.

Variegated Orange & Black chenille, the Forbidden Color

After that evening on the creek I called it the “Forbidden Color” – whose name can only be whispered among life-long pals, as everyone else is slapping their knee and laughing at your sincerity.

“Honest, this stuff is patented fish death!” and strangers backpedal making helpless motions when you offer some – like you were insisting “they’re eating Vienna sausages, just put one on a treble hook.”

If it had a name I’ve forgotten it, and Gary never claimed ownership, only insisting that no better stonefly nymph had ever seen fresh water …

Best Stonefly wet

If any, the secret is getting the fly wet (above). Garish oranges become shades of brown and giggles are stifled as it’s suddenly predatory and eatable.

Early season I’ll carry no less than a dozen. It’s heavy, packed with lead or in bead head variant, one of those classic “money” flies that look right at home once you wedge it repeatedly in a trout’s maw.

Tags: variegated orange and black chenille, gary warren, stonefly nymph, early season nymphing, weighted nymph, bead head

All superlatives taken with a grain of salt

There is a place in every burgeoning entrepreneur’s repertoire for daytime soaps or Judge Judy … Some hideous repetitive task looms, and as you eyeball the points, run your hand over the assembly for burrs, loosen or tighten screws, and whack a chunk of whatever is close by, the Good Judge is sending some sobbing teenager into the steely grasp of the bailiff …

Such has been my fate of late. The gloom of my living room and the toil of quality control leavened with the glow of the boob tube. It’s something learned from commercial fly tying; find a show that’s uninteresting – and focus on the task at hand, glancing up only for the obligatory flash of breast-meat or the dismemberment scene.

… and I even oiled the damned things, because I knew you never would.

I received the first shipment of tungsten-imbued Sixth Finger scissors this week. After paying off all the owe-sies, vendors, and blood relatives, it appears I’ll have nearly 50 sets available of the 4.5” (original size) model. The “General Purpose” large size will be arriving next – as I’ve just approved the final design and finger hole placement.

5.5" Sixth Finger "General Purpose"

The last six months were spent testing three different fingerhole placements, and the hard part was choosing between the last two (shown with blue handles) – but the right-most won, allowing the 5.5” General Purpose to extend beyond the hand the same distance as the smaller 4.5” Original design.

This allows you to switch back and forth between the two styles without changing your grip or suddenly poking out an eye because you forgot which set you were holding.

The longer heavier blade comprises nearly half of the extra length, and we’ve shortened the spring without affecting the effort needed to press the blades closed. The adjustable screw allows for complete scissor disassembly for sharpening, or just give it a quarter turn every couple of years if they loosen with use (and abuse).

Care and Feeding of your New play toy

I’ve witnessed many hideous crimes committed on or with scissors – and only occasionally was it some other oaf – most were of mine own invention.

The 4.5” scissor is a “light duty” precision scissor. Adding faster colors, adjustable screws and tungsten inserts makes it a extremely sharp, light duty scissor.

… it doesn’t make it invulnerable to your hammy handed enthusiasms, nor should it be used to chew concrete.

The sweet spot for this design is the countless tiny snips and trims associated with preparing feathers, positioning, and the finishing of the final product. It will cleave moose hair off the hide, it’ll whack copper wire into pieces, and accomplish most of the fly tying tasks you’ll ask of it.

Do you think the new scissors would work well for tying glo-bugs? I’m looking for a super sharp, heavy duty blade that will last a while tying egg patterns. I’ll try the sample you sent and let you know.

… and my response:

The 4.5" is still a light scissor. While the tungsten allows it to plow through heavier materials, I’d use the 5.5" scissor instead. The larger size has a beefier blade as well as the tungsten – and glo-bugs are heavy work. I’d use  the heavier blade only because it’s less about "can it do it" – than it is about "can it do a million of them."
Proper tool for the proper job rules – that heavier blade should allow you to chop a fistful of yarn a million times – the lighter scissor might be able to do it – maybe even well – but the pressures on the screw hole will chew the scissors up … the blades will loosen … and you’re left reaching for a new set.

The answer was in the question, “ super-sharp, heavy duty blade.”

Depending on what we were raised on as fly tiers warps our judgment completely. Surgeons have a thousand different kinds of scissor – each suited for specific tasks, yet us fly tiers insist that one pair of scissors be capable of mowing the lawn, mixing drinks, and walking the dog …

Just because you can cut the stem off a turkey quill with a pair of scissors doesn’t mean you can do it a million times without damage.

If you focus your usage in the sweet spot for any scissor, they will last a lifetime.

/end Momma’s lecture

The Avaricious Greed Part

My goal was to keep the price of both styles of scissor below thirty dollars. I was only partially successful …

The 4.5” Tungsten will retail for $28 a pair, and the 5.5” Tungsten will be $29 each. This is consistent with the market maker, Dr. Slick – whose 4.5” tungsten standard scissor is also $28.

But wait, there’s more …

My strident bellow about the inequities of the vendor community require me to trod rarified soil, anything less flirts with hypocrisy. While the gesture will be ignored by the larger community, my ethics require some small allegiance is owed those whose twenty dollars I’ve already pocketed.

Contrary to Harvard Business School and their tutelage, I see the customer as friend and compatriot, not competition.

Therefore, owners of the existing scissor can pick either flavor of the new scissor for $22.

Postage for a single set of scissors is $1.56 – and the padded envelope is $0.42 each, I’ll eat the bubble pack, tape, and the 20 minute wait at the Post Office.

Last time I paid the postage and you got the scissors for $20, this time you’ll pay for the shipping … and get the scissors for $20. This discount will be honored by me only – so asking your local merchant will result in a blank stare.

I’ll keep the offer open until redemptions roughly equal the amount of original scissors sold.

I’ll be working this weekend to update the Google shopping interface (the purchase image in the center column of this blog) to reflect the models and the discount, and dreaming up a surefire way to query you on your older purchase thereby qualifying you for the same.

I’ll mention this option again when the 5.5” models arrive, so if you’re interested in an upgrade decide which flavor you prefer. A rain check will be available if I run out of stock, so there’s little need to rush blindly into a new purchase.

Just my way of saying … thanks.

… and if you simply must be the first on your block, just drop me an email to reserve a set, as this shipment is small and sales look to be brisk.

Full Disclosure: I am the principal vendor for the Sixth Finger scissor and will benefit from any sale of this incredibly awesome scissor. All superlatives used to describe the male enhancing qualities and mind boggling function should be taken with a grain of salt.

Tags: Sixth Finger scissor, tungsten carbide insert, scissor upgrade option, light duty scissor, precision scissor, Google shopping, daytime soaps, Judge Judy, thanks for your patronage

Following my advice was the real mistake

Singlebarbed reader Spencer has trod where only the crazed and obsessed have dared and in traditional fashion I’ve started making excuses while flailing about trying to help.

“ … you mean you actually took my advice? That was your first mistake.”

The issue is simple.  A dye manufacturer boasts of an olive or brown and both are complex colors made of multiple sub-colors. From your watercolor days, brown can be made a thousand different ways (usually by all the colors running together), but most vendors use a combination of reds and blues or orange and purple to get brown.

Spencer dutifully tossed in his really expensive Whiting neck he hasn’t owned up to inexpensive rabbit fur test chunk and wound up with a nice purple for his trouble.

Been there. Spent most of last weekend in the exact same place with RIT dye. If I knew more of what comprised color on the mineral side I might have a definitive answer, right now it’s lumped under “sucks to be you.”

Dyeing destroys a lot of materials during the learning process but over time you can handle certain types of calamities, the rest you dry and do your best to find a use for – the material hasn’t been destroyed, it’s just not the awesome medium olive you’d hoped it would become.

If you can’t get a brown to dye brown , there’s little you can do to fix it – and the only variables are listed below:

1) Heat – make the dye bath hotter or colder from the failed temperature. Some minerals may only dissolve at certain temperatures, so if you dye brown and get bluish purple, it could be the red is activated only by higher temperatures than the blue. Purple means that some red and blue fired, but blue-ish purple suggests more blue than red fired.

2) Over-dye or tint the color back into the acceptable range. It works best for lighter colors as you’re adding additional color to an already dyed material. Dyeing dark purple with yellow will have no effect, but dyeing a light green with some brown and yellow will yield an olive or olive tint.

3) Time – leave the mess in the pot overnight. This should only be done on the darkest colors as even Tan left overnight will yield a brown feather. Perhaps time is required to get the other color(s) to precipitate onto the feathers.

Over-dyeing is also not for the faint of heart, but it’s one of the ways you can get the rarified colors like bronze blue dun or a multi-colored feather.

Last weekend I’d agreed to reproduce some of Cal Bird’s teal colors and had approached the issue with great trepidation – Cal being a trained artist and therefore fully fluent in the manipulation of colors and tints.

Left overnight RIT Tan yielded Dark BrownI’d dutifully followed the vendor’s color guide and built an olive and a brown from other colors. RIT lacks an olive, and their brown was too dark, so I mixed the custom colors in a proportion that I thought would yield something close…

It didn’t, and I was left scratching my head like friend Spencer.

The dye was largely RIT forest green with about 10% RIT tan, but the green vanished no matter what temperature was used.

I yanked the feathers before they became too dark, but left a pinch ofGreen rinse water them in the pot to test the overnight method. The result is above, a rich dark brown.

It didn’t matter what I tried, more heat, fixative, or dye yielded a pan full of forest green water and tan feathers. Over-dyeing was the only option, as I’d run out of suggestions from the manufacturer – who insisted I’d get an olive with the two colors mixed.

This drab, cold tan is shown below. It was yanked from the 90% green bath earlier – at the point when it had added all the tan needed to make the base color.

The "Cold" tan fellows yanked earlier

It has a miniscule amount of green in the feathers – just enough to turn the color cold.

I lump quasi-colors, those that I wasn’t expecting, under the destroyed feathers outcome;  the colors are useful and the feathers are undamaged – only the end result is unexpected.

A couple days later I subjected the now dry “cold tan” feathers I’d pulled early, to a bath containing only green and a bit of yellow. I needed only the smallest tint of color added to warm it to the sample color.

Sample shown with the feathers after the overdye process

The second bath applied what was missing to alter the color into the successful range. Green being equal parts yellow and blue and adding additional yellow – allowed the color to “warm” the feathers without obscuring the tan. There are hints of green in the feather duff at the base of each feather, but this is a brown-olive as dictated by the sample on the right.

Cal’s instructions are shown on the envelope, “olive and maple sugar.”

You can destroy feathers in millions of ways, with only a couple options to salvage the result. Consulting the color often allows you to pull the feathers when the unexpected results – and alters the problem from imbuing a light item with the finished color, to altering the existing color to match a desirable range.

Sorry, Spencer. It’s all part of the craft.

Tags: RIT, Cal Bird, teal, over-dyeing, tint, brown olive, bulk fly tying materials, custom dyed feathers, TINTEX maple sugar, whitefishcantjump.com, feather dyeing

Thirty Six miles of Maybe

Sure I was moving a little fast for my own good, but I was convinced I’d discovered the Holy Grail of Cloisonné (klaus-un-nay), that multifilament braided mylar tinsel we’ve adopted for steelhead flies. It is great stuff, available in silver and gold, never tarnishes and was a fly tier’s dream compared to all the thread-cored mylar tinsels of recent manufacture.

My $39.95 covered a lifetime supply plus postage from Asia.

… Oh, it’s a lifetime supply sure enough, only I missed the yarn sizing and wound up with 45000 yards each of Dark Olive and Pearlescent superfine tinsel-thread

Imagination meets Desperation, the one pounder

… that’s eighteen miles of each color.

Now I’ve got to figure something that uses a ^%$# ton of it.

It runs contrary to my ethics to invent a couple dozen patented killers, then claim how much of a favor I’m doing you by selling you some teensy dust mote of the stuff … the fly shops have plowed that ground thoroughly.

But it does represent the last unspeakable variant of fly tying creativity, the collision of Imagination and Desperation. Us “scroungers” have been here many times and can only be thankful it’s not a full Bull Elk hide dripping in my driveway.

It’s too wide and breaks too easily to use as thread, but it would lend itself to being doubled over and used to replace all the other pearlescent components we’ve accumulated over the last couple of years. I could make a spun round tinsel, shellbacks for nymphs, wingcases, Easter basket dressing …

DkOlive_Tinsel

… or I could tie the entire blessed imitation out of the stuff and hope for the best.

It’s dry, doesn’t stink, and can be stashed away from prying feminine eyes eager to pounce on my mistakes (after the obligatory lecture or two).

Trout flies come to mind and I managed to burn a foot building the little mayfly nymph above … 149,000 more and I’ll wish I’d bought two cones instead of the single …

I prefer the term unrepentant – society locks up those other fellows.

Tags: mylar thread, bulk fly tying materials, ice yarns, Turkey, mayfly nymph, Cloisonné, tinsel, fly tying