Category Archives: Fly Tying

Tying the Awkward hackle, adding artistry and function to the humdrum business of wet fly hackle

I was never at a loss as to what to call it, my only concern was whether I would call it the same thing twice or merely be content with whatever epithet I spat from clenched teeth.

A technique about as awkward as is frustrating, and while those that attempt it are not likely to mention genius in the same breath, it shows rare possibilities of extending traditional wet fly hackle into materials and styles not considered traditional.

As hackle typically covers the tie off of everything that came before it, all you need remember is the amount of “hackle” you prepare must change based on the number of turns you’ll apply, as well as the circumference of the thread you’re about to cover. As “less is more” in wet fly hackle, consider using no more than three turns total – more if using this technique to build a “Palmer” hackle or specialty hackle like a Spey fly requires.

I start with a slip of paper about 3/8” wide and three inches long, and smear a hint of tacky wax to the bottom two inches, giving me an inch to hold that is not sticky. Two inches of “awkward” hackle is about 3-4 turns of a #8 hook.

The beauty of this style is that any fiber is eligible to make a hackle flue, so you can select them based on color, texture, action, or stagger lengths so one color is short and close to the fly – and a second fiber is longer and drapes over the body.

It can also be used to “right size” feathers too big for the hook size you’re tying, as you can pull the fibers short now they’re no longer connected to a bothersome stem.

Clip a few fibers of material and press them into the tacky edge of the paper at regular intervals. Select a second, third, or fourth material and fill in the spaces with additional fibers to make your finished hackle.

In the below example, I’ve added Maple Sugar Teal flank fibers every 1/4 inch, and filled in the gaps with Olive dyed Hare’s Mask guard hair, using both feather and fur to make my hackle. The teal flank is set longer than the Hare’s Mask, which should project a few tips out past the halo of Olive fur, ensuring their color shows separate and distinct.

Teal_OliveHaresMask

Once the amount of fibers is appropriate for the hackle density, simply throw a loop of thread from the hook shank and slide the fiber side of the “hackle tape” through the loop, holding onto the top (or bottom) inch that does not have wax on it.

loop_tealOliveHares

Now grit your teeth and hold the loop closed with your left thumb and forefinger and run your scissors up between the gap of paper and thread and cut away the paper.

Now spin the mixture as quickly as you can to have the thread loop capture each fiber and lock it between the threads. If you’re not swearing yet, start – as really profane swearing can alter gravity and it’s attempt at dropping all your earlier work out of the loop and into your lap.

spun_loop

Transfer the loop to a set of hackle pliers and continue to spin the combined materials tightly. The more turns per inch on the resultant hackle the better the fibers will be anchored on the completed fly.

Awkward_Olive_Completed

Here is the completed “Awkward Olive” nymph showing the final hackle. The Maple teal was set longer than the Olive Hare’s Ear guard hair, and the regular rabbit duff found along with the guard hair was left in the final mix to offer softness and motion once wet.

Awkward_Olive_top

Here’s the same fly shown from above which allows you to see the two lengths of hackle added with a single application. The long teal fibers offer considerably more motion than usual as they are not connected to a stem, and the secondary fibers of Olive Hare’s mask pulse when wet, giving the result a compelling action unavailable in traditional hackle.

Use your imagination, add feather fibers and marabou strands, hair, deer hair fibers, any fibrous material can be used including yarn fragments and bits of tinsel. The only caution is the larger the fiber diameter the harder it is to lock tightly with thread.

Don’t be afraid to add a loop of Size “A” thread or even Kevlar thread for super coarse materials or extremely large flies including those tied Spey style. Wax the loop assist it holding the materials in place for the delicate cut that must be made.

While wax is not as popular as it once was, any tier worth his salt ignores what the crowd likes in favor of what works. It comes from too many icy winters filling fly boxes with bits of dead animal, the kind of behavior that depresses your Facebook “friend” count and neighbors looking to borrow sugar …

What do you suppose they’ll think of Jungle Cock?

blue_guinea_nails On the one hand it’s a relief we’ll not see another Yank led away in manacles after overstaying his welcome by pillaging the Royal and Ancient Bird Museum, on the other hand an anorexic second story supermodel might make a hell of a splash on Interpol …

Now that drab genetic chicken hackle is so completely-yesterday, it’s nice to see that girls might rend a big handful of plumes off something that squawks – instead of looking down their nose at Mister Outdoorsy who’s been ventilating all manner of birds for a couple of centuries.

pheasant_fingers

… but it’s that meat-headed rod builder that I want to find. Some thick skulled overly sensitive craftsman who wanted a couple extra days in the woods – who paid off his debt after shellacking  his wife fingernails with the local warbler. That same unthinking fellow that has doomed our game birds and fly shops to yet another tidal wave of fashion seeking society dames …

… I’m going to find you, and this time I’m going to hurt you …

Can fly tying cleanliness lead to hoarding obsession?

Homer Price and Gigantic Twine Ball It was a two room apartment, with four occupants and at least three outdoor hobbies participating. Keeping all those vocations in their respective corners was bad enough, not counting us kids fighting for extra flat space at the kitchen table.

In one of many book sessions I discovered deer hair and how to spin it. Now, each time the back door opened there were howls of dismay as the blizzard of gaily colored trimmings blew under my bed – or into the living room.

Some well-wisher had gifted me with the skeletal frame of a fly tying material clipping-catcher, minus the all-important catch-all bag. I explained what was needed and Ma dutifully whipped out a nice mesh bag that we threaded onto the harness. I dogged it onto the shaft of my Korean knock-off Thompson Model A and domestic bliss was restored.

Her cornbread no longer featured unwanted stubble and I discovered that a material-clipping-catcher was the Greatest Invention I’d Never Bought …

… and never will again.

The first month I reveled in the grief my brother caught for spreading his wire-rope splicing gear all over our bedroom. Now Ma was picking up snippets of waxed thread or rope, broken needles, and fragments of trimmed wire, while I cheerfully snipped away at Bass Awesomeness and made faces at Meathead Dumbass Older Bro while Ma lectured him sternly.

The second month I discovered that fly tying material clipping-catchers had uses far beyond simply catching all the airborne debris. They became a particle reservoir of everything I’d ever made, or ever will make …

By the third month I wondered how I’d managed to tie fly without one, and why the fly tying media never touched on the thousands of reuses all those trimmed parts represented.

Instead of opening a drawer to find Grizzly tailing material, you simply dug into the snippet bag, whose contents you’d never emptied, and was full to bursting with animal parts mixed with bits of toast, old socks, and small unidentifiable stuff …

By month four the ball of debris was so big you had to adjust it in your lap when you sat down. It was crucial to your tying as it had two or three inches of everything you owned, shaving minutes off each fly as you no longer had to guess which cardboard box contained pink and white variegated chenille, or that ancient spool of mint floss.

It was just there. Roll the ball around until you saw the tag end.

But at month five you realized it wasn’t gold so much as iron pyrite, that’s when the first moth fluttered up from the bottom of your accumulated ball of debris. You’d mistaken ash from Pop’s pipe dottle for the eggs of fly tying’s only nemesis.

Now, your ode to Homer Price was doomed.

… but not before you thought about saving your prize, whether you should endure the kiss of all those noxious chemicals, or could you endure separation anxiety and simply toss it and start anew.

This was an important moral quandary, which you would practice many times when you discovered girl friends.

The Debut of the “Do it Yourself” fish hook?

The folks at Fishingmatters Ltd, whom you may recall purchased the Partridge hook company, are concerned about the amount of time us over-consuming fly tiers spend searching for the better hook …

In the June issue of Tackle Trade World (pg10), suggest that they’re introducing the “Do It Yourself” hook, outfitted with a straight shank that allows you to bend it into the curve of your liking.

“ … research carried out by the company that shows advanced fly fishermen and pro guides are constantly searching for new hook patterns that don’t exist.”

– via Tackle Trade World, June 2012

As an “advanced fly tyer” and chronic hoarder I can attest to the time spent searching for good hooks. Most of the niche players that sponsored hook innovation like Partridge, have been plowed under by the Japanese and Korean hook companies, and esoteric models like the Flybody, Mariano Midge, Captain Hamilton, and Keith Fulsher’s Thunder Creek, all died lonesome.

Consolidation is a good thing until the pendulum swings too far and you’re left with Plain Vanilla and his kid sister …

Hooks used to have odd bends and varying length shanks, and an entire hook nomenclature was discarded to reduce the many to only best sellers. Outside of the constant influence of the salmon-steelhead crowd, and the Czech nymph phenomenon, we haven’t seen much in the way of new hooks in the last decade.

X-Stout, Offset, X-Heavy, Kirbed, Sproat, O’Shaughnessy, Limerick, X-light, 1,2,3,4,5 XL(ong), 1,2,3,4,5 XS(trong), and 1,2,3,4,5 XS(hort), haven’t been on the packaging in a mighty long time. Nor do today’s anglers understand why in this pinched-down-barb-era, how a good sproat or limerick offered something tangibly and different.

But we’ve got Black Nickel, which is a start …

Where we find more ways for you to use butt ends and random clippings

I’ve always called it by what it’s good at doing, combining all manner of leftovers into a “chaos wrap”, which tames a gaggle of unruly and dissimilar materials into something cohesive on your hook shank.

As well as melding unrelated objects it can right-size materials that are too long, and add some thread spine into those that are too fragile, as a double strand of thread can add toughness to thin or brittle stems, ensuring that damage is no longer catastrophic and feathers no longer unwind.

It’s also exactly the kind of shaggy I’m looking for when I marry shad’s brightness with trout’s buggy, as unlike the gentle presentation of trout flies, these will be slapped on the water via shooting head and all the G – forces commensurate with a swearing angler and his double haul.

Mats_In_Loop “Dubbed Loops” have shown a bit of a resurgence of late, and have always worked well converting hair and fur into hackle for big nymphs. Less well documented is their ability to mix a variety of materials into a single strand, and with a judicious stroke of scissors, can offer new opportunities for feathers that are too big for normal attachment and winding.

Above is a tuft of Red Fox Squirrel, dyed teal, and Peacock Angelina that I’ll marry as the thorax of a caddis design. I’ve cast a dubbing loop around the shank and tied it off, and inserted the three materials as a single pinch. I’ll push them collectively up the thread close to the hook shank, then spin them within the loop until the thread tightens around the butts of all three materials.

In the photo above, the material on the left side of the thread will be the portion I’ll retain and wind onto the fly. The material to the right of the thread will be trimmed close to the thread once the thread has started securing it in the loop.

trimmed_buttsResizing materials that are too long for the hook shank is done by pulling only a fraction of the material through to the left side of the loop, just enough to match the length of the legs needed for the fly, trimming the balance when semi-secured.

At right is the loop beginning to spin the materials into a “hackle”. I’ve trimmed all materials on the right side of the thread and will continue spinning the loop until the materials can no longer be pulled from the thread.

semi_tamedI’ll attempt to persuade the materials to clump on one side with finger pressure or saliva, but as the materials have been spun like a rubber band, they will resist your efforts to tame them.

Instead I’ll focus on sweeping the material back as it’s wrapped onto the fly. This will minimize the amount of trapped fibers, as well as encourage the strands to sweep over the rear of the fly.

Touching up the thorax area with a bit of Velcro will add a hint of fuzzy  free trapped materials and assist them to meld into a cohesive collar as they sweep towards the tail.

Depending on the fly being tied, the distribution of fibers can be made to make either a symmetrical or asymmetrical hackle. Placing the fibers in a clump will yield the small amount of duck under the bug as shown below. Spreading the fibers out yield a traditional style hackle.

Green  Caddis Shad Experimental

The completed experimental.  The transparent vinyl is wrapped over a base of flat gold tinsel, affording the abdomen a bit of “pop” and brightness. I’ve tied additional flies in pink and red just to see how traditional Shad colors fish with this caddis-style exterior.

Green trout-like shad flies

In Spring an Old Guy’s thoughts turn to divorce, or the encroaching Bony Silver Menace

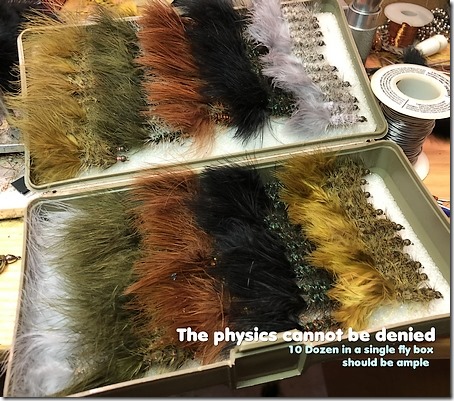
The physics of it all dictate lighter and smaller, the biology suggests buggier, and all the painstaking research says we’ve only scratched the surface of their depravity, as their tastes might range from drab to the ridiculously bright.

Physics because there’s a lot less water and rather than flinging high atomic weight, I may drag bottom with bead chain. Smaller because the absence of all that water suggests the prey may well be discriminating – shy of big flies in that shallow water …

Biology because the off season led to a wealth of papers on the American Shad, their eating habits, and my surprise to find out that the reigning angling wisdom on what and how they eat – has no basis in reality.

… and while they might seine all manner of smallish creatures in the salt and brackish estuaries (mostly small shrimp from stomach samples), the oddity of their attraction to bright colors may well be that of an expatriate dining on foreign cuisine – snacking on visual cues or the opportunistic feed when an item resembles something familiar.

Which is all that a burgeoning fly inventor need know … armed with a pocketful of bright will still work, but a cornucopia of experimental caddis and mayflies, minnows, moths, tee shirts, tennis balls, and discarded Doritos, might actually yield a Secret Fly of Complete Shad Dominance (SFoCSD), something that’s rumored to have surfaced many times in as many zip codes.

Number10OJ

I’ve got a pocketful of unknown and untested and am proof against both parking lot catcalls and all-knowing snigger. I’ve got buggy and somber, drab and motile, bright and bug-shaped, and every other combination a fertile mind can summon …

… and now I’ve got them in trout sizes, out of respect for low water …

You lads can flee to elevation and keep all those fragile trout company while I defend the local waters from the Silvery Invasive Menace surging upriver from the deep. All those bony palates, buck teeth, and feelers, paired with loose morals and lower standards, exactly what’s needed to keep a fly dresser thinking he’s distilled pure genius to a hook shank.

Six hundred things edited out of Fly Fisherman as the Zip Code wasn’t exotic enough No 311 & No 288

Flat tinsel is one of the many thousands of fly tying tasks that are intuitive in concept and unduly difficult in practice. Tinsel in past decades was flat metal, which sliced through fingertips with only slightly more resistance than tying thread.

The switch to Mylar eased the bloodletting and ended tarnish, but had the same problems with its application. Now you had to remember to tie in the color opposite what the body would be, as one side was silver and the other gold, which would result in the only cost savings two hundred years of fly tying has ever produced.

gold_side_facing

Figure 1: Gold side facing you means the fly will have a silver body

Tinsel bodies are quite common in trout streamers and steelhead flies, and can be tamed with three simple tricks; always use the widest tinsel available to cover the most with the least number of wraps, never overlap turns, and always double wrap the body, never attempt to single wrap the fly.

Tinsel is cheap – there’s little advantage in hoarding it.

Never overlap turns of tinsel

Figure 2: No turns overlap

If even the slightest overlap occurs it will create a “bubble” or air gap that will eventually slip to reveal the thread wraps beneath. Always wrap the first layer so you can see thread color between turns.

Final layer added, no overlap

Figure 3: Final layer of tinsel added

There are no overlaps on the upper layer of tinsel either. Because the two layers are at right angles to one another, no thread is visible despite our leaving rather obvious gaps on the bottom layer.

In the above “Comet” style of steelhead fly, I used an under-the-tail-wrap to change direction and bring the second layer forward to the eye. This makes the change of direction seamless, and lifts the tail away from the hook bend.

As an additional step, one that I’ve been asked about, is how the “tip-first” style of hackling subsurface flies can accommodate a second color.

Comet’s have a mixed orange and yellow hackle, and “folding” hackle so it drapes back naturally, precludes a second color – given that winding it forward would bind the first to the shank.

Instead, treat both feathers as if they were a single feather. Size the hackles by spreading the barbs perpendicular to the stems with your fingers. Place one on top of the other, and using either the thumb (top feather) or forefinger (bottom feather) slide the two along each other until the stroked barbules are the same length, as below:

slide the two feathers until the barbules are the same length

Figure 4: Both orange and yellow fibers match in length

A better view below, showing the two hackles now tied in, yet spread from the stem so you can see they’re of identical length …

A better look at the two feathers barbules

When gripped thusly, the forefinger controls the tension on the bottom feather, and the thumb controls stem tension on the top color. Note how the stroked perpendicular barbules are of the same raw length.

Now all that remains is to keep the stems together under equal tension when you stroke them at right angles with your scissors, or saliva equipped fingers, whatever is your favorite tool for moving the fibers to the same side.

Fibers now stroked roughly to the same side

Figure 5: Fibers stroked roughly to the same side

I use the edge of my scissors scraped towards me to break the backs of all the fibers and push them to a single side. Fingers finish the task, by stroking anything unruly back into line. Note how close the two stems are kept, they might as well be a single stem.

Now wind two forward

Figure 6: Winding both colors forward

This technique ensures the proper balance of colors as one turn of orange yields one turn of yellow, and the mixed color is exactly half of each. Adjust the stems over lumps or bumps using the finger that controls the wayward stem – bring it back in line with the other so they wind as a single object.

The completed comet style

Figure 7: The completed “Comet” style

This style of hackle does away with the overly large head caused by wrapping over the “dry fly style” hackling and forcing it down and over the back of the fly. A fly tied with this style hackle can have a head no larger than a trout fly if done correctly.

Note how the sizing we did at the beginning yields flues of equal length for both colors? No more guesswork needed to pick two hackles, simply slide them around until the flue length matches.

Using the right “style” of hackle for the task is a very important distinction a tyer makes on his path to mastery. When he understands why he abandons “butt-first dry fly hackle” for his underwater flies, it’s a real milestone in his formative process.

Six hundred things edited out of Fly Fisherman because the Zip Code wasn’t exotic enough – No.335

I’ve always assumed that questions about the mechanics of dubbing stem from the preponderance of fly tiers that attempt to learn the craft from books, Youtube, or blog posts like this one.

Most of us contract the fly fishing bug from someone else, and while casting and simple tasks like knots are shared from one angler to the next, fly tying and its legacy of dead animals parts is an individual journey for most.

I feel the mechanical ritual described to apply fur to thread is made overly complex in most books, and seeing someone else do it is much more enlightening, especially if you can ask questions.

The neophyte usually peers from an audience at some dignitary tying at a club dinner, who’s so enraptured by a future step as to scrub a mass of fur across thread without really describing much other than what preparation is needed for the feather he’s mounting next.

It’s a step glossed over not so much out of meanness or ill temper, so much as the journey fly tyer assumes dubbing is a simplicity shared by all watching, which is not always true.

Like all things, there is a right way and many wrong ways to attempt the fur on thread nightmare.

  1. Dubbing isn’t applied by cutting an enormous gout of fur from the hide and dipping your fingers in pancake batter to make it stick.
  2. Dubbing isn’t scrubbing fingers together in both directions, it’s scrubbing fingers together in one direction only. Tiers scrubbing fingers in both directions are attempting to make the hole the hook made hurt less.
  3. Commercial waxed thread offers no advantage getting fur to stick to thread, that’s because the wax used by Danville and other vendors is meant to plug bobbin barrels, and is much too hard to be tacky.
  4. Dubbing isn’t applied, nor can it be tamed, by attacking the middle of the fur with freshly licked fingers dripping with training saliva. Training saliva is only available after drinking milk, the rest of us use mousse.

Most of your trouble starts with your dependence on packaged dubbing. Grabbing a bag of fur allow you to pull an ounce or two as easily as the merest hint of color. Mirroring your drive-thru habits, you insist on supersizing your helping – whose bulk will fight you at each and every subsequent step.

Seen_Through

The proper amount should be transparent to the eye, and objects can be seen through the dubbing over its entire bulk.

The second portion is understanding that dubbing cannot be wrapped around thread until it is anchored to the thread at the top, with the balance of the fur then spun around the thread as the fingers move down the fur.

top_anchored

You can’t spin a rubber band tight, or anything tight, unless one end is “immovable” first, dubbing is no different.

It’s a devilishly simple and completely deceptive task, something that even video cannot impart completely, given that sub-steps of “hint of fur” and “anchored” are unknown to the novice, making the overall process simple yet completely foreign.

Wherein we recant the “you can’t have none” taunt, and admit to most of the obvious shortcomings

One of the horrors of being thoroughly enamored of a hobby is the fits of giddy that result when something attempted actually lives up to the original idea, versus flaming out midway through the development process.

My ambition was to develop a dubbing that mimicked the superfine aquatic mammal fur we’ve reserved for dry flies, yet was cheap and plentiful, took dyes well, was easy to mix and blend, and could replace the increasingly costly fur bearers like mink and otter.

Synthetics have become dominant in many areas of fly tying, yet have never lasted long in the dry fly space. Most are borrowed from aerospace or the carpet industry and have fibers too coarse for tiny fly bodies.

The fly tying market is tiny relative to carpets, which is why we’ve always adapted other items versus entreating DuPont or 3M to make something to fill the void. We dutifully salvage what looks promising, but most fibers made for upholstery, yarn, or car interiors, are useful for nymphs and streamers, not for gossamer or tiny.

Periodically some neo-prophet makes a wild claim that vaults a product into the limelight, like polypropylene, but nothing made by Man has ever lasted long enough to dominate muskrat or beaver, or any of Mother Nature’s aquatic fur bearers.

dry_dubbing

Dry fly bodies need extra fine materials that allow the body to be dubbed thinly to avoid absorbing too much water. Tiny amounts of fur can be air dried with a couple of false casts – too much fur is a sodden lump that we curse with every ungraceful landing.

With all the yarns and oddities I’ve pawed through over the last decade I managed to find a material heretofore unknown in the fly tying lexicon, whose fibers rival the thin filaments of aquatic mammals, absorbs dyes like a Black Hole, and is cheap as dirt – other than requiring a great deal of my labor to render it from its found form to dubbing.

Here’s the best part … the damn stuff floats as it’s naturally buoyant, something the aquatic fur bearers can only gnash teeth over …

Queue giddy.

As a means of apology for the excesses of yesterday’s post, if you email me your mailing address I’ll toss a couple of useful colors into an envelope allowing you to fiddle with it, after which you can call me an outright lying SOB, so thoroughly wrapped up in his own magnificence as to have lost sight with reality.

I will not use these addresses for any other purpose. unless you say you don’t like the material – then I’ll sign you up for every porn site containing pygmies and grape Jell-O

I have about four pounds of test colors, most being initial attempts at the Big Three; olive, pale olive, and gray. I have plenty of rust, some browns, a bit of Trout Underground Scarlet (which has been reserved by his Bleeding Lordship), and plenty of PMD look-a-likes.

I don’t mind sharing, and wouldn’t mind a bit of feedback either.

When I get to the process of picking final colors I will engage readers that want to take part in that process, just as I did with the Free Range Nymph products.

My mailing address is on the “About” link at the top of the page. I don’t ever dare type it in because of all the page crawling spiders that harvest email addresses for spammers.

You shouldn’t have to pay for poor quality control, take the time to visually inspect any fancy fly tying hook purchase

Tying these fuzzballs reminded me of all the notes on competition hooks and their efficacy I’ve been scribbling over the last couple of seasons. I find myself having so many defective hooks of late, and at thirty-five cents a hook I keep trying to make up for poor quality control and fix them with tying thread, simply to get a bit of service before cursing, snapping the thread, and hurling them into my waste can.

Over the last three years, I’ve accumulating a couple thousand Knapeks, Grips, Dohiku, Skalka, and Hanak’s – and the common thread among all of these seems to be how many poorly wired eyes exist in the small dry fly sizes.

I switched over a couple seasons ago because most of these newer manufacturers use the Redditch standard versus the Mustad/Tiemco extra-long shank variant.  Much of the early angler commentary I had read mentioned quality control and too-soft wire, but at the time was directed at the Czech nymph styles, which by nature are fast sinking, rock pounding, heavy abuse flies.

While I’ve had no wire issues over the last couple of seasons with nymph, Czech nymph, streamer, and dry fly hooks, big problems exist for nearly all the makers of small dry fly hooks.

Small being size #16 and below, which isn’t all that small …

Knapek has been the most egregious offender, and despite multiple purchases over the last three years, show little change in their quality control. Many of the 25 packs of dry fly hooks #16 or smaller have 8 or 9 hooks with incompletely closed eyes.

… suggesting that for each $6.50 spent on the hooks, $2 or more is wasted.

Low Profile Midge

This is one of the Low Profile Midge prototypes I’ve been fishing last month, using a Knapek #18 dry fly hook. You can actually see the butt end of the incompletely closed eye and how much thread it took to get some use out of the dang hook.

For those interested in trying these hooks I have no issues with the larger sizes and styles in all flavors and models. The larger hooks (#16 and above) have far fewer eye defects, but I would also recommend a visual inspection of the container contents.

Most of these are sold in transparent packages. Take the time to shake the hooks onto the bottom of the container so you can visually inspect the eyes. Purchase those boxes that contain the fewest visible defects.

The fly above is something I’ve been refining for the last couple of months. In Black, I used it as a Trico spinner with mind-numbing success rates on local coarse fish.

Underneath the hackle is a double shellback of moose fibers. When married with a dab of slightly undersized hackle you get a low profile, high floatation, midge-spinner shape.

Note the slim profile of the body, how the dubbed shank is almost the same diameter as the bare hook. This is my Free Range Dry Fly dubbing, natural floatation combined with fibers so fine as to make a fly tyer drop to both knees and weep aloud …

No, you can’t have any … yet.

More on the hooks and their qualities after this season …