Category Archives: Fly Tying

Fish Can’t Read, Issue #2 Return of the eZine

Fish Can't Read, Issue #2 The second issue of “Fish Can’t Read debuted yesterday, and the boys at Dry Fly Media have really done a bang up job. Lot’s of diverse content, photo essays, and meat … from numerous continents and a variety of gamefish.

… and yes, I added my two cents. This month’s column, “Three Flies Short” is “Paris Hilton is Now, but the Silver Hilton is Forever.” Wherein I accuse the last forty years of fly tiers of obscene crimes too horrible to mention here.

It’s a big, brash issue – filled with commentary and color, art and opinion, and is guaranteed to consume your entire lunch hour – and most of the next.

Quite a few pages, and with all the folks hitting the site – give it a minute to download.

Tags: Fish Can’t Read magazine, fishcantread.com, ezine, three flies short, fly tying, fly fishing, online fly fishing magazines, Dry Fly Media

Part 2 – Singlebarbed teaches the fundamentals of fly beauty

I don’t expect Science will ease a fly tier’s burden anytime soon. Even if they manage to add the vocal gene into a Salmonid and trundle the tank up to the podium … while all us fishermen crane forward waiting to hear what fish really like – it’s liable to eyeball a flybox and croak, “… needs Garlic.”

In the meantime, our best efforts are subject to the opinions and wit of brutish fishing pals – who continue to pillage our fly box despite their being; “too small”, “too yellow”, “too thick”, and “too few.”

Our goal is to weather criticism knowing that only fish determine beauty, and the success of the “well chewed fly” is ample proof. Pursuing visual perfection will teach solid construction technique – ensuring both ratty and perfect flies can be well chewed without falling apart.

six

Absolutely nothing can be corrected later. A tail that’s flopped onto the far side of the shank, the lumpy tie-in point for the body material, that upright and divided mallard wing whose center stem was not clipped, nothing can be corrected on the fly by adding more crap on top.

Nothing.

Perhaps a master fly tier can fix a lumpy body, but he’d never tolerate those lumps on the initial application. Lumps, bumps, cocked, and twisted, are caused by something wrong – or something you failed to do properly.

Elimination of these unsightly blemishes will take decades, as unfamiliar materials and the techniques to tame them are committed to memory.

Learn to back the material off the fly and reapply it. That will mean unwrapping 56 turns of thread (beginner), 30 turns of thread (intermediate), or the six turns (advanced) used to secure it.

A case in point:

The body of the fly and its transitions determines the finished fly’s appearance. In Part 1, Step 8 I made the same claim for lead wire on weighted flies, both are essentially the same thing. Lead is the underbody and whatever covers it has the ability to influence all the critical final steps of construction.

Anglers adore tapered bodies – it reminds them of the  mythical Supermodel lounging on the rock at the next bend – whom doesn’t exist, and they’ll never date…

In Part 1 we described the “gap-fill” process to overcome the rearmost transition which allowed a smooth taper from tail to thorax. We’ve got a similar dilemma on the front of the fly, an unknown number of steps and materials remain, we don’t want to influence their shape, but still need to close the gap between lead-filled thorax and hook shank.

You need a taper in front as well.

Especially critical for flies that have wings laid over the back (wet flies), hackle you want swept back and close to the body (soft hackles) or thorax materials placed on top and only tied in at the front, like Polly Rosborough nymphs or the wingcase of a Zug Bug.

A forward taper can be induced at the front of the fly using the body material itself, or by staggering the tie off points of the remaining steps to make an orderly transition from the thickest portion of the body (thorax) to the bare hook.

A nice front taper will put a finishing hackle or wet fly wing just far enough away from the thickest part of the body so that it doesn’t wedge against it and flair outward or upward.

Figure 1: Tied too close to the body lump

Spread_hackle

If you have too abrupt a transition from body to hackle and wingcase, those final steps will be “flared” outward; wings or hackle are pushed away from the body by the bulge of dubbing at the thorax.

Figure 2: The Double Tapered body

Tapered in front and behind

Put a short taper on the front of the body to allow hackle and other components to lie flush with the body rather than flared outward like a dry fly. When hackle is brushed back against the smaller diameter tapered area, the fibers will rest easy and encase the body in a cone of barbules.

Figure 3: Due to the taper the hackle is closer to the body

Hackle lays close to the body

five

The head of the fly is never shown in schematics. It’s the only part of the fly that defies known physics; it has no mass, no size, consumes no hook shank – defies taming, and persists in trapping our hackle and ensures the hook eye is plugged.

It’s the fly tying equivalent of a pimple on the end of your nose; turgid, menacing, and so very prominent.

It’s a fly tier’s signature, equivalent to a woman’s breasts; the first thing you see despite all efforts not to, and unduly influences perceptions of quality and beauty.

… which is why the divorce rate is so high.

Despite the many thousands of fly types and styles, beauty is consistent; the head should be free of materials, small or tapered, or both.

Tiers will commit the “2/3 body, 1/3 hackle” (or thorax) shank allocation to memory. They’ll spend the precious moments to ensure the tail is mounted correctly, the body is thinly dubbed, wings upright – or cocked at a rakish angle … and then destroy the fly by tying off everything in one brutish move, capturing a third of their hackle as they’re pressed for space, slam six or eight turns of whip finish onto the stubble – then dip the result in lacquer like it was a French fry…

… and the porcine lump of thread that results is deserved.

Small tapered heads require space. While the “2/3 – 1/3” rule is quite valid – your instructor was shy and didn’t mention that he’d allocated 1/8” behind the eye for the head – and it’s “2/3 – 1/3” of what remains

That precious allocation will require you to adjust your lead placement on nymphs, and the location of the wing on dry flies. “Small” guarantees the whip finish to land on bare hook shank and not on materials. There are many types of fly and many adjustments that must be made to the “where” and “how” of the final knot – but every head on every fly must be planned.

Figure 4: Reserving space in advance

Reserved Space - the line of Death

Recognize that Step 6 above, and the forward transition from fly body to whip finish is linked completely with the final small whip finish. Planning the forward transition determines how the naked thread is covered by the final materials ensuring the whip finish lands on shank.

Figure 5: The Sacred space is still inviolate

Reserved Space for Head

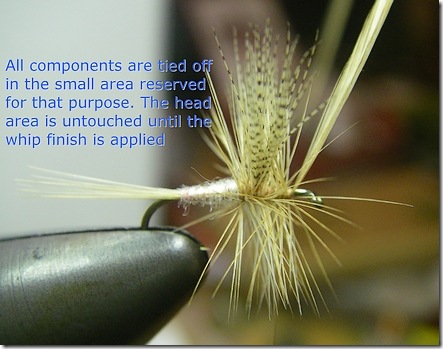
The above shows the final step on a modified Gartside Sparrow, winding the front philoplume just prior to the whip finish.  Note that the area reserved for the head remains untouched.

Keeping the mental picture of the head as you apply the finishing materials to the fly, ensures loose fibers and crap are not part of the whip finish, and ensures all the tie-off points are staggered so everything isn’t crammed together in one final orgasm of knot.

The head will be small and delicate, will evade rocks as other parts of the fly will contact it first – and will cause your critical viewing audience to swoon in appreciation.

four

Torque is one of those subjects most of us skipped out on in High School. “Grab-assing” on the back steps was so much more important in the day, and physics combined with the post-lunch digestive period guaranteed slumber.

A right-handed tyer will move materials clockwise around the shank, even if they were tied in and secured earlier.

Many fur and feather fibers are slippery, and as we hold them precariously near the shank attempting to secure them, we’ll move them off of top-dead-center just with the torque of our thread wraps.

Tails are especially vulnerable as we may have to tie in both ribbing and body material on top – and if our thread strays too far back in any subsequent step, we’ll move the tail away from us – perhaps even to the far side of the hook.

Some of this can be corrected by grabbing the offending item and giving it a yank in the opposite direction – which is acceptable after the fly is finished, but if it’s still in the vice the Golden Rule of Step Six –adding more crap can’t fix anything, is gospel.

Flies with lead underbodies are especially vulnerable. Securing lead has always been an issue and subsequent steps may rotate the body or thorax due to the pressures of thread direction and torque. Large flies with heavy wire or oval tinsel rib – or synthetic monofilaments like V-rib allow tiers to get heavy handed on the fly – which can induce movement.

Recognizing this phenomenon allows you to watch for it. Tying in tails and body parts 10°-15° off of top dead center on the near side will allow you to adjust troublesome wingcases and tails, and proof them against subsequent steps.

Later as skills develop you’ll have an easier time of it as you’ll learn to anchor materials differently (see Part 3) which will resist movement and proof you against everything but your own strength.

Note: if your tongue is clenched between your teeth as you apply ribbing, or your sweating profusely afterwards, that’s bad.

Our last post will feature the Big Three, techniques learned only after climbing the mountain barehanded, walking across hot coals, and observing the tying secrets of ancient Shao-Lin masters.

Tags: Gartside Sparrow, torque, lead underbody, V-rib, oval tinsel, fly tying, monofilament, ribbing, Philoplume, whip finish,

The Ekich Rotary Bobbin

Seeing a new wrinkle in any of our traditional regalia has always piqued my interest. Cameron Mortenson at the Fiberglass Manifesto (via Moldy Chum) sent me a little tidbit figuring it would whet the creative juices.

The idea of a $100 fly tying bobbin would have had us gagging a couple of years ago, but once fly rods broke the $1000 barrier the lines between reality and fantasy became blurred – and almost anything is acceptable.

Billed as a rotary bobbin, with constant force spring and ability to retract thread as well as dispense it – an interesting idea, and something we don’t currently enjoy with our aging fleet of Matarelli bobbins and the countless imitations that Frank’s bobbins have spawned …

The Ekich Bobbin

The Ekich bobbin is available in Trout (20mm) and Steelhead (35mm) sizes, stainless steel or ceramic lined.

It appears the spring must be discharged periodically. My interpretation of the user guide suggests the spool needs to be reseated slightly to discharge the thread tension after usage.

Pulling the thread rotates the spool in a clockwise direction storing energy in the spring/clutch mechanism. The spring dispenses 60 cm (24″) of thread. At this point, it is fully wound and there is a noticeable increase in thread tension. The spring needs to be reset by lifting the spool just enough to disengage the drive pin. This reset is also required prior to thread cutting. The amount of thread left outside the tube during the resetting process will remain there without being rewound.

Cutting that small tang off the faceplate appears it may eliminate the need to discharge the spring, but it would also remove the ability to respool the line.

I love gadgets. Unfortunately, revolutionary change is elusive – and fly tying and its aged tools seem to be an excellent candidate for modernization, yet our quaint and curmudgeonly pastime resists change quite effectively.

It’s an interesting concept, worthy of the couple minute read ..

Tags: The Fiberglass Manifesto, Ekich rotary bobbin, fly tying tools, fly tying, Matarelli bobbin,

Part 1 – Singlebarbed teaches the fundamentals of fly beauty, and insists you’re catching fishermen mostly

Fly tying is six weeks thinking of nothing but the fish, tying small stuff to smaller stuff, the shock and awe that all insects don’t suck blood or whine in your ear, the majesty of the first fish caught on your own fly, and the amazing riot of colors and animal parts coveted and purchased …

… and then it’s forty years of attempting to make your flies resemble someone else’s – validation not so much duped fish as successful copy of a book photo, or an appreciative comment from a fellow angler.

You start tying flies for fish – and wind up tying flies for fishermen.

It’s not a conscious decision, but aesthetics and beauty are as insidious in fly tying as they are in life.

The industry has always embraced beginners with great fervor, as they’re the source of a great deal of revenue. They need everything and a canny shop owner loves to host a class as it guarantees commerce. Fly fishing clubs love them as well. It’s a great way to be “hale fellows well met”, attract “lurkers” that don’t show for banquets and Beef au Jus’, and co-sponsor them with local shops happy to provide a small discount for students.

… and six weeks later you’re mounting that gleaming new vise to a table wishing you had someone to ask the hundred-thousand questions that occurred since your final lesson …

Magazines, books, and Youtube provide inspiration but spawn more questions than answers, and despite the fellow at the fly shop claiming “Cree” is nearly as good as Grizzly, your unimpugnable sources are gone and you’re left to figure it out … alone.

Intermediate and Advanced classes are few and far between, as there’s no agreement on what techniques or flies belong to either, there’s little retail traffic, and finding a master-instructor that has all the answers and is sober is more difficult in a club setting.

When offered they’re usually a three-part chain; beginner, intermediate, and advanced – and often filled with recent graduates of the beginner class, who’d be better served if they tied 5 or 6 thousand flies before stepping up the complexity.

If you’ve made it past the beginner class and resolved to master fly tying, knowing full well that further precision is largely vanity as the “well chewed fly” and its effectiveness has debunked taut, tight, and pretty…

… I’ve got nine steps for you to master if you want to catch fishermen.

The “Why” of it all

Refining your tying for the critical gaze of other fishermen will make your flies sturdier. All the painful lessons you’re about to learn are lost on fish, fish are stupid, lack artistic sense, and eat cigarette butts.

If you smoked you’d know this.

“Refinement” is a fancy word for discipline. Holding instincts in check and enduring someone else’s artificial sense of style, proportions, and method.

Beginning tiers lament the movement of materials on completed flies, loose tinsels, flopped over tails, and precarious hackle – and are heavy-handed with thread on all subsequent attempts. Reaching inside that glossy plate to give the author’s fly a twist will yield movement too, but it won’t unravel or fall apart – and yours might.

The difference between 30 years of fly tying and a recent initiate is about 8-9 fish. Even the best flies disintegrate and replacement is required.

In its day the flat tinsel body humbled most tiers. It’s not used as much presently but the lesson learned holds true for all wound body materials, doubly so if they’re shiny.

Dubbing bodies allows a tyer to add a little more or take a little off, but yarns and chenille don’t share that quality. They’re a constant diameter that shows every lump and foible of the materials underneath, and completely unforgiving.

Mastery of these materials is simple if you get to watch someone else do it. For chenille, downsize it one size and tie it in at the front and double wrap the body.

A double wrapped body of small chenille is the same size as a single wrap of medium, yet you can add taper, wrap it tighter, and tie it off with less thread than the larger size.

Flat tinsel and floss are identical. Wrap from the front of the fly backwards to the tail then wrap back up the body to the start. You’ll have a gleaming body absent gaps in the tinsel or “bubbles” – where overlapped tinsel pops out of the turn next to it leaving a small area of underbody and thread showing.

A large area to work with doesn’t make the task easier. Large trout streamers with their 6X long hook actually magnifies the floss or tinsel’s effect on the overall fly – as it’s much more visible. Working with floss requires you to cover your fingers as the sweat of your grip will immediately remove the shine or stain light colors.

Lead wire on nymphs and larger flies dictate the look of rest of the fly. A poor choice in placement or the inability to address the obvious lumps of where it starts and stops, cannot be corrected.

On trout nymphs the lead wire is the thorax – giving you a pronounced lump that ends the body and defines the wingcase. It should be positioned on the fly exactly where the thorax will occur – and the number of turns used should be the exact width of your planned thorax area.

…that’s right, planned. Flies don’t wind up with proper proportions by accident, and tail, body, thorax, and head are all mapped in your mind before thread touches the hook.

On larger flies lead wire may cover most of the shank, or it may be larger diameter, and no amount of thread or glue will keep it from rotating. Bind it as best you can and use the tail and body materials to plug the gap between shank and the rearmost end of the lead.

The mistake most make is not leaving enough room for the forward transition at the eye of the hook. All your materials will be spiraling off the lead coils and secured on the much thinner hook shank. Dubbing can be used to hide many sins, but wound materials like ribbing and chenille will always have trouble on that transition.

Positioning the thorax too close to the eye of the hook will yield a crowded eye – and worse – if a couple of turns of hackle need to be wound in that area to complete the fly. If the tie off area is still abrupt in definition hackle will flair outward away from the body due to the bulge – rather than close as it’s intended.

Lead placement dictates everything – including the hackle shape.

If it’s not dry fly hackle then it’s tied in by the tip and folded, then wound.

… and there’s some very good reasons for that unshakable rule …

Hackle is the most fragile component of any fly, dry or wet. The thin tip gripped by your pliers limits the amount of pressure you can use when hackle is wound around the hook shank. Tying in the tip means the stem gets thicker with every turn and you can apply more force when it’s wound palmer up the body – or used as a collar on nymphs and steelhead flies.

… and at the eye – where it’s tied off, the stem is thickest yet, perhaps enough to withstand being barked on a rock on a low backcast or torn off a tree limb on a misguided forward stroke.

The real value is the effect. Hackle fibers get longer as you move towards the butt of the feather. When winding collars with a folded hackle each turn is longer than the last. Longer fibers obscure the shorter fibers of earlier turns – giving the appearance that all the hackle is a perfect cone of exactly the same length.

It’s beauty were after, remember. Sound science is merely an accidental nicety in our quest to catch fishermen.

“Folding” a hackle is the act of tying it in my the tip and running a right angled object (like your scissors) up the stem to break the fiber’s back and make them slant backwards towards the rear of the fly. This process is shown in all the best fly tying books and is instantly recognizable on the fly itself.

Tying in your hackle by the butts and winding a nymph or steelhead fly’s collar will require you to wrap thread backward onto the hackle to get it to lay down, resulting in a ungainly head that’s got hackle color peeking through – and is prone to damage.

Putting it all together

We started with the least important beautification tips, working our way to the most important. Putting items 9, 8, and 7, together – let’s see how we can use them on a standard #6 Silver Hilton.

Silver Hilton 1: Lead Placement and Downsize

Silver Hilton

Do I use 10 turns of 2 amp lead wire or 20 turns of 1 amp?

Downsize: I opted for the smaller size as I could cover the body completely – guaranteeing the lead is uniform over the entire fly. No lumps or transitions to worry about and I squeezed in 5 extra turns of the smaller wire, making it heavier.

Silver Hilton 2: Gap fill

Silver Hilton 2

Lead is secured with three runs of 6/0 Olive thread (chosen so you can see it). It’s not going to prevent a vigorous twist between thumb and forefinger – but neither will 50 runs of thread. Thread is always your enemy, use what’s needed and nothing more.

Gap Fill: The teal tail is tied onto the hook shank leaving a transition I’ll address with subsequent materials. The balance of the tail material is trimmed at the rear of the lead, about a 1/4” of tie down/transition remains.

Silver Hilton 3: Gap Fill

Silver Hilton 3

Gap Fill: The oval silver tinsel follows the tail, tied in exactly the same spot and trimmed identically. The “gap” is slowly closing so the transition will be imperceptible on the body material.

Silver Hilton 4: Downsize and Double wrap

Silver Hilton 4

Downsize & Double Wrap: Rather than medium chenille I’m using fine velvet chenille. Regular chenille is just as good but I prefer the finer grained Vernille (velvet chenille) to regular rayon. It’s tied in front so I can make a double pass of the fly body; the first offers bulk, and the second will be drawn tightly over the first to give a smooth gap-free look.

Silver Hilton 5: Double wrap

Silver Hilton 5

Double Wrap: A nice plush body with a hint of taper, the result of gap fill and the second “finish” wrap of chenille. The second allows me to fill gaps and address contour, resulting in a “fisherman catching” look – and structural integrity.

Silver Hilton 6: Double wrap

Silver Hilton 6

Because of the fly body being a double wrap of chenille, note how the oval tinsel stays on top of the body versus digging into the material and being lost from view. The extra density of two layers means all subsequent materials will not vanish into the “grain” of the wound chenille.

Likely both fish and fishermen can appreciate that …

Silver Hilton 7: Tied in at the tip and folded

Silver Hilton 7

The hackle has been tied in at the tip and folded. I’ve drawn the right angle of my scissors towards me breaking the spine of each fiber and in so doing they’ll point back toward the tail of the fly naturally.

Silver Hilton 8: Folded hackle

Silver Hilton 8

Folded Hackle: The hackling is complete. Note how the hackle lays back over the fly naturally without being coaxed by 65 wraps of thread. In fact, where’d all that thread go?

Because I can “crank down” on the hackle after the first couple of turns, I’ve laid it exactly where I wanted it – covering the thread tie in area we saw in the previous picture. I’m about to start my whip finish and only two turns of thread are visible.

Silver Hilton 9: The final “fisherman catching Sumbitch”

Silver Hilton Final

The completed fly.

Tiny head. No gaps or foibles noticeable – and the eye is clean of cement and feather dander. It is a fisherman catching SOB, and your buddies will compliment you with great sincerity while palming all of them off your bench.

Small things that seem trivial, yet added together can make a huge difference in the way your flies look, last – and how they’re perceived by others. It’s of little consequence when running the fly through a riffle as only fish are a true test of what looks tasty and what doesn’t.

In the meantime, if you’ve just finished your six lessons of beginner class and are feeling your oats, you may want to commit these simple steps to memory.

Next Week: Three more pearls of wisdom as defined by hisself and his questionable wit…

Tags: Silver Hilton, lead wire, tapered fly body, folded hackle, Vernille, velvet chenille, Mustad 36890, teal flank, oval silver tinsel, beginner fly tying class, intermediate fly tying, advanced fly tying, flies that catch fishermen

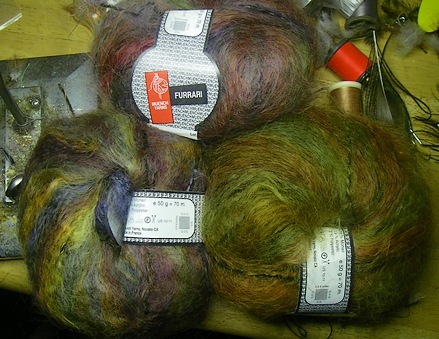
My binges at the Yarn aisle are still intact, just less successful

My yarn fetish hasn’t slowed any I’ve just become demure and sensitive to catcalls from the fellows keeping a manly distance from the yarn aisle and fidgeting under the weight of Madam’s purse. My progress through the store monitored closely by a stern female proprietor who always assumes I’m shoplifting.

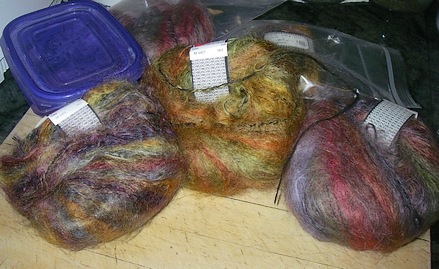
Can’t blame her much, she’s never seen a fellow fondle a blend of silk, mohair and polyamide with such sexual tension…

I do my best to set them at ease, shifting the subject quickly to how I plan on dismembering some hand dyed woven masterpiece into lint – and all the fish I’m liable to catch in the doing …

… which is why Grandma presses her phone number into my armload of gaily colored skeins – testosterone is in damned short supply and even a portly scowling fisherman makes for a stirring presentation.

The Yarn reject pile, growing larger by the minute Most of the latest batches have found their way to the reject pile. Lured by color and texture and undone by a hidden weave or indestructible fiber that prevents reduction into fur.

I’m still searching for a heavy fibrous yarn that I can get in 20-30 colors that can be torn apart for large trout flies and Steelhead.

… and at the same time I’m practicing with fiber reactive and disperse dyes – so that once I find it I can turn it into any color missing from the vendor’s base compliment.

Which usually means Olive, as it’s quite a rarity to see anything other than a Kelly Green or perhaps an Ocher.

Swimming_Damsel

I’ve got a lot of testing underway and damn few fish to assist. The above is a swimming-style damselfly made of a polyamide eyelash yarn which also contains a sponge segment that I’m attempting to incorporate.

You saw something similar on the mayfly nymphs I’d done earlier, only this time I’m opting to get more of those soft swimming fibers onto the fly to offer a marabou-style swimming motion.

I’m tying them on Knapek and Skalka hooks, part of a larger test of all the high priced competition wire that is becoming commonplace. I’ve laid in supplies of Knapek, Grip, Skalka, and Dohiku dry and nymph hooks to test quality of manufacture, consistency, fishing capabilities, and wire (soft or brittle) – as part of a larger article on the subject.

… in the meantime I’m proving myself a poster child for the Fish Can’t Read article on obsessive fly mongering.

Tags: Knapek, Skalka, Grip, Dohiku, competition hooks, obsessive feather collecting, polyamide yarn, Fishcantread.com, Olive is no longer fashionable, fly tying

That 70’s cloth none of us admit to wearing? That shortened your life too

Darth Polyester

I figure it was some great sin in a past life – nothing newsworthy or famous, just some callous Lothario that fleeced spinsters of their birthright, some real estate wunderkind that unloaded worthless railroad right-of-way by foreclosing on widows and orphans.

Others have a knack for useful things like plumbing or electrical wiring, own a house full of beaming children and spend most of their time basking in the adoring gaze of their spouse.

Me, I wallow in toxins.

I smile as girlfriend backs out of the garage, giving “thumbs up” while waving the list of “honey-do’s” – and as soon as she’s upwind I’m adding a dab of this to a dollop of that, all of which have skulls and crossbones on the label.

… all of which say, “empty into your sink when finished.”

The sport may be “green” but its components are pure death.

With strong winds in the area and “Momma” elsewhere, it was time to explore polyester and the disperse dyes needed to give it lasting color. Synthetics can be made from thousands of polymers, many of the items we use can be derivatives of nylon, polyester, rayon, or even a component of a natural material like viscose, comprised of plant or wood fiber.

All we see is “shiny” or “sparkly” and rarely delve further than shelling out the money for a nickel bag.

The nice folks that make the raw Soft Crimp Angelina material had sent me the Holy Grail of their “doll hair” fiber, a material data sheet that outlined the temperatures the fiber melts at, the temp the fiber loses its iridescence, and similar data that would allow me to dye their product without torching too many Ben Franklin’s …

Many of you have asked about the material, which is unavailable anywhere except in tiny little packets labeled, “Ice Dub.” I use it in raw form in countless flies and dubbing blends, but have shied away from coloring it because polyester requires caustic chemicals and plenty of heat.

Tasty Peacock Green  … not to mention the fumes, which is the Shit are pervasive and great odiferous. A well ventilated environment is needed so you can get the entire neighborhood lit and as kitchen cabinets, countertops, and flooring may be unknown material (may contain polyester) you can’t afford to drip the stuff on anything other than porcelain or stainless steel.

Skin is no problem. You could dip your head in it and brush your teeth, and after a couple whiffs you’ll want to …

Pro Chemical & Dye has dyes for every type of fiber you’ll encounter. With only 12 colors available for polyester you’ll need to learn the artist’s color wheel and how to construct complex colors from their components.

Example: Olive, a complex color made of equal parts yellow and green, with 1/2 a part of dark grey or black. Add yellow to make it a “warm” olive, and more green to make it a “cold” olive, and add more black to make it a dark olive (either warm or cold). For the below colors I used equal parts Kelly green and Buttercup yellow, and a half part of Cool Black (Pro Chemical & Dye colors). Using Buttercup versus the Bright Yellow means I’ll err on the side of a warm Olive.

As I’ve had experience in dyeing colors and building shades and tints using their components, my goal was to build a color that resembles a Peacock herl or eye. The iridescence was the easy part – it was built right into the Aurora Soft Crimp Angelina, which has motes of bronze, green, and gold.

Peacock is a double complex color as it would be described as green, olive, dark green, bright green, or bronze, depending on the location of the herl and the genetics of the bird itself.

You can’t dye material “peacock” – instead you dye three or four colors around it and blend them to make the final coloration. This is much easier than it sounds as dye baths will alter shades and color depending on the amount of time the material is left soaking.

Three shades, one dye bath

Here is the damp material after 3 minutes (left), 6 minutes (top), and 9 minutes (bottom). One dye bath to color all three shades, only immersion time differs.

Blended Angelina under Morning light

Here’s the final blended color seen under morning light. You can pick out the lighter tints and darkened fibers in the aggregate mass – and I still have the three other shades should I want to alter it further. I used the same formula when blending the result; one part green, one part darker olive, half a part of the darkest shade.

Used on a leech

The above shows the mixture used on a traditional leech pattern, note how the florescent light makes the material much more green than the prior photo shot outdoors. Florescent is a “white” light – not blue tinted as is normal sunlight, it always lightens colors by one or more shades.

#14 Zug Bug

I always hated tying Zug Bugs as the peacock has difficulty hiding the bulge of lead wire underneath – plus its fragility. Above is a #14 Zug Bug tied with the blended color, note how the slip of mallard lies flat on the back (as it should). The finer filament coupled with the ability to build the proper taper with dubbing gives much more control over the fly than wound herl, and the durability is increased at the same time.

That's no "dime" bag

I still need a great deal more practice with these new dyes but once I’ve built the formula for colors and immersion times, I’ll be able to reproduce these with reasonable surety. Returning the material to its dry and fluffy state is also quite problematic as I’m still un-matting the fibers by hand.

Knowing my “stay of execution” is limited – I’m hustling the dye pot outside as soon as each color is achieved, there to cool down while fumes exit the house. The ceramic disk attached to the storm drain stares at me accusingly – a large fish with the entreaty, “this empties directly into the river.”

I considered the crime briefly, but opted for the squirrel burrow in the backyard. While the label says it’s safe I’d rather be entertained by a florescent Orange squirrel staggering out of his burrow on unsteady legs.

The kids next door trundle up to investigate and I’m unaware until the little blond angel wrinkles her nose and says, “oOo, what’s that smell?”

They’re peering into the algae colored water with the shiny bits of debris  – and I’m croaking out my best sinister through the rebreather, “ .. in the cauldron boil and bake, eye of newt and toe of frog, wool of bat and tongue of your dog …”

… they screamed appreciatively all the way back to the house. Ma came out to make sure all was well – and fixed me with the obligatory “you are so bad” look as soon as chubby fingers pointed in my direction.

It means visitors next Saturday night requiring a double fistful of Snickers to pay for my sins.

Tags: Peacock, Ice Dub, Soft Crimp Angelina, Pro Chemical & Dye, polyester, disperse dyes, Halloween, little blond angel, toxic chemicals, Leech, Zug Bug, fly tying materials, fly tying

How to torture both cloth and your dog, and not wear the result

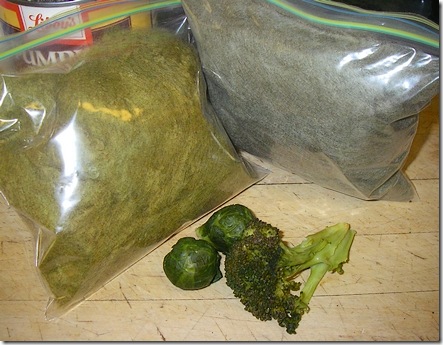
Having a eye for the next great fly tying material is one thing, ideas being the easiest part of the larger riddle, it’s the destruction and transformation that is the real test of invention.

I’ve discovered the next great dry fly dubbing; filament size smaller than the finest materials currently available, specific gravity less than 1.0 – so it floats naturally, and wants to stick to thread so badly that static from your fingers is nearly enough to wind it tightly around unwaxed thread…

The #16 Light Cahill

I’ve got visions of groupies and dinners at the White House, getting the “hale fellow well met” glad-hand from the current anglers of legend, and never having to pay for drinks again…

… there’s just this teensy little problem I have …

I have to destroy it to make it.

Blenders can’t dent it, acid melts it, and dragging it behind my truck works – but I can’t tie enough to the bumper to create a snowstorm of filaments that I can scoop off the neighbor’s lawn.

I’m doing battle with some Ph.D fabric engineer who saw a great cloth and spent months ensuring it’d never unravel. He didn’t realize some idiot fly tyer would delight in destroying his best work for the sake of dampening it in a trout stream.

Old Tailwagger The first sign of progress was the judicious use of “Old Tailwagger.” It’s right after blenders in the fly tying book of mass destruction. Blenders excel on yarn, but fabric requires torture to become fibrous, and the Tailwagger is the tool of choice for stressing tightly woven filaments.

The downside being everything four legged is your new best friend. I use a brown paper bag to smuggle it past the family pets – which possess a sixth sense for leashes, brushes, and trips to the refrigerator.

The above picture shows the results of stressing a “panel” of material and rendering it from flat and lifeless – to a veritable sheepdog of fiber.

Note the fiber at the tail, about 1/5 the thickness of a single hackle

As I’m still possessed by the Catskill dry (due to Mike Valla’s book) the above shows a single filament of the dubbing contrasted against the tail fibers of a Light Cahill. The filament size is only about 1/8 of the width of a single hackle barbule.

That’s nearly microscopic.

That translates into a tiny dry fly body – and much less water absorption than normal. Wings and bodies have always proven the nemesis of dry flies as they’re the only materials that don’t assist in flotation. Smaller amounts of dubbing assists both classic dry and their scientific cousins in remaining afloat.

No build up

For the aspiring dry fly fiend this solves one of the more troublesome problems. How to dub a tight thin body that’s neither lumpy nor absorbs extra water. The above magnification shows the complete dubbed Light Cahill, albeit poorly, there’s almost no build up of material when compared to the raw thread area behind the wing.

… and why I spent the better part of this weekend transforming the material into something usable.

Hell, I got a bag full of the Goodie

Now all the fun starts. Dyeing the material into the most common 15-20 colors used for dry flies – additional tinkering with blended colors – and I may attempt to mix it with larger-fibered beaver or muskrat just to gauge the effect.

Microscopic fibers don’t blend well using machinery. Only water shaken vigorously can act as the blending agent. Blender blades and agitators just clump the fiber like cotton candy.

It’ll take some time to pick the colors and render mass quantities of material, but Winter is plenty long and this type of project is just what’s needed when football grows dull.

Those of you who fancy the dry fly might want to drop me a note. I’d be happy to send out some samples when I get a couple nice Olives and a medium Gray, as I’ll be looking for some feedback on both the material and colors. Refining a raw product takes a great deal of tinkering, patience, and time.

Tags: dubbing, classic dry flies, Light Cahill, dry fly dubbing, fly tying materials, fly tying

Book Review – Tying Catskill Style Dry Flies

I’ve always likened the traditional dry fly as the fly fishing equivalent of the Japanese Tea ceremony. You can tie a million of them and the number of times you’re pleased with the result you can count on one hand.

Double-divided quill wings spin our gossamer tippet into a snarl, Woodduck flank is expensive as hell, and we roar past the traditional Catskill dry enroute to something more contemporary and scientific.

The Catskill Cabal; George Labranche, Theodore Gordon, Preston Jennings, Walt & Winnie Dette, Rube Cross, Art Flick, Harry & Elsie Darbee, and Roy Steenrod, were instrumental in the migration of English dry fly theory and adapting chalkstream tactics to moving water. Despite the passage of nearly one hundred years, their influence on the sport continues unabated.

Red Quill, one of many Catskill standards

Mike Valla has written an engaging book on the entire Catskill experience – from his vantage as an “adoptee” of the Dette’s. It’s an interesting and fast read that introduces the rivers – their unique personalities and patrons, the fishermen, and the fly tying brain trust that gave us the traditional patterns we know today.

The book focuses on the development and variations of the traditional Catskill flies, how each was modified, the individual variants popularized by each tier, and how the modern Catskill patterns we tie today evolved from their inception.

“This was the Rube cross who told Walt Dette, in the late 1920’s, to get lost when Dette asked Cross to show him how to tie flies. Walt promised that he would tie only for himself, but Cross would have no part of it.”

“When (Rube) Cross turned down Walt Dette’s request to teach him his tying techniques, Dette purchased $50 worth of flies from Cross, and he, Winnie, and Harry Darbee dismantled them in a rented room above a Roscoe movie theater to learn the Cross technique ..”

“Legends” can be as ornery and cantankerous as the rest of us. Books and autobiographies usually omit personality and character – facets that add a great deal to any legend. In describing Rube Cross’s 1950 work, “The Complete Fly Tier” – where his fly tying style was photographed, its author may have tried to hide his technique from us as well:

“One late summer evening many years ago, while I was at Walt’s side at his vise, he explained what they discovered about the Cross technique: ‘That is not what the unwrapping revealed. When we untied Cross’s flies, he set those wings first, then the tails, then the body, the common sequence that is used today.’ Walt used to give Cross some benefit of the doubt, and stated that maybe Cross changed his technique, but it does seem odd. Winnie, on the other hand, thought the change described in the book deliberate, to hold secret his true technique.”

This “forty-thousand foot view” of the area and its personalities adds a great deal of information not encountered in specific literature, like the interactions of all this talent and their individual foibles.

Considering the materials and techniques of the day, no bobbins, 3/0 silk thread held with clothes pins, the lack of genetic hackle, the paucity of blue dun – a color that permeates Catskill flies, few synthetics, and no domestic supply of fly tying items – most ordered from England, their skill, especially the Dette’s and Rube Cross, is astounding.

The chapter on hackle brought back unwelcome memories from my own youth, as Dun necks were squirreled away in back rooms – reserved for that special customer. Each Catskill tyer eventually developed his own stable of chickens to ensure adequate dun hackle. “Live plucking” the hackle was the norm – the chickens being much too valuable to kill.

We’ve never had to run around in the dark trying to corral wise old roosters who’ve experienced a couple years of scalp pulling…

“Modern fly tiers have access to every possible shade of hackle required for any fly pattern, and the stiff hackle is superior to what we all had to live with years ago. Jack Atherton once traded one of his original paintings, worth thousands of dollars, for a hackle cape that the stiffness and color required for Neversink Skaters; tiers today don’t realize how coveted a good neck was in the early years. One can walk into any good shop and choose from a wide variety of dun shade and be assured that even the lowest grade necks are better than hackle available ten years ago.”

Indian and Chinese capes were the only thing available pre-1980’s. They were serviceable enough for flies #12 and above, but tying #16’s – with hackle less than an inch long, still brings me nightmares.

That attention to detail has propagated itself into the current hackle business, as Harry Darbee’s line of genetic chickens may have served as the initial brood stock for both amateur and commercial alike:

“The Darbee line, as it is called , has also found its way into the flock of numerous backyard breeders like Doc Alan Fried in Livingston Manor. Fried , in turn, continued Darbee’s generosity in sharing eggs, and it was through Doc Fried that Darbee DNA found its way into the Collins and Whiting hackle.” 

For the fly tyer interested in plates, dressings, and authentic patterns, you’ll not be disappointed. Step by step illustrations demonstrate the Dette-trained Valla’s Catskill mastery, and the many variants practiced by each of the above tiers. Many samples of original work are depicted from the author’s collection – and the Catskill Fly Fishing Center and Museum.

Despite the cross-continent geographic gulf, the dissimilarity in watersheds that I fish, and all the advances in synthetics and angling technology, “Catskill” style traditional dries still comprise a dominant role in the fly box. We no longer need to leave the gap behind the eye as the Turle knot has been replaced by the Clinch, but the design and simplicity of this style of dressing will likely survive another hundred years, despite the many who insist it’s outdated.

Great book, with content for both angler and fly tier alike.

(Full Disclosure: The reviewer paid full retail for the book, it’s available from Amazon.com for $32.95)

Tags: Mike Valla, Catskill Fly Fishing Center and Museum, Art Flick, Walt Dette, Rube Cross, Theodore Gordon, Harry Darbee, George LaBranche, Roy Steenrod, Preston Jennings, Tying Catskill Style Dry Flies, Turle knot, the Complete Fly Tier, Catskill angling lore

How to extinct the San Juan Worm without half trying

I’ve been holding this one close to the vest for fear of upsetting the Roughfisher, knowing once he catches a glimpse of what’s possible, we’ll be seeing “Darth Earthworm” and the San Juan Worm’s days are numbered.

Paton Glittallic yarn

It’s actually two yarns loosely wrapped together. One is best described as a trilobal-polyester that glitters like broken glass, intertwined with a soft synthetic braid that can be used as a flat yarn, or you can stuff things inside it to stretch it into a veined mayfly wing, or seal the ends to make a San Juan Worm-killer.

Pink and Amber

The woven strand looks like a shed reptile skin – and whips around in the water like a snake. I used it for the shellback on the October Caddis earlier, and am converting the old SJW to this – more mobile flavor.

The downside is that not a lot of colors are available, and being polyester, dyeing what’s needed is more work than I care to endure. Special polyester dyes are required as is a chemical fixative and a lot of heat.

SJW Killer

I flamed the end to melt some rigidity into the tube, threaded it over a 4mm gold bead and added the SJW headpiece. Both tubes are sealed with a lighter to complete the fly. The motion is so much more wormlike than the velvet chenille that I’m tempted to eat it.

What’s needed is a good rich Olive, but I’ve only found the material in black, Lilac Lame (pink), Cream Gleam, Blue Flash, and Maroon Shine. It’s about $2 per skein on EBay.

Tags: San Juan Worm, Paton Glittallic, Polyester, Lurex, October Caddis, fly tying material, Roughfisher.com. trilobal yarn,

The Czech Republic lends some sparkle to the mix

In Spring a young man’s thoughts turn to love – and in Fall, us mature types think of love too, how much we’d love it to be cooler…

I’m tired of dusty creeks and the rattle of discarded water bottles blowing in the hot breeze. We’ve endured enough fires, sweltering mornings, and fleeing to the safety of air conditioning before noon.

October usually offers the first real respite from Summer’s heat. After three years of drought and yet another fortnight of blazing days I’m ready for mornings chill and the tinkle of something other than broken glass.

I’m going to will a change in the weather, if only by the flies tied.

Jan Siman's Peacock Dubbing

Jan Siman’s Peacock dubbing showed Friday, which had me scratching my chin. It’s a different cut of Angelina fiber that I’ve not seen before – akin to the the soft crimp but with straight fibers rather than crinkled.

The straight fiber offers a much rougher dubbing than traditional soft crimp Angelina fiber, consistent with the dubbing-brush-rough-combed look of most Czech nymphs. I’ll investigate this style with the vendor to see if there isn’t something new in the offing.

Comparatively speaking, the Peacock dubbing package is about a quarter the size of a traditional pack of dubbed fur – and the declining dollar versus the Euro adds to the $4.25 price burden. Beautiful colors useful for much more than Czech nymphs – but I was caught up in a new yarn, a yen for cooler temperatures, and the Fall Big Bug, the October Caddis.

October Caddis, Czech style

It’s a mixture of new materials; using the lace component of a new trilobal yarn I unearthed, mixed with a gold and brownish-burgundy blended fur and topped with some of the Peacock dubbing.

Tied upside down so the the lace is on top once the fly flips over. The Orange lace extends over the bead and is tied on the opposite side. This gives the gold 4mm bead an orange effect, and dulls the shine quite effectively. You can see the raw gold versus the yarn-draped color in the picture shown below.

A gaggle of Czech

Comb out the underside a bit to offer a hint of leg, and start praying for colder weather and fish with an appetite.

Tags: Jan Siman’s Peacock dubbing, Angelina soft crimp, Angelina fiber, fly tying materials, October Caddis, Czech nymphs, fly tying