Category Archives: Fly Pattern

A trout’s eye view, minus the assumptions

While the balance of nature might be perfection, most of its inhabitants are less so. Us fishermen are often knotted up in our notions of behavior and only underwater footage or other form of proof is needed to get us thinking outside the conventional.

Utah Fly Guides posted a video of Green Drake nymphs struggling to the surface – and as the video plainly demonstrates, they’re tumbling around in the water column and in the unfamiliar medium stability only comes with a solid anchor.

If this is what the fish sees; first a flash of light belly, then a split second of dark back, enduring all that effort to separate colors may be worth the effort. Then again, woven bodies involve considerable pain and suffering and share a certain stiffness coupled with a tendency to rotate around the hook with abuse.

With an upcoming foray into the Pristine scheduled, and a couple of ideas, I brushed the Orange and Pink materials out of the way to see what I could dream up.

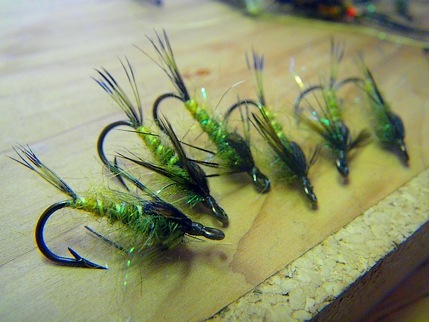
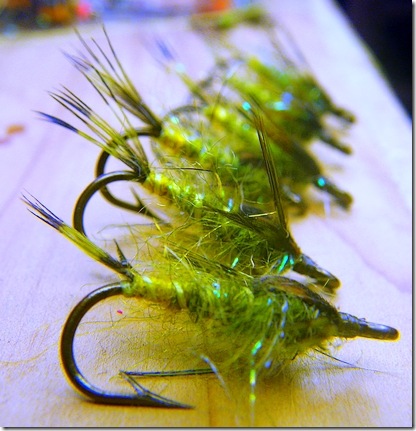
Four colors of dubbing to blend belly to back color

As always efficiency is better than painstaking detail, and if they prove successful you’ll be better off with a couple dozen versus a couple period…

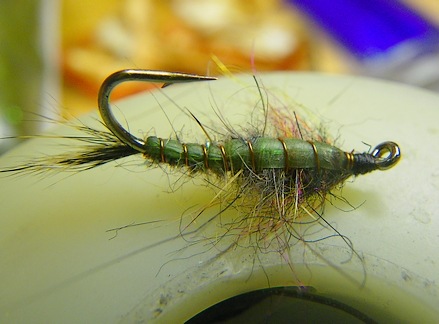
I started with the traditional color for the Drakes I’ve fished over in California, and the color of its underbelly. I made a quick blend of 1/2 belly – 1/2 back, and 3/4 belly – 1/4 back, then used all four colors to dub the body in short stages.

The effect is a nice harmony – a color spectrum that shifts from light to dark (in Olives) – and should make both back and belly colors visible to matter what attitude the fish has to the fly.

Transitional colors belly to back

In watching the video a couple times, I noticed the belly color offers the starkest contrast with the surrounding water – allowing me to pick out the “food” from the bits of leaves rather quickly.

We’ll never know what the trout sees, but transitioning colors in this manner yields no additional complexity and a rather striking end result.

Tags: Green Drakes, fly tying, color transition, trout fishing, blended dubbing, fly tying complexity,

They eat, so they must be fed

It wasn’t so much the Perfect Storm as it was the perfect sunshine – robbing me of any pretense that I could vanish fishing. The American was running nearly double last year’s flows, which gave momentary pause, but the accumulated chores and yard work was running nearly triple normal.

While I blistered those soft pasty fingers on shovels, lawn mowers, and hedge trimmers, I was framing my response to last week’s revelation that Shad ate in fresh water

Shad eat in fresh water. They just don’t eat enough.

… and with plenty of the bright, cornea-damaging Shad flies from last season, I’m thinking a fistful of drab and semi-natural looking flies might be that changeup needed on some slow mid-morning.

Add a liberal dose of the Czech style of realistic attractor, throw in some of the time honored Shad colors, and it ought to please the fish and may even lure some half-pounders into biting. All I needed was less blisters on my tying fingers, less water spilling over Folsom Dam, and a smattering of vacation to test all these unknowns.

Locate the fish using traditional patterns and then add a dropper with the experimentals and see whether it’s the semi-attractor or the eyeball wrenching Pink that becomes the preferred fly.

The opportunistic nature of feeding explains why the Shad has a yen for anything bright flung in its direction. Just like small trout rush out to smack the fly first, a large school of Shad probably behaves identically, only with greater urgency – as each fish is competing with 100,000 of its brethren and knows it will fall prey to another if not eaten immediately.

… and if I’d spent most of my existence seining plankton in 300 feet of water, how the hell would I know what freshwater chow looks and acts like?

See it, eat it, or spit it out.

The Underwear River Caddis

The hard part is marrying the attributes of tiny nymphs to a much larger Shad hook. While the native waters are host to all manner of small fish, and the occasional Hexagenia mayfly, it’s a limited palette. I opted to err on the side of voracious hunger, figuring “buggy” was all that is really needed.

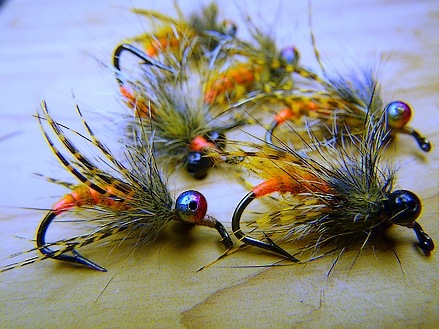
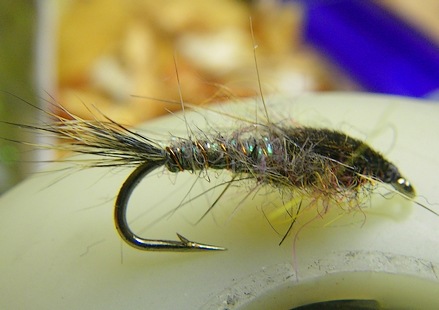
The eastern bloc McGintyThe Underwear River Caddis marries the soft hackle and fur collar to traditional shad orange, it’s an homage to classic shad colors with a bit of trout food chaser.

All are tied on ancient Mustad iron, a 3116A size 7, (2 extra strong, 2X short, Limerick bend). The odd size is exactly between the sizes I fish most – #6, and #8’s, which makes a nice intermediary hook with the properties of both.

All the reports featuring terrestrials allowed me to dust off the old traditional attractors. We’ve added opalescent wing stubs and soft hackle to the classic McGinty, hoping the bright mix of yellow and black might give something a serious mad …

The Eastern Bloc, classic lines and Czech colors … and for the minnow crowd we assumed a bit of shiny mixed with a lean silhouette would cover all the possible fry that might stumble into a pod of ravenous herring.

The Eastern Bloc featured at right, is a marriage of classic Czech colors with the traditional Shad wet fly. It’ll slim down to a nice minnow shape and features enough dyed black Angelina to offer plenty of eye-catching sparkle.

The other dozen patterns I’ll hold until we start the research in earnest, which will be shortly after the shovel blisters recede and expose the Lilly-white paper pushing flesh beneath.

Precious fly tier’s fingers, don’t mess with ‘em …

Tags: American River, shad flies, Czech Nymphs, Wet Flies, limerick bend, Mustad fly hooks, McGinty, fly fishing blog, soft hackle, fly tying

The giggles die right about the time the fly gets wet

There was no genius on my part, Gary Warren presses a handful of aesthetically horrid flies into my hand – and while I’m recoiling in abject terror and mock offense, he’s cackling madly “trust me Bubba, you gonna want those..”

Only the best damn stonefly nymph ever

I’ve got a handful of bulky and garish panfish flies and we’re supposed to assaulting one of California’s pristine spring creeks…

I’m thinking my leg’s being pulled. Gossamer and precise I could handle, small and delicate I was expecting, but large-lumpy with a taste of cathouse was what I got.

Chenille has been one of many casualties over the last couple of decades. Once common on all manner of trout flies – wet or dry, it’s now mostly relegated to large flies. Smaller synthetic chenille saw a brief resurgence, but the steady onslaught of synthetics with similar yet more forgiving qualities have eroded its use considerably.

I keep skeins stashed in most of the colors, but my fishing has the diversity that warrants such a collection.

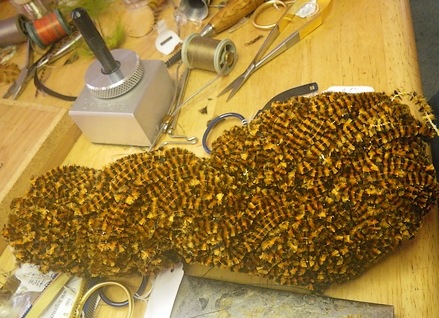
Variegated Orange & Black chenille, the Forbidden Color

After that evening on the creek I called it the “Forbidden Color” – whose name can only be whispered among life-long pals, as everyone else is slapping their knee and laughing at your sincerity.

“Honest, this stuff is patented fish death!” and strangers backpedal making helpless motions when you offer some – like you were insisting “they’re eating Vienna sausages, just put one on a treble hook.”

If it had a name I’ve forgotten it, and Gary never claimed ownership, only insisting that no better stonefly nymph had ever seen fresh water …

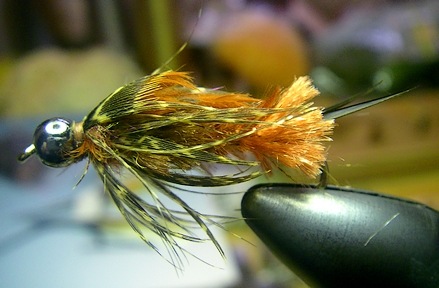
Best Stonefly wet

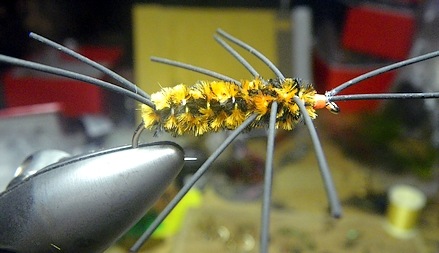
If any, the secret is getting the fly wet (above). Garish oranges become shades of brown and giggles are stifled as it’s suddenly predatory and eatable.

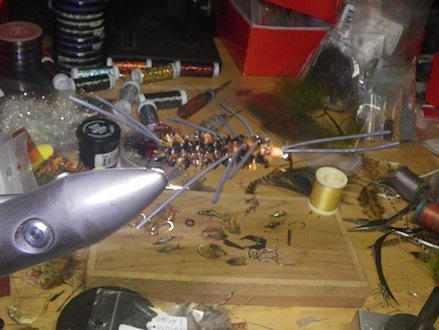
Early season I’ll carry no less than a dozen. It’s heavy, packed with lead or in bead head variant, one of those classic “money” flies that look right at home once you wedge it repeatedly in a trout’s maw.

Tags: variegated orange and black chenille, gary warren, stonefly nymph, early season nymphing, weighted nymph, bead head

The Fusion fly: Where we expose our ample hindquarters to scorn and levity

The Author in a moment of repose I’m minding my own business and Reed Curry plants an idea in my head that’s been gnawing at me for months:

“What elements of a natural fly are absolutely essential for the trout brain to use…”

… to recognize food.

Better yet, what elements of a natural (or successful imitation) are essential when it’s moving at eight or ten miles an hour, in concert with millions of oxygen bubbles, scraps of moss and twigs, and the sediment your buddy upstream added?

Does a fish eating stonefly nymphs take your nymph because of its size, or because it’s both big and black? Does the grab you just missed on your Pheasant Tail mean the nymph represents the predominant hatching insect – or was it merely the closest, and the fish was bored of the olive ones ….

Hence the quandary, the simplest of all questions – and there’s no single authority to ask for a definitive answer.

Anglers never look a gift horse in the mouth, we’re free with what little fact we’ve established. Some fellow sees us playing a fish and inquires what they’re eating, and the fact that we’ve caught four on a #14 Pale Morning Dun cannot be denied. If our new found pal knots one on and scratches a fish or two, it’s unanimous, the fish are eating PMD’s …

… but are they?

Caddis are dancing under the overhanging brush, there’s something in the water column headed for the surface, and just above us could be slack water with a spinner fall.

It could be that the PMD’s are emerging upstream and only getting to the surface in the fifty yards we’re camped in – perhaps that caddis has a similar body color, and your mayfly imitation is the next best thing to Nature, accidental like …

… or maybe the outflow from the slack water is bunching the spinners into small rafts of wings and tails and the fish are keyed to anything that looks semi-edible and floats.

… but we’ll never know, as we’re intent on sliding that PMD under that big tree limb where the dimples appear larger.

I love posing the impossible question, and hate being the recipient. Friend Reed has dropped an imponderable in my lap and I can’t tease it loose.

Compounding the problem is my binocular vision, and while I can’t see as a fish can, I’ve got a couple hundred years of succesful flies to inspect for those common fish appealing attributes.

If you bounce some mayfly nymphs off your desk the impression you get may be a hint of color, perhaps a lumpy front and a thin rear. Throwing some caddis nymphs yields less singularity, tubelike and a flash of color. Stonefly nymphs give you BIG, and dark – and well defined legs, but only if the pattern is biot based or contains rubberlegs.

Dry flies are like caddis, very little detail other than “stuff in front” and a hint of color, sometimes hackle – sometimes it’s the body.

We’ve always been enamored of the static view of flies, and matching the frozen natural, something a fish never sees. Instead, fish have to cull food items from the moving litany of leaves, bubbles, and debris that accompany them, and if they’re not right 90% of the time they starve to death.

Looking at the patterns and construction we’ve used to imitate the Big Three food groups, reveals many common elements that reduce the singularities to a manageable number. Mayfly nymphs use the traditional construction of tail, body, and folded wingcase, and then eight or nine million different things for legs.

Caddis stages mostly look wormlike and almost always have a light body and a dark head – unless it’s a cased pattern.

Stonefly nymphs are big, also dark.

Therein is the crux – those few necessary features that distinguish one bug family from another. An enormous leap of faith is required, but we’ve already done that; that fish eat selectively, whether they feed on the most numerous bug, or the insect that requires the fewest calories to capture.

I started off conventional enough, but the experimental flies looked just like the stuff we’ve been using for decades, which shouldn’t be terribly surprising – as I was imitating imitations.

Then the Czech Nymph book threw me for a tailspin, as I’d overlooked the entire attractor paradigm. I started integrating attractor elements with physical design and came out with stunning bugs – that looked like all the other stunning bugs I’d seen …

… and while I patiently waited for the flood waters to subside, towing first one fly then another through stained puddles on the creek bank – I glanced down at the fly box and the Angels sang …

… a medley actually, featuring Eminem and Jay-Z compliments of the boom box rattling the parking lot.

First Law of Fusion : The best elements of flies can be contained on a single fly – and the result serves as multiple insects, rather than a single imitation.

We’ve trod that ground before, employing countless flies that imitate nothing yet resemble everything. Most of the better nondescript flies like the Bird’s Nest, Burlap, Casual Dress, and Adams, all fit this mold.

Second Law of Fusion : Combine two bugs on the same hook.

That … is truly different.

Fused Hare's Ear

Above is a minor variation of the traditional Hare’s Ear, I’ve added some attractor elements; a little flash blended into the body dubbing, and a hint of Claret and Yellow to the front of the thorax…

Fused Hare's Ear, bottom view

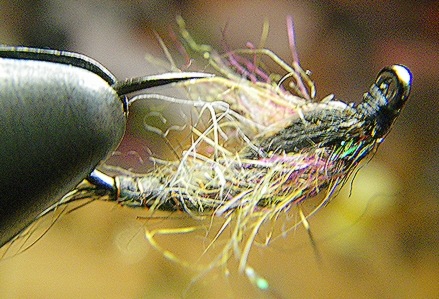
Here’s a glimpse of the same fly only a bottom view. We’ve fused the traditional Czech nymph attributes – the caddis “worm” shellback, with the traditional “mayfly” design of the Hare’s Ear. The hint of claret and yellow is revealed to be the traditional multi-color Czech element, part attractor, part tradition.

Czech Nymph bottom view

Here is a smaller size Czech nymph (tied on a traditional Knapek Scud hook), and the underside is revealed to be the venerable Hare’s Ear.

The idea is sound enough – with the complimentary flies needing a shared body color – although the shellback of the Czech-style eliminates even that restriction.

Tugging flies through puddles demonstrated that anything tied on scud wire, competition or otherwise, rides upside down. Allowing me a blank canvas to build the mayfly on top.

… and for the rest, it’s a homework assignment. There’s infinite possible ways to combine two insect groups on a single fly. Giant stoneflies are troublesome as their size restricts fusion to either Crane fly larvae or baitfish on the underside.

Which of you stalwarts is willing to risk public castigation to offer a better fused mousetrap?

Damn you Reed Curry, you’re the stealthy hand that forced inspiration past the normal cranial pathways and into the realm of outright mirth, as if they’re not giggling yet they certainly will be when I debut the Loch Ness dry fly series.

Tags: fusion flies, Knapek scud hooks, crane fly larvae, Hare’s Ear nymph, Reed Curry, The New Scientific Angling, Eminem, Jay-Z, inspirational fly tying, shellback,

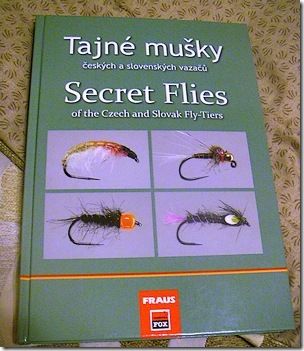
Secret Flies of the Czech and Slovak Fly-Tiers, an encyclopedia of Czech Nymphing patterns

There’s little doubt I prefer the technical references to the feel-good fly fishing memoir, both have their proper place, but when I reach for text I want a question answered, skills increased, or broader knowledge of an unfamiliar yet burgeoning subject.

Secret_flies_ofCzech

Czech nymphing has  fascinated me for a variety of reasons. It’s the “Cinderella” story mostly; small team emerges to dominate traditional fly fishing competition, remains virtually unbeatable in successive years, and the rest of the angling planet alternately “pooh-pooh’s” their meat oriented fishing style, while desperately begging for similar tackle from domestic makers.

Despite their monopoly of the long light rod, the resurgence of the multiple fly rig, coiled Stren indicators, and 24-30 foot leaders, scud hooks, and the preformed lead inlay – what sets the Czech nymph apart from most fly styles is their elegant blend of color and precise imitation.

Quite simply, they have incorporated the finer elements of attractors, yet have retained the shape and styles consistent with our modern realistic imitations.

… and as a reformed whore former commercial fly tier, tying many hundreds of drab dull flies can be onerous. A hint of sparkle or color is just enough to make that chair less hard ….

“Secret Flies of the Czech and Slovak Fly-Tiers” is a pattern encyclopedia featuring twenty one current or former Czech competitors and nearly 350 of their favorite flies.  There is very little preamble and almost no text. Each tier gives a brief explanation of past accomplishments on the World stage, and presents a dozen or more of his favorite flies. Both the patterns and text are in Czech – which is translated into English as a footnote to each pattern.

It’s the largest single compendium of Czech patterns that I’ve seen to date, and provides a glimpse of enough Caddis nymphs, wet flies, and streamers, for you to realize those elements common to all the featured flies.

Like color. Neither Rhycophilia nor Brachycentrus feature a tricolor abdomen highlighted by orange seal, but you’d still welcome a couple dozen in your fly box.

Many countries have a long history of colorful attractor flies, gradually slipping from prominence due to gleaming newer flies and the synthetics they contain. Scientific angling still holds sway, and colors our perception of what’s fishy and what’s not.

… and while we fiddle with knotted legs and precision, some Eastern Bloc kindred spirit adds a dab of maroon seal to his Olive Caddis and eats our competitive lunch …

Czech patterns and fishing style is slowly entering our mainstream arsenal, almost like Spey rods – which we held at arm’s length for a couple hundred years, then claim we invented them …

But the typical Czech nymph tied by American fly tier’s is missing the delicate profile of the european original. As many of the featured flies in the book portray, the authentic flies feature a double-tapered body – lightly tapered body, thick middle, and tapered front. It’s a trifling detail for most, but lends itself to a couple fortnights of inspired tying – especially for those fellows willing to order the book from Europe to learn more …

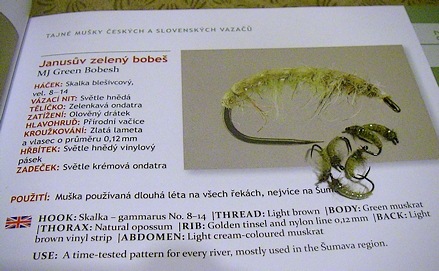
 Milo Janus's Green Bobesh

The above photo shows a representative fly pattern, its translation, and scant narrative. 

While the photographs are detailed and quite excellent, this book is for an accomplished tier – one that can reproduce the pattern from a glimpse of a single photo …

… AND … knows enough of European materials (both hooks and synthetics) to make the appropriate substitution. Unfortunately, Wapsi and Umpqua are only known to the US, and many common synthetics like the vinyl/latex back may have a different vendor and therefore a different vended name for their product.

They’ll be cited in the translation but you may have to do a little leg work to verify your pet flavor of vinyl is appropriate.

Most of the hooks referenced are Skalka, Knapek, and Maruto. You can substitute similar hooks if you’re familiar with those makers and their models. US vendors like the Blue Quill Angler carry both the Skalka and Knapek competition hooks – and they’re not cheap.

All of these materials can be purchased at Czechnymph.com which was the source of the book, as I could not find it available anywhere in the United States.

In short, an advanced fly tying pattern encyclopedia – absent fishing techniques or step by step illustrations, requiring significant knowledge on the part of the reader – and containing about 350 patterns of Czech-Slovak origin.

As I’ve seen few Czech nymphing books contain this many patterns, I’d think it would be considered singular in that respect.

Full Disclosure: I paid 779.3 CZK for the book, with shipping it was about $42 retail. (changes in world currency are daily)

Tags: Czechnymph.com, Milo Janus, Skalka hooks, Knapek hooks, Maruto hooks, Blue Quill Angler, Secret Flies of the Czech and Slovak Fly-Tiers, fly tying pattern reference, Czech nymphing, Caddis

Like a Royal Coachman only with a yellow body …

Some aspiring beginner announces on a forum that he’s invented a new fly, asking for comments on the quality of construction and the style used.

… which brings the Wrath of The Horribly Offended onto his narrow shoulders. The first half dozen comments point out someone else’s fly his resembles, albeit minus the red tail, and then all original thought is ignored as various fanbois attribute the tie to their respective Sensei.

In the meantime the next great fly tier backpedals back into anonymity swearing never to show his work again.

Ours isn’t the only sport where the word “invention” is four letters. Perhaps variation or derivation is more appropriate – but with 200 plus years of fly tying already behind us has anyone really invented anything in the last 50 years?

Of course they have, only we have trouble admitting it.

Discounting the new flies that arrive with each synthetic, most of the natural materials like fur and feathers are well known and documented. We’ve wrapped, clumped, bound, spiraled, tamped, straightened, and parachuted most everything already.

Fly patterns have this enormous gulf of Gray, with rabid partisans perched on every outcropping just waiting to tee off on the unwary. Us well intentioned tiers duck and evade the unguarded phrase containing “new” or “invented” – and are reminded how easy it is to lift the lid off Hell Incarnate.

I figure there are three basic issues within the larger question of “new”, and these revolve around colors, styles, and method.

Changing the tail on a Black Gnat from black to chartreuse will rarely work up much emotion. With only the single change, it’s a variant of the Black Gnat, and should be named similarly. “Bob’s Black Gnat” is appropriate, as is “Yellow-tailed Black Gnat.” The issue is straightforward – do you wish to pay homage to the original, or do you wish fame everlasting?

As with all vanity, it’s an individual thing – and is probably the source of the foment when the issue raises itself in the media. In the most virulent posts – and ensuing comments – affixing your name to an existing variation is unworthy, even if you made the fly better.

… but if you’re already famous it’s okay, as witnessed by the Royal Coachman and its derivative the Royal Wulff.

Variations caused by style are similar. No one raises an eyebrow at a Parachute Adams – unless it’s introduced as Bob’s Killer Bug. Fingers start pointing, flames erupt and in the blink of an eye – the forum thread is in shambles, with the incensed participants labeling each other with even better names …

Fly tying styles have always incorporated the traditional patterns, as they’re already the product of many years of tinkering and refinement.

We don’t like to think in those terms, how the original fly may have been slightly different and bore a different name – but history is written by the victor, and the venerable Adams may have originated as Finkle’s Wilson, until some SOB added grizzly wings …

… and was vilified by anglers when he dared rename it.

Which neatly explains how difficult it is to trace the original recipe on the timeless patterns of yesterday, likely each author took the variant he fished as gospel.

Style can be incurred by materials as well as tying method. Polypropylene made us retie everything, and we gleefully discarded muskrat, fox belly, and beaver bodies … until we learned Poly fur was coarse, unforgiving, and didn’t float much better than our old fur. That didn’t stop us from putting “Poly” in front half the old standby’s, but as the material proved a false prophet the renaming ceased once it became less popular.

Bead head flies are another example of how a functional style begats variation. Somehow the addition of a heavy bead didn’t warrant renaming the Prince nymph, and we merely added “bead head” to distinguish the functional change.

We’ve seen numerous styles in the last 50 years, most have occurred since we mastered the petroleum polymers, like Nylon, Banlon, Antron, and Z-lon – and the countless synthetics that have been adapted from carpet fibers and the upholstery trade.

We’ve replaced chicken fibers with Microfibbets, wings with Polypropylene or Z-lon, swapped fur dubbing for Antron carpet blends, and did away with hackle entirely – or tried to … We’ve endured the Yorkshire Flybody hook, Swedish dry flies, thorax duns, Waterwalkers, No Hackles, and dozens of different surface film flavors that only young eyes can see.

We’re so busy attempting to replace the Catskill dry and standard nymph, that our failure to find a glossy synthetic equivalent may play a part of the angst displayed when policing derivations and variants.

Structural method also spawns flies as new. Advances in hook design or the debut of a lightweight gossamer can spawn new styles of tying the older flies, and inspire much creativity.

Parachute flies are a great example. Most contain the identical ingredients of the traditional fly, and like bead heads we’ve added “parachute” to the name with little fanfare and no resistance.

… and it’s only because the Czech’s have been consistently eating our competitive lunch that we haven’t complained of their adaptation of a scud style (hook and style) into a bonafide Czech Nymph.

… like Kaiser Soze – we’re terrified of angering them.

Fly tiers have always approached invention with trepidation. Our first halting steps were necessity rather than genius, and added a taint not soon forgotten.

A new tier usually takes the glossy plates of books and magazines as his first muse. Consumed with creativity he’ll often overlook materials in the original recipe that he’s missing. With the fly two-thirds complete another four letter word, substitution, rears its ugly head.

Even if a Light Cahill is completed with Green hackle tips for wings he’ll view it as a failed attempt, as it’s not the original pattern. Months later when he’s more comfortable with skills and patterns he makes a minor modification, perhaps to customize it for his watershed or local insects, and we chew his ass for blasphemy.

A strange dichotomy, on the one hand we’re intent on discarding the old, and are incensed by anything new derived of their tradition.

The Royal Coachman Nymph, I invented it The Royal Coachman Nymph, and I invented it

Later in a fly tier’s career it’s all about experimentals and variations of derivatives. After many years fishing you realize that traditional patterns are merely flies that have become popular, not that they’re better than everything else.

But all those test cases and oddballs are kept close to the vest. Metered out to strangers on the creek when you’re lucky enough to have something that’s better than most that afternoon, and the rest given a trial and buried into an overhanging tree limb or sunken log.

… and while the forum dwellers snarl at each other from the safety of their computer, attributing whatever appears as something their favorite author or fishing buddy tied first, half of them don’t tie at all – and the other half don’t tie well … which is most of the reason they’re not offering their flies for commentary.

Is it a new fly worthy of a name, whose pedigree can be traced to its originator? Usually not. Mostly they’re copies of copies whose original dressings were guessed at – contained frequent substitutions, which were fortunate enough to have their name and recipe contained in an early tome on fly fishing.

… and if its description involves naming a classic fly, then it’s a derivation regardless of what you call it.

Tags: fly tying, naming flies, Yorkshire flybody hook, Partridge hook company, Catskill dry, traditional fly patterns, fly fishing forums, Light Cahill, Royal Wulff, parachute flies, bead head, Czech nymphs

Cal Bird’s Modified distribution wrap, for Monty Montana

In last Monday’s post we described the distribution wrap, a method to make feathers that were oversized act as hackle on smaller hooks. That post described how a single segment of even flank feather could be spun around the shank as hackle.

One of the more popular flies that Cal originated was the Bird’s Nest, where he’d use Tintex Maple Sugar dye to color heavily barred teal flank – and then use a modified distribution wrap to use feathers whose tips were crooked but whose sides were even.

Tintex Maple Sugar dyed teal flank

The above is a reference color from a batch of teal flank that Cal dyed for me. Tintex “Maple Sugar” is no longer made but the color can be reproduced with a good warm amber or imitation wood duck dye.

Tip clipped and used for the tail

Clip the tip and center stem of the feather and mount that fragment as the tail. The width of the sides sections determine whether the fly is lightly or heavily hackled. For the hook shown (#8) you will need about 3/8” segments on either side – about half of what’s shown.

Measure the teal against the tail

The front hackle should extend half way down the tail. This is a reference measurement before clamping the near side of the feather to the hook shank with my thumb (to freeze the movement).

Near side clamped to shank with left thumb

Left thumb clamps the fibers to the hook shank to prevent movement. The left forefinger will come down on the far side clump and pinch it to the far side of the fly.

The forefinger squeezes the other segment to the far side of the fly

Now that both segments are measured and secured with finger pressure, bring the thread up to roll them around the shank and even out the fibers.

Near side has thread, far side is coming around the belly of the fly

The thread is shown distributing the feathers. The near side clump becomes the top half of the fly, the far side clump wraps the fibers around the belly of the fly.

hackle collar complete

The hackle collar is anchored. Like the original distribution wrap you can wind back towards the body to redistribute the fibers any way you like. Clip off the remainder of the feather once you’ve finalized the hackle placement.

Completed Olive Bird's Nest

The completed #8 Olive Bird’s Nest. Cal preferred the old Mustad 7957BX hook which was 1X long, 1X heavy, forged model Perfect bend.

Woodcock & Orange

Here’s the same wrap done on a #14 Woodcock & Orange. A collaborative effort; seal provided by [Unknown], Woodcock arrived at Christmas – compliments of the Roughfisher – and glue lump assisted by a holiday sugar rush coupled with unsteady hands.

For Monty Montana.

Tags: Woodcock, seal fur, maple sugar Tintex, teal flank, Cal Bird, Bird’s Nest, soft hackle, Roughfisher.com, Christmas sugar rush, distribution wrap

From the mouths of Babes comes Thread Wisdom

With the casting club some four miles distant the round trip on a stingray was reserved for weekends. Weekdays it was the bathtub as trout stream surrogate.

A young lad learning to tie flies has to make due. Each time the UPS truck squealed to a stop out front it disgorged some new material from Dan Bailey’s or Kaufmann’s Streamborne, and I’d start the bathtub going to see why marabou was such a big deal, or determine whether a fly tied of polypropylene could survive the eddy between spigot and drain.

In those days everything was tied with Size A Black Nymo unless I was feeling gaudy and opted for white.

Six feet of monofilament tippet and a handful of experimentals tugged through the water using “hand-twist” retrieve. I learned which materials caused flies to ride sideways, upside down, and how stiff materials assisted by head cement spun the fly uncontrollably …

… but most importantly I learned what not to do, and how to make a shortcoming an asset.

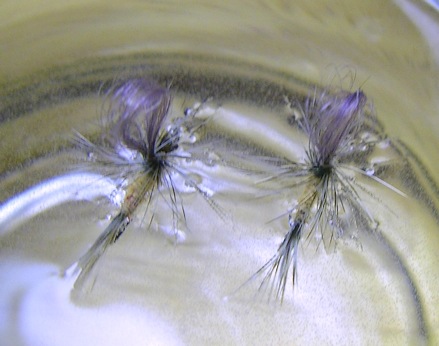
Upper_Sac_Parachute

… above are a couple Creamy-Orange Paraduns that I attribute to the Gary Warren – Chuck Stranahan – Hat Creek brain trust. Are the two shown the same?

Wet_Creamy_Orange_Top

The “Bath Tub” test shows the same two flies riding nicely. The left fly is starting to show it’s true colors …

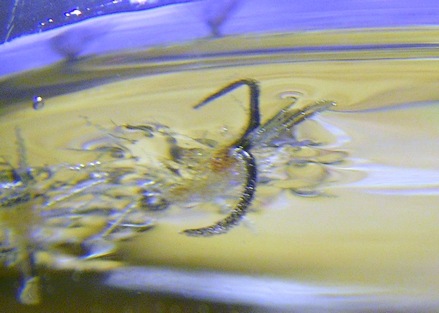
Upper_Sac_Creamy_bottom

The underwater view of the left fly shows a pronounced orange-red butt section by the tail. It’s revealed to be the Upper Sacramento variant of the Creamy-Orange with a butt of blood red thread underneath the dubbing.

Thread choice isn’t pronounced on the dry version of the fly, but all my “wet testing” of years ago confirmed that Black Nymo overwhelmed every color of dry fly dubbing tested.

Now I knew why Art Flick, Roy Steenrod, and Walt Dette, as well as every other past master of the dry fly used neutral gray thread.

The ensuing month saw me delivering papers frantically, husbanding tips while looking predaciously at the UPS truck and the inevitable squeal that would announce a gleaming 12-pack of gray 3/0 Monocord.

Thread can be many things – a boon as well as a detractor. It acts as a hidden color layer influencing the body color of the fly. In this case, the Upper Sacramento is home to a dusky red-bodied mayfly whose abdomen fades into a creamy orange color up by the wing roots.

Wrapping red thread under a lightly dubbed body gives me precise control over how that color bleeds through the dubbing, and how much it influences the body color of the fly. A light dusting of dubbing will bleed red, a little more dubbing will bleed less (dusky red).

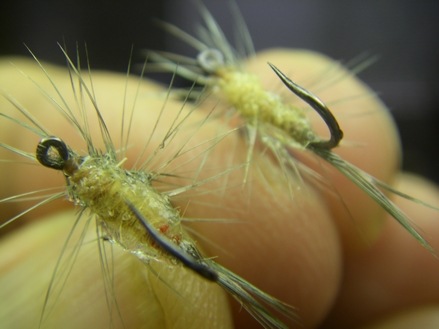
Creamy Orange Damp Underbody

Here’s the same two flies removed from the glass; the left fly shows a pronounced red butt, and the fly on the right has none. Both flies were tied with a neutral tan thread so as not to influence the dubbing color on the remainder of the fly.

Fish never see a dry fly, they only see floating flies that are wet.

Water has a tendency to darken every color one or two shades, and rather than spend all your efforts matching the natural with dry dubbing – doesn’t it make more sense to test the colors wet?

It may well have been the only wisdom learned in the ensuing couple of decades, if you believe my parents …

Tags: dry fly, thread as color, dubbing techniques, upper Sacramento river, Monocord, Nymo thread, butt section, Chuck Stranahan, Gary Warren, Roy Steenrod, Art Flick, Walt Dette, Catskill dry fly, hand twist retrieve, Dan bailey’s, Kaufmann’s Streamborne fly shop

Part Last – Singlebarbed teaches the beauty secrets of the Shao-Lin Masters

As we mentioned in Parts 1 & 2, the measure of true fly beauty is held by fish not humans. Unfortunately only averaging  9 days afield your flies are viewed most by people, and suffering their continual criticisms can make a fly tyer resign himself to please both anglers and quarry.

… and in the doing, gain the precision to make his flies sturdier.

We’re down to the final three, each so hideous and daunting as to cause fly tiers to scream, gnash teeth, or give up the craft entirely. Three crucial steps that professional tiers do subconsciously, that plague beginners for decades, are rarely mentioned, and completed so quickly you’ll miss it on a video or live demonstration because you’re drawn to more glamorous materials and technique.

Watching a talented tier can be mesmerizing. A crowd of fellows inching forward looking at some vindictive SOB who’s just palmed a couple ounces of yard-long #16 saddle hackle in Coral Pink. You’re trying to stammer the question, “… Wh … where’d you get that?” – and you miss a half dozen gems of technique while he pretends he’s got a closet full of the material and doesn’t.

Here’s what you missed:

three In prior posts we mentioned the difficulty of keeping materials from moving around the shank – either via thread torque, bulk, or method of attachment.

I’ll ask a simple question;

Which holds the tail of a nymph onto the shank, the six turns of thread you used to tie it on, or the forty turns of thread that come with adding ribbing, body, and all remaining steps?

Light bulb.

Thread management is part art form and part physics. Thread is your enemy and we use it as sparingly as is possible. It’s heavy, lifeless, and is always applied in great quantities where it’s least useful.

A tail isn’t “lashed” onto a hook with tight concentric turns, it doesn’t require taming where all traces of it are buried under thread, it’s anchored with three tight consecutive turns of thread at the tie-in point, and then the thread is spiraled to the next step.

That’s true of wings, wingcases, ribbing, bead chain eyes … and everything else.

The anchor wraps occur at the last portion of shank before the fibers become tail. The butt ends will be bound securely by the thread used to dub the body and attach the ribbing, and we don’t need any additional turns to hold them mid-shank. Any tail movement will occur at the anchor point – not in the middle of the fly.

Understanding the physics behind this practice is the hard part, execution is much easier. “Anchor points” exist where the stress will occur – and the thread wraps and tension used are critical only at that spot – all other wraps position the bobbin for the next step.

Less thread pays off in slim profiles, small heads, and buoyant dry flies – and is as memorable to the critiquing angler as is the curves of a Supermodel.

two

Hand in hand with the notion of “anchor” is the tapered cut. As described above the anchor is needed to hold the material firmly to the shank. Once the three wraps of the anchor are in place, it’s an automatic trigger for the cut.

New tiers are still unfamiliar with everything; small hooks, tiny scissors, unfamiliar materials, and insecure grasp of proportions. They’re thrilled to cut the material at all – and usually after securing it with 46 turns of thread.

Often they’ll “blunt cut” the item, scissors held at right angles to the hook shank so they can square cut the wing or tail butts – leaving a promiscuous gap between material and shank that will have to be addressed by subsequent materials.

Intermediate tiers will have learned the horrors of the lump left by the blunt cut, and will taper their cuts – scissors parallel with the hook shank – cutting downwards at the shank.

… after they’ve secured the item with 26 turns of thread.

A blunt cut can only be used when the material covers the entire body area of the fly.

All that’s needed to attach any part of a fly to the hook shank is three turns of thread.

Bold words, and you’ll note I didn’t say it was attached permanently. If the anchor is the only thread needed to hold the material stationary – and subsequent steps will add more thread to lock down the butts that extend over the body area, than those three anchor turns will hold the material well enough for us to cut the taper – yet will be loose enough so if torque has carried the fibers too far to one side, we can straighten them with finger pressure.

Which is why the Golden Rule applies: Nothing on a fly can be fixed by laying more crap down – because the “three-turn-anchor-tapered-cut” allows us to reposition it before we move to the next step.

We fix as we tie, because we’re learning thread management.

The taper we induce as part of the cut is every bit as important as the anchor and the three-turn trigger cut. For flies that please humans, only two kinds of cut are permitted; the blunt cut when the material covers the entire body area – as in the tail of a dry fly – where it’s trimmed behind the wing, or the tapered cut – which produces the finished body contour.

Using cuts to define body shape is easier than adding the right amount of dubbing to thread to have a thin arse and thicker middle. Beginners and Intermediate tiers haven’t mastered dubbing yet, asking them to be doubly clever in its application will not work.

… and tapered cuts have to be learned anyways – as not all flies have dubbing to make contour. The Quill Gordon is a classic example, it’s body is the stripped quill from a center strand of Peacock eye and the taper of the body is caused by the cuts made on the prior materials.

It’s easiest for a new tier to learn to dub “level” – that’s something he can gauge easily as it’s the same thickness of fur over the length of thread used.

… later, after he finishes digesting the three parts of this post, he’ll be able to master a tapered dub consistently – and will have an additional tool at his disposal.

one

Nothing gives the prospective fly tyer more trouble than dubbing. It’s deceptively simple, a simple twist between thumb and forefinger – nothing devious or hidden, no wrist motion or hidden timing.

It’s “mash crap on thread” – yet the proper technique of this routine task eludes most tiers for decades.

That’s because there is no technique.

It’s no different than loading a paint brush. A tiny thread, whether it’s waxed or no, can only trap a certain amount of fur tightly. Anything more than that will be trapped loosely – and if you add more will degenerate into a lump of sodden crap that resists your saliva, glue, hammy hands, and everything else you throw at it.

Golden Rule of Dubbing: if you can’t see through it, you’ve got too much.

I like to use “mist” to describe the dubbing process to students, as all mists whether water, vapor, or solid, are transparent.

The average #16 dry fly uses so little fur that you could snort it without sneezing … but the gag reflex is horrid.

The inability to apply the correct amount of dubbing, and the myriad of issues it raises, adds a common visual roughness to all your flies – as it’s among the most common tasks performed, and is so very visible.

It will not matter how many videos and demonstrations you’ll watch, the right amount of dubbing is an afterthought to the presenter – he’s mastered dubbing and is busy explaining why you want to fish his Hopper over someone else’s. “Mist” isn’t visible to the camera lens unless it’s within inches of the fly, and much of the action is off screen.

Dubbing can be a very deep subject to us reformed-whore-nutcases, that two percent of fly tiers that go where others fear to tread. We blend fur types and textures, layer colors, give it loft and sparkle, or shape it to replace traditional fly components. But the average tyer still struggles with loading it on the thread, and his Messiah is strict adherence to the Golden Rule of Dubbing above.

Once mastered you’ll realize there are many kinds of dubbing, some are well suited for the task, and others are very poor dubbing choices – but are endured due to the color or sparkle they offer, some quality not found in traditional fur bearers. Baby seal is a great example. A transparent sheath surrounding a white inner core, designed to reflect sunlight away from the animal so it doesn’t burn to death while waiting for that insensitive Canuck to mash its life out with a club.

… sure, you’re all tears now, but that’ll change once someone offers you a nickel bag.

Dubbing that’s suited for dry flies are usually the waterborne mammals, fine filaments and soft to the touch. Nymph dubbing can range from fine to coarse, often contains a goodly component of guard hair, and may contain synthetics to offer sparkle or other qualities.

Just because it’s the right color doesn’t mean it’s the proper tool for the job. Store bought dubbing is simplistic generalist dubbing, not the premier designed-for-dry-flies that us nutcases are fond of …

Putting it all Together:

Let’s put these hideous lessons together in an assault on the traditional Catskill dry, a magnet for criticism whose light coloration shows every lump, knot, and tear stain:

Light Cahill 1: What I see that you don’t
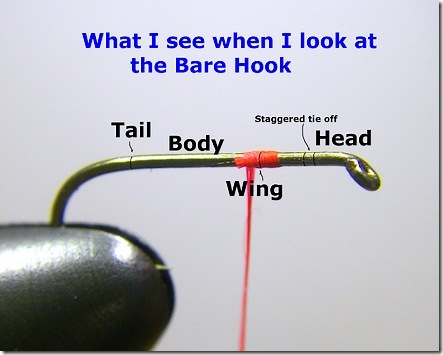
This is what I see, and you probably don't

I can’t help it, I see all the tie-in and tie-off points, where I’m going to put the wings, tie everything off, start the head, where the body ends, the entire fly just by looking at the hook shank.

With this “tie by the numbers” approach coupled with thread management, I know when I’ve strayed over a boundary line – and correct it right then, rather than let the problem slowly compound.

Light Cahill 2: Three turn anchor, trigger for the tapered cut
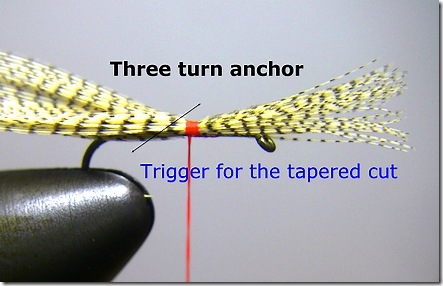
Three Turn Anchor

I’ve attached the Woodduck with three turns of 6/0 Danville. I’ve tied them in about two turns of thread past the mark where I want the wings to stand – this space will be consumed by me folding the material upright, something that most beginner and intermediate tiers forget. Transitioning anything from horizontal to vertical will consume space on the hook shank – and if the heads of your dry flies are perennially crowded, you may be forgetting that critical physics lesson.

Three turns is my trigger for the tapered cut. I’ll come in from the wing side and cut downwards towards the shank. If you have tungsten tipped scissors, it’s the most dangerous cut possible, as tungsten is extremely brittle and you can chip or remove the points if you catch the hook shank in your cut.

Light Cahill 3: Body taper complete
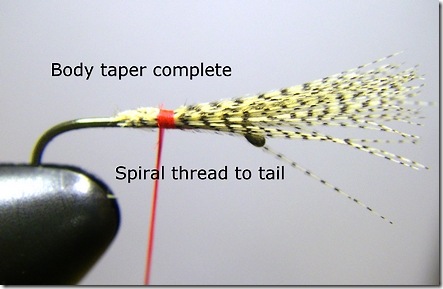
Body Taper compliments of a scissors cut

The tapered cut is complete and my body taper established. The anchor point holds the materials firmly so I’ll spiral the thread to the tail position and mount the tail now.

Note: Us old geezers that used Nymo thread in the 70’s and 80’s recognize that nylon thread can be used in two manners. Spinning the bobbin will essentially turn the filament flat (which is why my thread appears so wide) and will create less bulk than a normal strand of 6/0. Spinning the bobbin again will restore the spun flat fiber to round – best used for the anchor wraps themselves as they can bite into the material.

It’s all part of the art of thread management. Thread is a lot more than it seems…

Light Cahill 4: Tail anchor
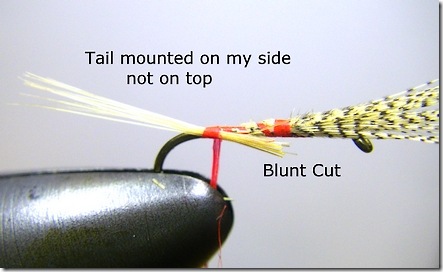
Tail anchored

There’s a lot to see in this picture, as this is where a lot of techniques start to pay off.

The thread has been spiraled from the wing anchor to the tail mount point. The tail has been mounted on my side (thread torque) with a three turn anchor. The tips of the tail have had a blunt cut (scissors at right angles to the hook shank) but are long enough to traverse the entire body of the fly.

A blunt cut can only be used when the material covers the entire body area of the fly.

… so we have adhered to the rule as stated above … and now we’ll begin to see the reward.

Light Cahill 5: Token Blurry Picture
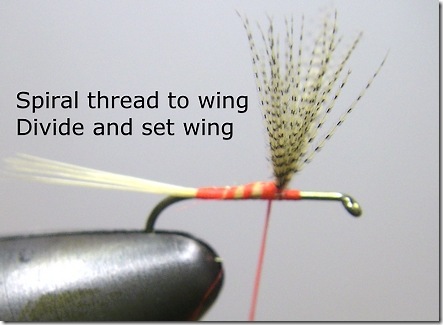
Taper preserved

Because the tail butts are uniform thickness and cover the entire body, the taper induced by our scissor cut has been preserved.

Note the spirals of thread as it was moved from tail mount to the base of the wing. That’s not 56 turns of thread, or even 24 – it’s exactly three. Also notice the tail as compared to the picture above; we’ve only wrapped three turns of thread since the anchor, but note how far towards top-dead-center the thread torque has moved it.

I’ve lifted the wings (consuming some horizontal shank) and divided them, the tie-off and head area remain untouched.

Light Cahill 6: A Mist of dubbing
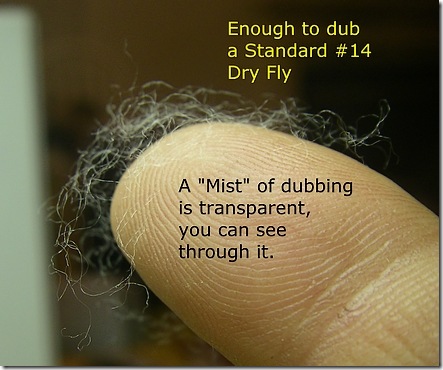
Mist of Dubbing

A mist of dubbing is transparent and even at its thickest point you can see right through it. It will lock onto thread like a fat kid on a candy bar, it will do anything you ask it without complaint, with little coaxing.

Your dry flies will be buoyant and float twice as long as there is so little water absorption, and they’ll dry with a flick or two of the rod. Beauty, with good physical properties to back your play.

Light Cahill 7: A mist on thread
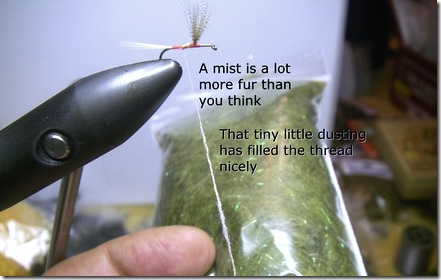
Mist on Thread

That’s the same small dusting you saw on Step 7 above. It doesn’t look so small anymore. I’ve switched to tan thread (which is what I use on the Light Cahill) so the thread color won’t overwhelm the dubbing I’ve added.

Note the tail, it is now top-dead-center … bloody miraculous.

Light Cahill 8: The final dubbed body
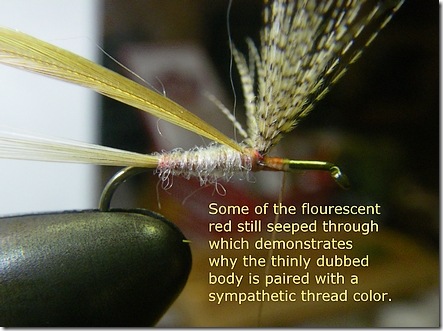
The dubbed body with hackle tied in

A bit of the tail anchor florescence has peaked through – partly because of my reluctance to cover absolutely all of it with tan thread. Thread is always your enemy even when you’re demonstrating what not to do.

The staggered tie off area and head are untouched. I’ll put 1/3 of the hackle behind the wing, 2/3rd’s in front. It’ll be “westernized” – we use a bit more hackle than our eastern brethren due to the brawling nature of our rivers.

Light Cahill 9: Tie off
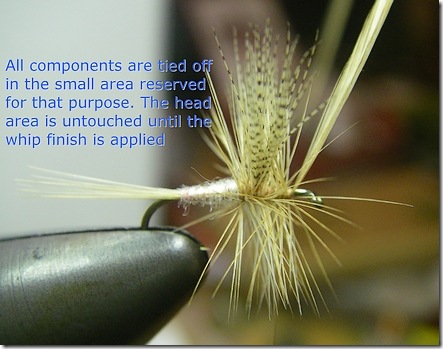
The tie-off area gets thread

The hackle has been applied and the reserved area for tieing off the final materials has been intruded upon. The head, which we planned since the bare hook shank, has its area yet untouched.

Light Cahill 10: The finished “westernized” Light Cahill
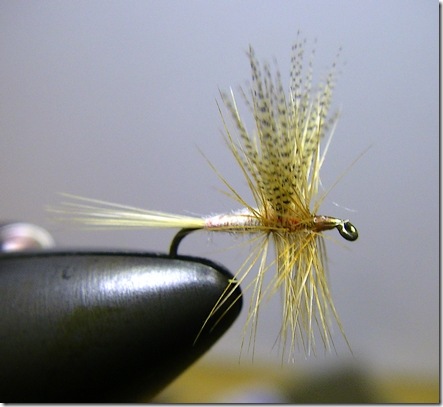
The Finished Light Cahill

The finished Light Cahill using most of the lessons we’ve described in the past three posts. This magnified version shows all my foibles – which I’ll gladly admit to while pretending I didn’t see you add it to your fly box.

I’ll do better on the next hundred dozen, honest.

Tags: Light Cahill, Catskill dry fly, small tapered head, fly tying tips, thread anchor, dubbing, tapered cut, tungsten fly tying scissors, beauty as perceived by anglers, fly box, hackle, vindictive fly tyer
Part 1 – Singlebarbed teaches the fundamentals of fly beauty, and insists you’re catching fishermen mostly

Fly tying is six weeks thinking of nothing but the fish, tying small stuff to smaller stuff, the shock and awe that all insects don’t suck blood or whine in your ear, the majesty of the first fish caught on your own fly, and the amazing riot of colors and animal parts coveted and purchased …

… and then it’s forty years of attempting to make your flies resemble someone else’s – validation not so much duped fish as successful copy of a book photo, or an appreciative comment from a fellow angler.

You start tying flies for fish – and wind up tying flies for fishermen.

It’s not a conscious decision, but aesthetics and beauty are as insidious in fly tying as they are in life.

The industry has always embraced beginners with great fervor, as they’re the source of a great deal of revenue. They need everything and a canny shop owner loves to host a class as it guarantees commerce. Fly fishing clubs love them as well. It’s a great way to be “hale fellows well met”, attract “lurkers” that don’t show for banquets and Beef au Jus’, and co-sponsor them with local shops happy to provide a small discount for students.

… and six weeks later you’re mounting that gleaming new vise to a table wishing you had someone to ask the hundred-thousand questions that occurred since your final lesson …

Magazines, books, and Youtube provide inspiration but spawn more questions than answers, and despite the fellow at the fly shop claiming “Cree” is nearly as good as Grizzly, your unimpugnable sources are gone and you’re left to figure it out … alone.

Intermediate and Advanced classes are few and far between, as there’s no agreement on what techniques or flies belong to either, there’s little retail traffic, and finding a master-instructor that has all the answers and is sober is more difficult in a club setting.

When offered they’re usually a three-part chain; beginner, intermediate, and advanced – and often filled with recent graduates of the beginner class, who’d be better served if they tied 5 or 6 thousand flies before stepping up the complexity.

If you’ve made it past the beginner class and resolved to master fly tying, knowing full well that further precision is largely vanity as the “well chewed fly” and its effectiveness has debunked taut, tight, and pretty…

… I’ve got nine steps for you to master if you want to catch fishermen.

The “Why” of it all

Refining your tying for the critical gaze of other fishermen will make your flies sturdier. All the painful lessons you’re about to learn are lost on fish, fish are stupid, lack artistic sense, and eat cigarette butts.

If you smoked you’d know this.

“Refinement” is a fancy word for discipline. Holding instincts in check and enduring someone else’s artificial sense of style, proportions, and method.

Beginning tiers lament the movement of materials on completed flies, loose tinsels, flopped over tails, and precarious hackle – and are heavy-handed with thread on all subsequent attempts. Reaching inside that glossy plate to give the author’s fly a twist will yield movement too, but it won’t unravel or fall apart – and yours might.

The difference between 30 years of fly tying and a recent initiate is about 8-9 fish. Even the best flies disintegrate and replacement is required.

In its day the flat tinsel body humbled most tiers. It’s not used as much presently but the lesson learned holds true for all wound body materials, doubly so if they’re shiny.

Dubbing bodies allows a tyer to add a little more or take a little off, but yarns and chenille don’t share that quality. They’re a constant diameter that shows every lump and foible of the materials underneath, and completely unforgiving.

Mastery of these materials is simple if you get to watch someone else do it. For chenille, downsize it one size and tie it in at the front and double wrap the body.

A double wrapped body of small chenille is the same size as a single wrap of medium, yet you can add taper, wrap it tighter, and tie it off with less thread than the larger size.

Flat tinsel and floss are identical. Wrap from the front of the fly backwards to the tail then wrap back up the body to the start. You’ll have a gleaming body absent gaps in the tinsel or “bubbles” – where overlapped tinsel pops out of the turn next to it leaving a small area of underbody and thread showing.

A large area to work with doesn’t make the task easier. Large trout streamers with their 6X long hook actually magnifies the floss or tinsel’s effect on the overall fly – as it’s much more visible. Working with floss requires you to cover your fingers as the sweat of your grip will immediately remove the shine or stain light colors.

Lead wire on nymphs and larger flies dictate the look of rest of the fly. A poor choice in placement or the inability to address the obvious lumps of where it starts and stops, cannot be corrected.

On trout nymphs the lead wire is the thorax – giving you a pronounced lump that ends the body and defines the wingcase. It should be positioned on the fly exactly where the thorax will occur – and the number of turns used should be the exact width of your planned thorax area.

…that’s right, planned. Flies don’t wind up with proper proportions by accident, and tail, body, thorax, and head are all mapped in your mind before thread touches the hook.

On larger flies lead wire may cover most of the shank, or it may be larger diameter, and no amount of thread or glue will keep it from rotating. Bind it as best you can and use the tail and body materials to plug the gap between shank and the rearmost end of the lead.

The mistake most make is not leaving enough room for the forward transition at the eye of the hook. All your materials will be spiraling off the lead coils and secured on the much thinner hook shank. Dubbing can be used to hide many sins, but wound materials like ribbing and chenille will always have trouble on that transition.

Positioning the thorax too close to the eye of the hook will yield a crowded eye – and worse – if a couple of turns of hackle need to be wound in that area to complete the fly. If the tie off area is still abrupt in definition hackle will flair outward away from the body due to the bulge – rather than close as it’s intended.

Lead placement dictates everything – including the hackle shape.

If it’s not dry fly hackle then it’s tied in by the tip and folded, then wound.

… and there’s some very good reasons for that unshakable rule …

Hackle is the most fragile component of any fly, dry or wet. The thin tip gripped by your pliers limits the amount of pressure you can use when hackle is wound around the hook shank. Tying in the tip means the stem gets thicker with every turn and you can apply more force when it’s wound palmer up the body – or used as a collar on nymphs and steelhead flies.

… and at the eye – where it’s tied off, the stem is thickest yet, perhaps enough to withstand being barked on a rock on a low backcast or torn off a tree limb on a misguided forward stroke.

The real value is the effect. Hackle fibers get longer as you move towards the butt of the feather. When winding collars with a folded hackle each turn is longer than the last. Longer fibers obscure the shorter fibers of earlier turns – giving the appearance that all the hackle is a perfect cone of exactly the same length.

It’s beauty were after, remember. Sound science is merely an accidental nicety in our quest to catch fishermen.

“Folding” a hackle is the act of tying it in my the tip and running a right angled object (like your scissors) up the stem to break the fiber’s back and make them slant backwards towards the rear of the fly. This process is shown in all the best fly tying books and is instantly recognizable on the fly itself.

Tying in your hackle by the butts and winding a nymph or steelhead fly’s collar will require you to wrap thread backward onto the hackle to get it to lay down, resulting in a ungainly head that’s got hackle color peeking through – and is prone to damage.

Putting it all together

We started with the least important beautification tips, working our way to the most important. Putting items 9, 8, and 7, together – let’s see how we can use them on a standard #6 Silver Hilton.

Silver Hilton 1: Lead Placement and Downsize

Silver Hilton

Do I use 10 turns of 2 amp lead wire or 20 turns of 1 amp?

Downsize: I opted for the smaller size as I could cover the body completely – guaranteeing the lead is uniform over the entire fly. No lumps or transitions to worry about and I squeezed in 5 extra turns of the smaller wire, making it heavier.

Silver Hilton 2: Gap fill

Silver Hilton 2

Lead is secured with three runs of 6/0 Olive thread (chosen so you can see it). It’s not going to prevent a vigorous twist between thumb and forefinger – but neither will 50 runs of thread. Thread is always your enemy, use what’s needed and nothing more.

Gap Fill: The teal tail is tied onto the hook shank leaving a transition I’ll address with subsequent materials. The balance of the tail material is trimmed at the rear of the lead, about a 1/4” of tie down/transition remains.

Silver Hilton 3: Gap Fill

Silver Hilton 3

Gap Fill: The oval silver tinsel follows the tail, tied in exactly the same spot and trimmed identically. The “gap” is slowly closing so the transition will be imperceptible on the body material.

Silver Hilton 4: Downsize and Double wrap

Silver Hilton 4

Downsize & Double Wrap: Rather than medium chenille I’m using fine velvet chenille. Regular chenille is just as good but I prefer the finer grained Vernille (velvet chenille) to regular rayon. It’s tied in front so I can make a double pass of the fly body; the first offers bulk, and the second will be drawn tightly over the first to give a smooth gap-free look.

Silver Hilton 5: Double wrap

Silver Hilton 5

Double Wrap: A nice plush body with a hint of taper, the result of gap fill and the second “finish” wrap of chenille. The second allows me to fill gaps and address contour, resulting in a “fisherman catching” look – and structural integrity.

Silver Hilton 6: Double wrap

Silver Hilton 6

Because of the fly body being a double wrap of chenille, note how the oval tinsel stays on top of the body versus digging into the material and being lost from view. The extra density of two layers means all subsequent materials will not vanish into the “grain” of the wound chenille.

Likely both fish and fishermen can appreciate that …

Silver Hilton 7: Tied in at the tip and folded

Silver Hilton 7

The hackle has been tied in at the tip and folded. I’ve drawn the right angle of my scissors towards me breaking the spine of each fiber and in so doing they’ll point back toward the tail of the fly naturally.

Silver Hilton 8: Folded hackle

Silver Hilton 8

Folded Hackle: The hackling is complete. Note how the hackle lays back over the fly naturally without being coaxed by 65 wraps of thread. In fact, where’d all that thread go?

Because I can “crank down” on the hackle after the first couple of turns, I’ve laid it exactly where I wanted it – covering the thread tie in area we saw in the previous picture. I’m about to start my whip finish and only two turns of thread are visible.

Silver Hilton 9: The final “fisherman catching Sumbitch”

Silver Hilton Final

The completed fly.

Tiny head. No gaps or foibles noticeable – and the eye is clean of cement and feather dander. It is a fisherman catching SOB, and your buddies will compliment you with great sincerity while palming all of them off your bench.

Small things that seem trivial, yet added together can make a huge difference in the way your flies look, last – and how they’re perceived by others. It’s of little consequence when running the fly through a riffle as only fish are a true test of what looks tasty and what doesn’t.

In the meantime, if you’ve just finished your six lessons of beginner class and are feeling your oats, you may want to commit these simple steps to memory.

Next Week: Three more pearls of wisdom as defined by hisself and his questionable wit…

Tags: Silver Hilton, lead wire, tapered fly body, folded hackle, Vernille, velvet chenille, Mustad 36890, teal flank, oval silver tinsel, beginner fly tying class, intermediate fly tying, advanced fly tying, flies that catch fishermen