There is a lot of confusion over Ice Dub and finding it in the wild. Years ago I wrote a piece on Meadowbrook Glitter’s Angelina fibers, and how they’ve since become Ice Dub. Since that time I have answered a lot of confused questions about the Angelina product and whether it is or isn’t what we know as Ice Dub.
I thought I might reiterate what it is you’re looking for and describe what it is you might purchase when looking for it … and how fraught with peril your purchase might be … and how best to fix it … which is a lot for a single post, but advanced fly tying simply ain’t for sissies.
What we are dealing with …
Meadowbrook Glitter makes many types of Angelina fibers. There are “straight”, “soft crimp”, “hot fix”, and several other flavors for which I don’t have a bonafide description or label. I will call them “small denier”, and “long straight.” All of these fibers are made from a thin polyester sheet sliced into tiny thin strips.
“Soft Crimp” Angelina is what we know as Ice Dub. It is a thin curly film soft to the touch and dubs onto thread fairly well. Soft Crimp Angelina has 15 denier wide fiber, whose filament is about two inches long, and is the only Angelina flavor that is Ice Dub.
“Straight” “Angelina is a similar width fiber to the soft crimp, but is NOT curly, is several inches longer than the crimped, and while it can be dubbed onto thread, is a little stiffer and less easy to dub than Soft Crimp. Straight Angelina is available in all the same colors as Soft Crimp, but Ice Dub has even more colors than Angelina, so Ice Dub has many custom colors unique to their product. Meadowbrook Glitter makes both the Soft Crimp and Straight fiber in about 27 colors, and Ice Dub has considerably more than that.
“Hot Fix” Angelina is a heat fusible fiber identical in appearance to straight Angelina, only the application of heat will make the fiber fuse into a mesh sheet or “bug wing” of iridescence. Simply drape fibers onto a clean surface in any pattern, lay a piece of paper over them, then pass a warm iron over the paper, Instant insect wings.
Why it’s a problem …
Angelina fibers were originally made for the glitter business, chopped into tiny fragments so folks could toss them in the air while inebriated. Angelina fibers are now sold to the millinery and yarn business, and that industry uses most of these fibers interchangeably, so they don’t care about the differences as much. Angelina fibers are woven into spun yarns to add flash and sparkle, and only the heat fusible fibers are of concern to the yarn crowd, as they don’t want their garments melting accidentally.
A fly tier intent on buying “Ice Dub” by the ounce can search for Soft Crimp Angelina on the Internet, and will likely get a mix of Angelina fibers, much of it the wrong stuff. The yarn or spinning vendor lists their Angelina fibers incorrectly, or without knowing which are what, and you wind up buying packages of the “straight” fiber Angelina rather than the Soft Crimp. The yarn vendor doesn’t seem to care about straight versus crimped, and you get a confusing mix of incorrect products when ordering online.
This is the source of the confusion, vendors selling straight fibers when you’re looking for soft crimp, and the product you get is close … but not exact.
As a test I ordered from five different yarn stores and recieved all three types under the “soft crimp” label. That means “caveat emptor” … and I cannot fix this for you.
The Good News being that while the straight and hot fix fibers are only slightly harder to dub, they are still very usable in fly tying and your money will not be wasted.
There are two kinds of fly tiers, those that go the extra mile, and those that buy packaged crap
While I can’t fix this issue of vendor mislabeling, I can teach you how to make Lemonade from Lemons, with the aid of a little knowledge and Science …
Think Taco Bell and it’s products served by high school kids. Any new product they debut will make use of existing Taco Bell products and processes, rather than something completely new. They’ll slap beans onto a taco shell, add a soft flour taco cover and call the Artery Hardening result a “Chalupa” … They already had the soft flour taco, beans, and crispy shell, on other products, as well as the process to cook and wrap them in greasy waxed paper …
The same is likely true of Meadowbrook Glitter, all their fibers stem from the same thin polyester sheets, so there has to be some simple process to convert straight to crimped, as everything but the shape is the same. The “hot fix” flavor suggests temperature modification may be the answer.
Enter Science.
Polyester has a melt point of 220 degrees fahrenheit, at that temperature solid polyester will turn into a liquid. At temperatures less than 220F, polyester will shrink, twist, and curl, changing both its form and texture.
Hot water from the tap is about 100F. All we need do is figure out what temperature will turn straight Angelina into something more resembling Soft Crimp. In addition, the heat fusible form of Angelina is an obvious special case, as it’s likely something has been added to its base polyester to melt slightly with warm iron use.
Doctor Frankenstein I presume …
Dyeing polyester is a lot of fun, and being no stranger to the process as well as owning several pounds of soft crimp Angelina, I figured I could add to my available colors of Ice Dub at the same time I deduced what the heat properties were on the baseline Angelina product.
Case 1: Heat fusible Angelina. Heat fusible Angelina begins to lose its straightness at around 130F to 140F. Hot tap water is about 100F, so this is only slightly hotter than tap water. At these temperatures the width of each fiber and its straightness are both comprimised, and the result is essentially a better form of Ice Dub, with a thinner filament size.
Case 2: Standard Angelina (straight). The straight Angelina fibers that are NOT heat fusible have a higher deformation temperature, around 155F to 165F. At these temperatures the same deformation of fiber width and straightness occur, making standard straight Angelina into more of an Ice Dub flavor.
Note: If you wish to do this on your own, you need to have a good thermometer and remove the Angelina from the water bath frequently to check the fibers for the start of the malformation process. I initially removed the material after one minute of exposure to an increase of 10 degrees fahrenheit. In this manner I could determine a roughly ten degree window where the material began to change shape. Leaving the material in the bath longer, or increasing the temperature more can increase the amount of shrinkage and deformation of the Angelina fiber. So you need to assume you will destroy some learning how to shape/dye this material.
Hell, you destroy materials simply dyeing them the wrong color, and as I can buy a quarter ounce of Angelina for the price of one teensy pack of Ice Dub, we’ll have plenty of mistakes and unsusable mats, and we’ll make plenty of things you’ll want to make again.
Reproduce the Range of Outcomes
You know what Ice Dub looks and feels like. You’ve got a package of Angelina so you know its characteristics, now pinch off a dab and toss it in a pot of hot water equipped with a liquid or candy thermometer.
Every ten degrees of temperature increase over 120F you should remove the materials and check for changes. Once you determine the curl and shrink temperature, destroy some by leaving it for too long. This will show you how much change is possible with the water temperature changes, allowing you to reproduce the effect again.
Keep in mind you might not know what the vendor sent you (he might not know either) so record the temperatures and try the process on another sample, if you bought more than one color. If you get one package curling at a lower temperature, chances are you have a hot fusible pack, so make a few bug wings to see what they look like.
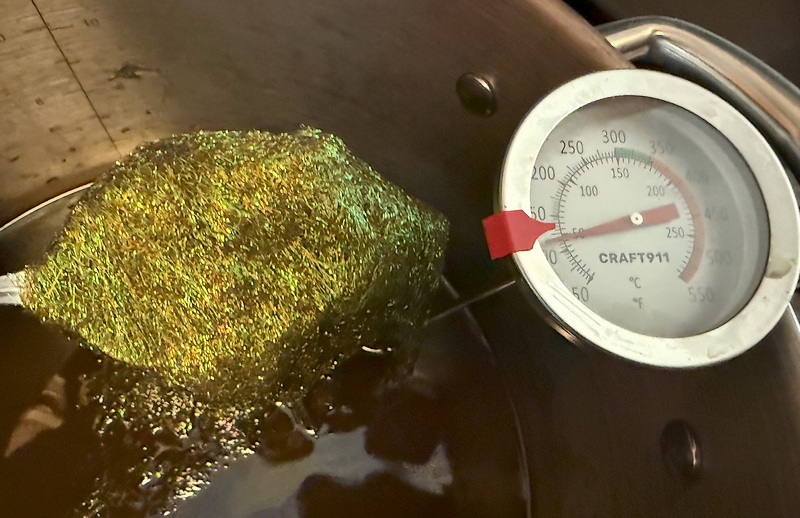
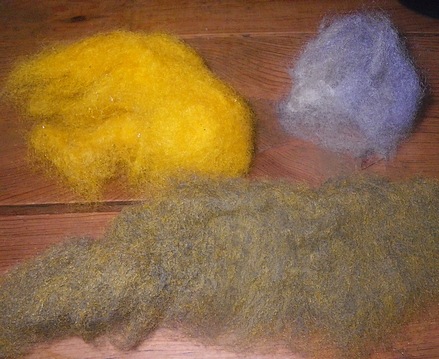
The above picture shows the “default Green” color that emerges first when you dye the Angelina fiber. This is “Crystilina Aurora” color and the opalescent refractions assist in making the result look green. This is “white” Crystilina Aurora dyed with Jacquard Brown iDye. The brown is beginning to take, but more time in the dye bath will be needed to get a dark brown.
Dyeing polyester requires a different type of dye
Polyester is a synthetic fiber, so you need a synthetic dye to color it correctly. Synthetic dyes typically will not dye protein, so you can dip your hand in the dye with no ill effect, other than suffering horribly from scalding water burns.
Spilling it on formica is a different issue, as most kitchen formica is synthetic, and every dollop, slurpage, or drip may dye your kitchen floor vividly.
RIT makes a synthetic dye called “DyeMore” for use on synthetic fabrics including Polyester. The Jacquard company makes “Idye Poly” for synthetics which will also dye Polyester. As Jacquard also makes an Idye for natural fibers, make sure you order the correct product. Jacquard iDye contains a packet of gel fixative to set the color, and the RIT DyeMore requires no additional fixative to set the color permanently.
The instructions on the labels of these dyes are a bit misleading, as they are designed for pounds of cloth, not tiny fragments of polyester. Often the directions will insist the dye bath be closer to 200F than the 120-160F range I described. Ignore the directions and test the process using a pinch or two of the Angelina material, testing shrinkage, curling, and color, before committing your entire purchase to the dye pot. THe physics are undeniable, as dumping several pounds of wet cloth into the pot is going to lower the temperature 20-30 degrees, whereas your little packet of Angelina will not have that cooling affect, and the small pinch of material will probably liquify into an unusable gum.
I tested both RIT DyeMore and the Jacquard IDye Poly and had great results with both. One of the unique things about polyester is that the initial color picked up by the Angelina is always a Peacock Green, even if you’re dyeing something Tan. I’m sure there’s an explanation for this phenomenon, simply leave the material in the pot longer and the proper dye color will eventually show.
I always yank some out of the pot if the initial green color is particularly fetching, leaving the remainder to acquire the actual color of the dye. This gives me two colors for the price of one.
Angelina has several white colors suitable for dyeing, each with a different iridescent or opalescent highlight. My favorite is Soft Crimp Angelina in the “Crystilina Aurora” color. This highlight is like shattered abalone shell and contains more colors than the other highlights, hence my favorite.
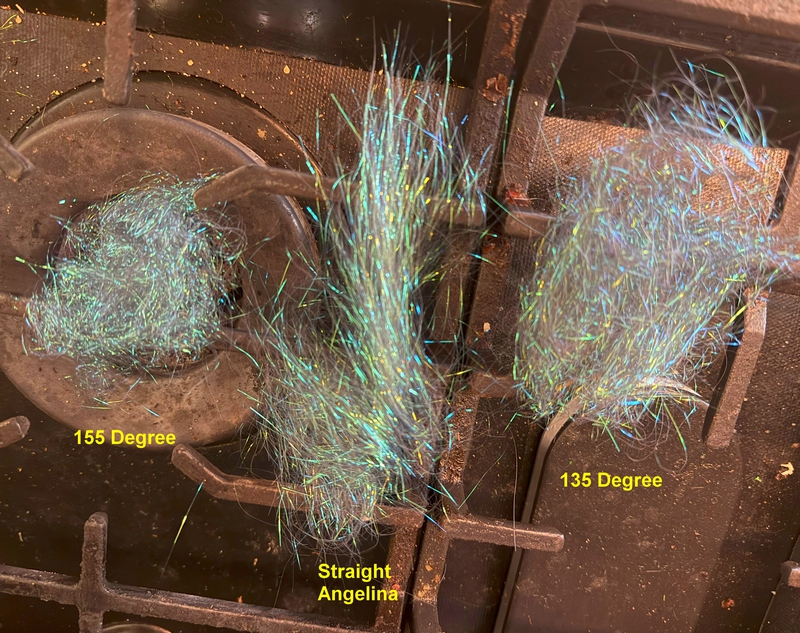
The above image shows the deformation of the straight Angelina fibers when exposed to hot water. The original sample is in the center, and the 155 Degree was a several minute exposure to 155F hot water. Likewise for the 135F specimen at right. You will have to watch carefully to get the right amount of change in your straight or hot fix Angelina, and as water temperature can differ at altitude you will probably require several attempts before you get what you like. Experiment with small pinches of the material before submerging your entire stash. Remember that Ice Dub has a shorter filament length than the Soft Crimp Angelina, so depending on what the vendor sold you there may be small differences still. Based on the above sample and temperatures, it appears this is “straight” Angelina, not the heat fusible or soft crimp versions.
As most of you are new to dyeing understand that you’ll need to approach this systematically. Your results will vary from mine due to simple things like size of pot, amount of water, amount of dye used, so don’t expect perfection on the first try. In my trials I used a full container of the dye, either Jacquard or RIT, mixed with about 4 inches of water in a large stew pot. The large pot allows the attachment of the candy thermometer without getting in the way of stirring the mix.
To make it easy on yourself, heat the liquid to the desired temperature and turn off the burner. This will allow you to soak materials for several minutes without scorching or destroying them suddenly. Once you’re certain of the time and temperature exposures you can get bolder in your efforts.
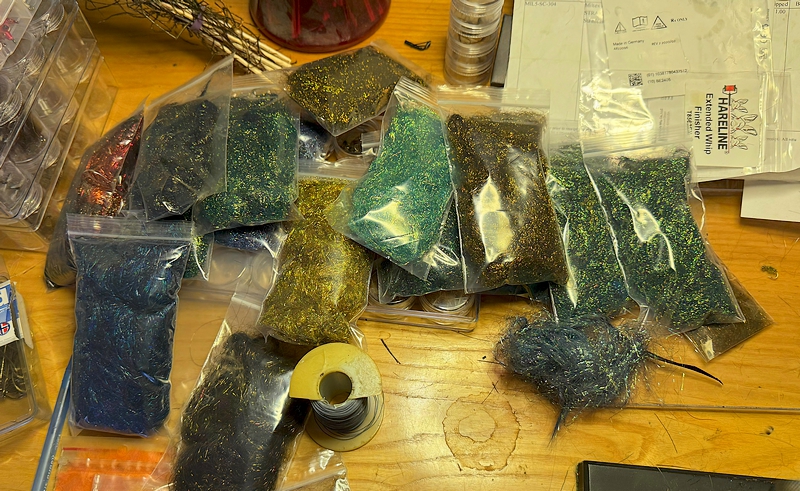
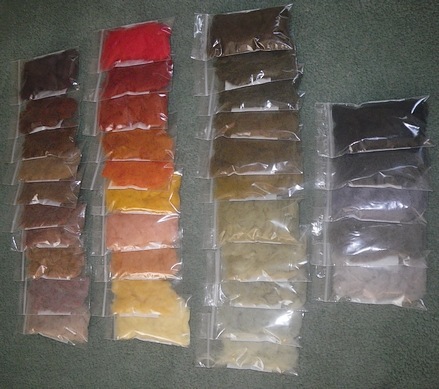
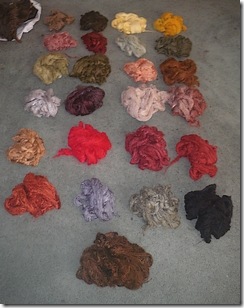
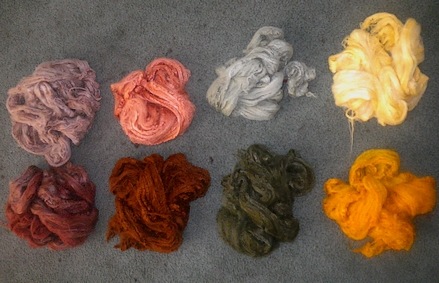
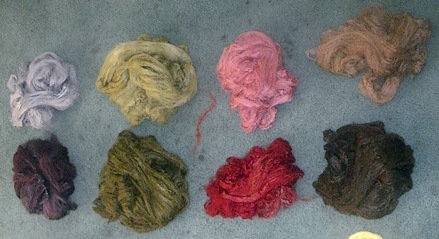
The above shows the results of testing both dyes and fibers. RIT DyeMore Sandstone, Gunmetal, Jacquard Green, Silver Gray, and Brown. Several of the greens shown are me pulling some out before the actual color takes over. Almost all the synthetic dyes yield a green on the initial dip with the color showing up only after some minutes in the bath. The Gunmetal color took nearly 15 minutes to show correctly, and I had to reheat the dye bath a couple times to ensure it remained near the desired temperature range.
With products as delicate as Angelina it is really easy to destroy them in the dye bath, so turn the heat off where possible to ensure you do not scorch the product or weaken it structurally.
In Summary, Angelina fibers are sold by many vendors without regard to whether they are soft crimp, straight, or heat fusible, and its possible to recieve any of these flavors when ordering the Soft Crimp flavor online, just as I did. Angelina will curl and shrink under heat, so if the “Soft Crimp Angelina” shows up and is the straight or heat fusible version, you can make it into a better version of itself with a dye pot and the appropriate dyes – or simply hot water.



 I figure my sudden foray into dubbing was like McDonald’s adding salads to an otherwise lard-based menu. How the lights abruptly dimmed and the sudden demand for lettuce left most of the country rediscovering Broccoli for their evening meal.

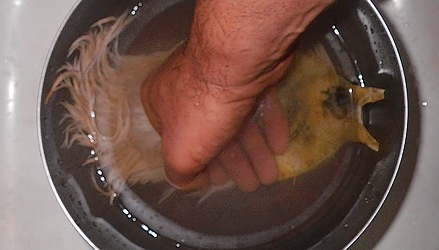
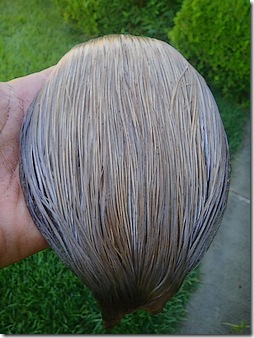 We’ll watch the top half of the hackles to monitor how deep the color will be before pulling the cape from the bath. The webby lower feather absorbs dye greedily and will darken much faster than the harder, shiny tips, often causing us to pull the cape from the dye prematurely. Hackle tips take dye slower, and we’ll pull the neck when the top half of the feather is the color needed.
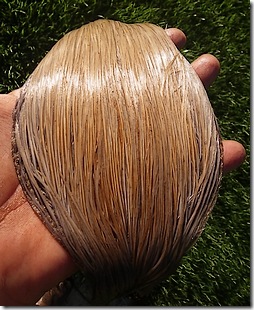 The edges of the cape show the “clean Gray” color – largely absent blue or purplish tinges common to gray or black dye. The ginger center is assisted by the gray to form a really nice tint of honey or bronze dun.
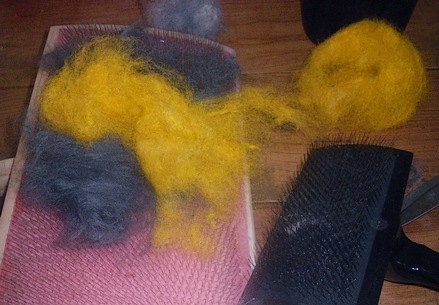
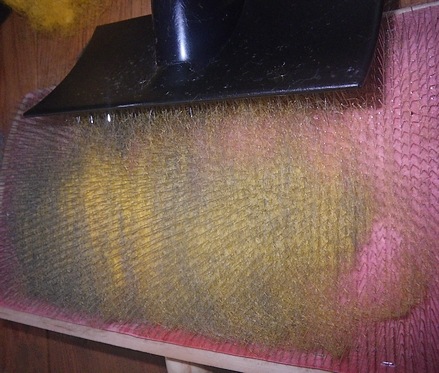
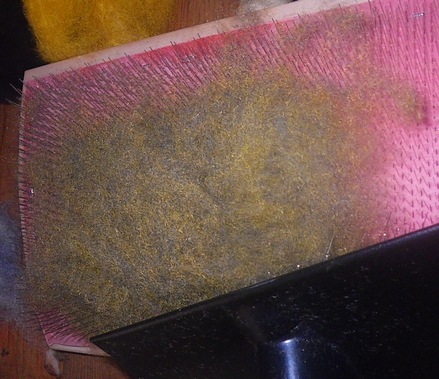
 Wet dyeing is a mixture of chance and things we can bend to our will, “dry dyeing” allows us to micro-manage color and turn lemons into lemonade.
 Call me a slow learner, but the aerial display of the fourth will have nothing on the fireworks tonight …
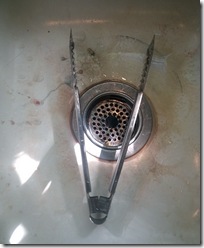 As no points are scored for being banned from the kitchen, it’s important that the how to make a complete mess is tempered with how to extricate yourself from a screaming and angry woman.
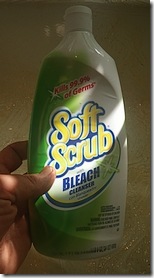 At right is the Righter of Kitchen Wrongs, cleanses fingerprints, restores the Pristine to the porcelain, and is capable of making you innocent of all imagined crimes.