The “Beginner to Better” posts relay small tips used by experienced or commercial tyers to improve speed, quality, or simply enumerate some of the physics behind our tying that beginners are unaware of until much later in their skill progression. Most tend to be overlooked in the Youtube narrations, as even video footage cannot convey physics or the rationale behind the inclusion or omission of a step.
Big Unwieldy heads caused by a dependance on beaded flies
The dominance of beaded flies is hamstringing a lot of new fly tiers, as the presence of a bead eliminates the portion of the fly that would have been the tie off points for the last few materials, and the formation of a slender, graceful head.
Beads mask the finesse of the fly’s finish, and turn it into a thread lump – often as tall or taller than the bead itself. Tiers no longer plan the fly’s finish, they simply lump everything in one spot along with seventy five turns of thread. Gone is the learned thread discipline, keeping turns to the minimum, and with its departure are the “feathered” tie off points that spread the fly finish and thread over a larger area, rather than simply focusing everything in the gap behind the bead.
Instead of ample room and a gentle slope, whip finishes are crammed on top of the seventy turns already present, and the knot can tighten poorly, prove unstable, or the thread can snap due to a poor draw. We’ll cover each eventuality below.
Whip Finish Physics
Whip finishes are a thread running the length of the knot, covered by multiple turns of more thread, that when tightened, cover that tag end when the thread is cut. Of vital importance, is to only make those turns of thread in one direction, down the hook towards the eye. In this manner the thread is covered by the subsequent turns and the knot draws cleanly and tightens properly.
Should you make a sloppy knot, where the first three turns move towards the eye, and the subsequent three turns move away from the eye, the underlying thread will have an “S” curve in it and the knot will tighten less well. If you are using excessive thread, eight or nine turns in your whip finish, and you spray those all over, up and down the fly, the knot will have multiple “S” turns in the underlying thread, and will likely not draw tight at all – or the thread will snap when you attempt to tighten the knot.
Rule 1: Learn to tie whip finishes with the same number of turns of thread.
Rule 2: Whip finishes must start at the top of the head and move in one direction only, towards the eye of the hook. On a beaded fly, the knot starts at the point furthest from the bead and moves towards the bead with each subsequent turn.
Typically I use a four turn whip finish on everything. If the head is large and exposed, like a big saltwater fly, I might take a few more turns, but will adhere to the “each turn closer to the eye” requirement.
Thread Physics
Thread also influences the whip finish in a variety of ways. Fine threads, 6/0 and smaller, are weak and more susceptible to thread ailments. Besides the hammy handed fly tier, the biggest ailments for thread are age and spin.
Age:
Nylon threads age well if kept in the proper conditions, and age really poorly if you don’t keep them properly. The nemisis of nylon is sunlight, so if you are in the habit of putting your extra thread spool onto a dowel on your tool caddy, which along with your tying desk, is near the window … you can expect your fine threads to die a rapid and horrible death.
Nylon threads must be kept in a drawer or opaque container. They will last forever under those conditions. I have several hundred spools of 6/0 that are nearly forty years old, and show no signs of deterioration due to my keeping them out of sunlight and excessive heat.
Spin:
If you spin your bobbin excessively you will turn your single strand of nylon thread into a round thread. As your bobbin hangs under the fly while tying it will spin in different directions due to your striking it with your hands or the materials you’re manipulating. If your bobbin spins excessively in one direction (without being allowed to spin opposite) you could have a slightly weaker thread due to the constriction of the thread induced by the spin.
Should you immediately spray nine turns of a whip finish all over the head of your fly, the weakness will show due to the increased resistance of multiple “S” turns trapped in the knot, and the weakened thread can snap when tightened.
Letting the bobbin “rest” just prior to the whip finish, will allow it spin to equilibrium, removing the tightness of weave due to your spinning the tool for some purpose, like a dubbed loop or brush.

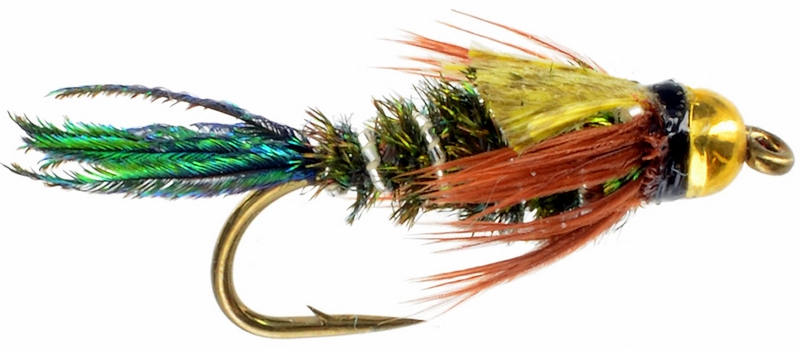
The above ZugBug illustrates the overly large head where the thread head actually protrudes onto the bead. While the fly is fine proportionally, and will fish wonderfully, the combination of tungsten beads (and whether this is a slotted or countersunk bead), will have the fly bouncing along the bottom making contact with the rocks and timbers that make up the creek bed.
If the bead rides slightly offcenter, which can happen with slotted beads, the fly may be bouncing merrily down the creek upside down, and the thread being “taller” than the bead … the knot will be making contact with all the boulders, and not the bead. Heavily weighted flies take lots of abuse and the overly large whip finish area will be a liability due to the damage that area will recieve.
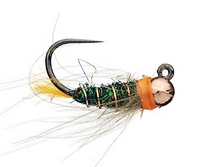
Rule 3: Beaded flies are fine, when tying them ensure your whip finish is smaller than the bead, so the bead absorbs all the instream impacts and not the knot area.

