In last Monday’s post we described the distribution wrap, a method to make feathers that were oversized act as hackle on smaller hooks. That post described how a single segment of even flank feather could be spun around the shank as hackle.
One of the more popular flies that Cal originated was the Bird’s Nest, where he’d use Tintex Maple Sugar dye to color heavily barred teal flank – and then use a modified distribution wrap to use feathers whose tips were crooked but whose sides were even.
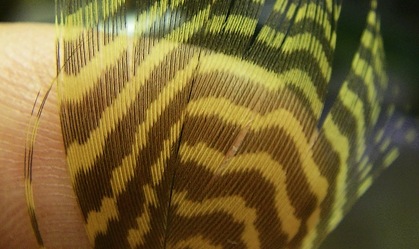
The above is a reference color from a batch of teal flank that Cal dyed for me. Tintex “Maple Sugar” is no longer made but the color can be reproduced with a good warm amber or imitation wood duck dye.
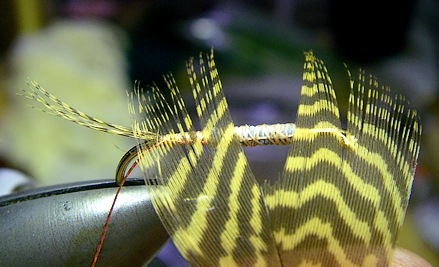
Clip the tip and center stem of the feather and mount that fragment as the tail. The width of the sides sections determine whether the fly is lightly or heavily hackled. For the hook shown (#8) you will need about 3/8” segments on either side – about half of what’s shown.
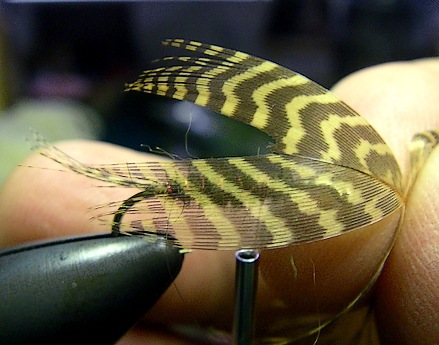
The front hackle should extend half way down the tail. This is a reference measurement before clamping the near side of the feather to the hook shank with my thumb (to freeze the movement).
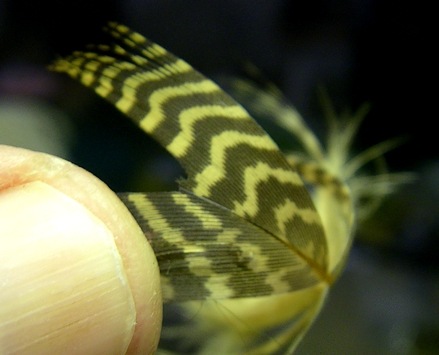
Left thumb clamps the fibers to the hook shank to prevent movement. The left forefinger will come down on the far side clump and pinch it to the far side of the fly.
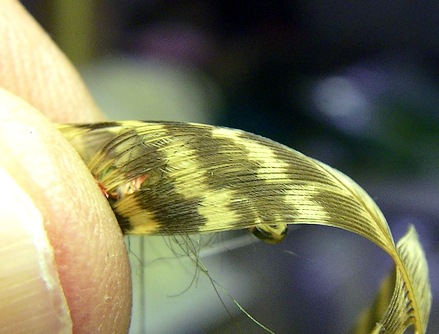
Now that both segments are measured and secured with finger pressure, bring the thread up to roll them around the shank and even out the fibers.
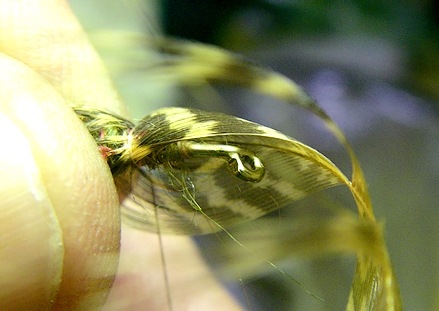
The thread is shown distributing the feathers. The near side clump becomes the top half of the fly, the far side clump wraps the fibers around the belly of the fly.
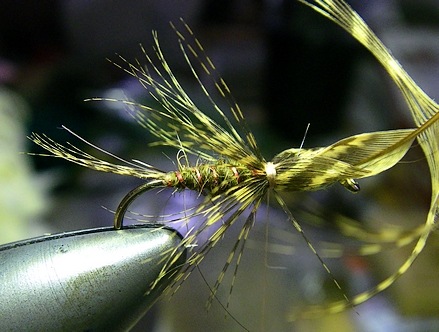
The hackle collar is anchored. Like the original distribution wrap you can wind back towards the body to redistribute the fibers any way you like. Clip off the remainder of the feather once you’ve finalized the hackle placement.
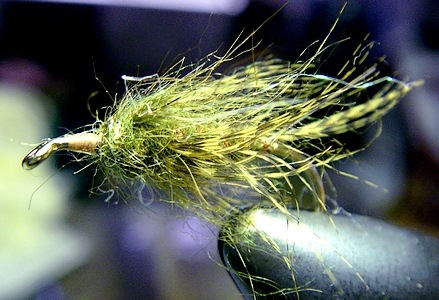
The completed #8 Olive Bird’s Nest. Cal preferred the old Mustad 7957BX hook which was 1X long, 1X heavy, forged model Perfect bend.
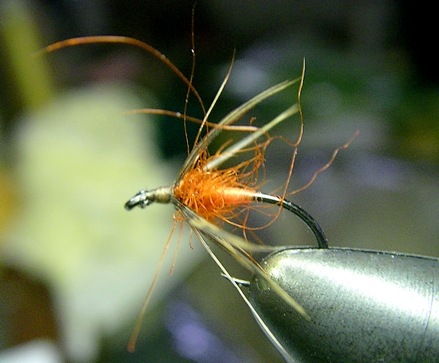
Here’s the same wrap done on a #14 Woodcock & Orange. A collaborative effort; seal provided by [Unknown], Woodcock arrived at Christmas – compliments of the Roughfisher – and glue lump assisted by a holiday sugar rush coupled with unsteady hands.
For Monty Montana.
Tags: Woodcock, seal fur, maple sugar Tintex, teal flank, Cal Bird, Bird’s Nest, soft hackle, Roughfisher.com, Christmas sugar rush, distribution wrap

Thanks again, most helpful. If I was only allowed to fish one fly, it would be a Bird’s Nest.
Questions:
Do you usually wrap lead for Bird’s Nest or just on larger ones?
How do you finish the fly? Dubbing loop?
TIA
Pingback: Fly Tying: The "Distribution Wrap" : Avid Fishing
As you know the Bird’s Nest is one of those designs that represents anything, looks like everything, and imitates nothing.
I tie them both weighted and unweighted. The weighted version is a superb searching pattern when probing pocket water or “high sticking” in faster flows. The unweighted version works well as an emerger pattern is either fast or slow water.
When I was first introduced to them by Cal he was tying both a giant stonefly nymph (weighted) in dark brown, as well as the natural grey and spectral variant. Most of them were weighted.
I posted the spectral version here about a year ago.
The fly is finished by intentionally overloading the thread with dubbing so that it is loosely bound. After wrapping the oversized head use Velcro to comb the fur off the thread and back over the hackle. All of Cal’s Bird’s Nests have a combed fur transition between head and hackle – neatly blending the two as shown in the fly above.
I use a thin dowel that I’ve wrapped with adhesive backed male Velcro – the small diameter allows me to get in close and rough up the head.
Hi Keith,
Another great picking out tool is a barbed broach that dentists use when doing a root canal.
I ended up with a LOT of Cal’s fly tying materials. Tons of teal flank, lots dyed and lots more natural late season highly marked teal.
Don Labbe
Don Labbe, been a long time. I’ve heard about that tool but am always in such a rush to escape the Dentist’s chair that I forget to ask for one…
Nothing strikes fear into a fellow than the high pitched whine of the drill.
HI Don,
Nice to hear you are still around. If you come to Hamilton Montana stop in for a visit.
Lots of old days Fenwick school memories.
Dave
Hi Dave,
I will probably be in Hamilton for a couple of days in July. I usually stop and see Chuck Stranahan. I still have the two Ruana Knives that you sold me at the Santa Rosa Show many years ago.
I will call you.
Don