The next time the wife complains of gray hair or dark roots you can leap to your feet and assist. Fiddling with Madam’s hair being a case of “come back with your shield, or on it” – so you may want to practice a wee bit before restoring her lost youth …
Dyeing materials can be the easiest thing you’ve ever attempted, but it can also be the end of your relationship and the complete destruction of considerable high quality tying materials.
Despite all the complexity, coloration can be broken down into two real requirements, the first is easy – I need some red hackle. The second is incredibly difficult – I need some more of the same color.
Dyeing a primary color is easy. Buy the dye in the color you need, follow the labeled instructions, add fixative, and dry the mess out. Matching a color is much more difficult. The fellow that made it may have used a different vendor for his dye, dipped it for an unknown length of time, and you’ve got to reverse engineer that color back out of your pot – which is not trivial.
The Big Two:
For animal parts, furs, feathers, hides, and anything else natural (except plant fiber), you can use the commonplace dyes available in your supermarket, like powdered or liquid RIT – or you can use coal tar dyes – also known as “acid” or “protein dyes.
Each has its preferred fixative, RIT uses table salt – and protein dyes use any weak solution of acid. Muriatic and Acetic acid are the most common fixatives, you know them as white vinegar (5% solution of Acetic acid), and Muriatic is (a 10% solution of Hydrochloric) sold to properly PH your swimming pool. Both are readily available and cheap.
A whiff of Muriatic is most memorable, the inhale starts and the body instantly overrides the mind. If you don’t already have a swimming pool (and don’t care for noxious chemicals) stick with the plain white vinegar.
Each dye vendor has a completely different range of colors and compounds used to make them, which can add some unneccesary complexity when mixing and matching. It’s best to pick one as the source of all your colors, relying on a combination of written notes and familiarity with his colors to breed consistency quickly.
I’ve recently changed to Pro Chemical & Dye as my protein source. I can buy dye in pounds or ounces, and the prices vary by color. If you remember your history books, different colors are the result of different rare earths and minerals, some being more expensive than others like Cobalt, which is why their pricing is disjoint.
… and the range can be significant. Coral Pink is $2.40 per ounce, and Yellow is $9.00 an ounce. They also have a full range of odd fixatives, dyes for synthetic fibers, instructions on use, and a great complement of detergents and degreasers.
RIT is somewhat self explanatory. You get what the supermarket or craft store stocks. Most salt fixed dyes recommend non-Iodized salt, but they plainly state that table salt works just fine.
The Strong and the Weak
Each of these types of dye have strong and weak points – and rules that you must follow religiously.
Rule #1: Salt-fixed dyes (RIT, Tintex) should only be used for earthen or pastel colors – never used to make bright or vibrant color.
There’s good reason for the above. RIT is a weak fabric dye and salt isn’t much of a fixative. If you think of the molecular level, the pigment has to “stick” to the filaments you’re dyeing, and the fixative is largely there to “score” the fibers and let the dye attach itself permanently.
Salt is really quite toxic in high concentrations so it acts like an acid, it’s just not a very good one.
Tan, Light Brown, Pale Yellow, imitation Wood Duck, gray, light Olive – any of the lighter shades of natural colors will allow RIT to do a serviceable job. It’s quite capable of dark colors as well – but stick to the Brown’s, Yellow’s, some Olives, and the warm end of the spectrum.
It also helps to use pure white materials when using RIT as it lacks the muscle to overpower tinted or off-white materials. In more advanced processes we can use this to our advantage, as in the Bronze Blue Dun neck -which is largely medium gray with a brown tint.
Rule #2: Bright, vibrant, or fluorescent, should always be Protein dyes.
Largely for the reasons stated above. Weak solutions of acid can better penetrate fibers and therefore deposit more pigment. If you’re after the steelhead colors; Purple, Red, Orange, and Green, and you need them vivid – stick to the protein flavor.
The Hidden Color Story
Rule #3: The color on the package is called a “reference color.”
This is where most of you will make the first hundred dollar mistake. You’ll dye a little rabbit fur or marabou and have some success. Emboldened, you’ll reach for an immaculate #1 Whiting Cream neck and match it with a medium Gray dye …
… and tears are the result.
The package is labeled with one of the many possible colors you may get. It’s not the color achieved by flinging the entire box into the water followed by a shovel-full of salt.
In my experience the reference color, that displayed on the packaging, is about halfway down the possible spectrum. That’s why your Whiting neck is now a rare color of soot…
Rule #4: Meathead, Read the Goddamn label.
RIT dyes plainly state, “this approximates the color achieved when adding one pound of fabric to the dye bath.” As your precious $75 is now soot-black, it’s your own damn fault.
Think about the weight of the material you’re about to dye and contrast that to the “one pound of fabric” that small package is intended to color. Adding a single box (or bottle) to the pot is about 6 times too much dye, giving you four seconds where the color was acceptable, and you missed it and it’s enroute to Ebony.
Let’s blacken Mama’s Kitchen shall we?
As the principal cook and bottle washer I’m allowed special dispensation in my kitchen – and can extricate myself from Hell’s fiery grip with the next gourmet meal…
If you aren’t similarly situated then you’ll just have to be cleaner than most.
All dyeing should be done in porcelain lined pots or stainless steel. There’s plenty of sour, odiferous, and caustic elements you’ll be juggling – so you’ll be buying these pots rather than using Mama’s.
You’ll need wooden spoons, Barbeque tongs, a Chinese deep fry strainer, and perhaps later – a candy thermometer. Most of this stuff can be scored at garage sales, so while walking the dog keep your eyes peeled. The above links are reference only, not a recommendation.
The deep fry strainer is for loose fur and feathers. You could also use a permeable bag of some sort – but this is how you’ll remove all the individual items from the dye bath. Tongs are needed for the larger single pieces – like chicken necks and saddles, or chunks of dyed hides. Remember all this stuff will be hot, so try to get wooden handles on everything.
A candy thermometer is needed for synthetics mostly. Most of them melt over a certain temperature, so you’ll need to constantly adjust flame to avoid exceeding the temp listed in the material data sheet.
Many vendors provide material data sheets on their web sites, and you can look up the melt point on a yarn or synthetic fabric easily. As most of the synthetics in fly shops are “super secret” – stolen from another industry and relabeled … well, good luck.
My entire kit cost me about nine dollars, as I’m the Scourge of the local Goodwill franchise.
You’ll use plenty of paper towels, a little dish detergent, and you’ll want hand sponges to mop up the slurps and spills, so lay in a different color than you use around dishes and food.
Rule #5: Hide all this from your spouse. If she sees all those cleaning products she’ll take it as proof that “love can change him” – so she’ll redouble her efforts after she recovers from her faint …
The Mark of the Professional is not success, it’s pink fingers
I’m going to leave the simple colors for your experimentation and head straight for the difficult and frustrating. We’re going to attempt the dreaded, “Lemon dyed Wood Duck” with only the Medium Bronze Blue Dun killing more quality feathers …
The Color Theory Component: Lemon Wood Duck can actually be dyed more than one way which shouldn’t be too surprising. Complex colors offer multiple paths to a single shade.
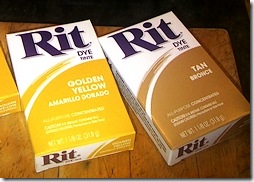 As Lemon Wood Duck is a tan/yellow tint we can start with tan and add yellow, or start with yellow and add tan. Pretty simple sounding, but dye concentration and timing are still wild cards.
I’ve selected RIT for the task. RIT does good pastels and earth tones, and it’ll allow you to put the “death rattle” in your relationship if you wish to follow along.
I chose Golden Yellow as there’s a hint of amber to some flank feathers, and a hint of orange is in the dye to assist me in that effect.
Feather Preparation: I’ve got a Blue Winged Teal and Gadwall mix left from last season. Both have the beautiful dark markings I like, and as a bonus I can use these feathers to make Bird’s Nest’s as well.
Waterfowl are one of the hideous feathers to dye. They’re full of grit, blood, and natural oils, and should be thoroughly soaked to get them cleansed and waterlogged. (I’ll cover the water logged component in the next installment when we do animal fur)
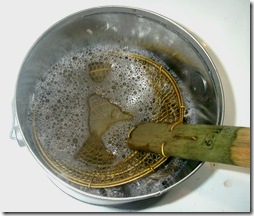 Prepare a bowl deep enough to get the feathers submerged using cold water and about half a teaspoon of regular dish detergent.
For added realism you can use Lemon Scented …
Once you given the feathers a vigorous wash (evidenced by the detergent bubbles at left) lay the deep fry strainer over them and let steep. The more water we can soak into the feathers the better.
After about 30 minutes of soaking rinse the feathers clean with about three passes of clean water.
Now we’re ready to get dirty.
In your porcelain pot add enough water to cover the amount of feathers you’ll be dyeing. You’ll want enough to keep them underwater as much as is possible.
Get the water hot enough so there’s plenty of steam coming off yet no evidence of boil. Set your flame on low from here on.
Drain the water from the feather soaking bowl and refill it with hot water from the tap. This ensures the feathers are hot when moved into the dye pot and reduces any shock to them caused by the move from cold to red hot.
Do not drain the feather water, we’ll pull them out of the water and plop them straight into the pot completely soaked.
Both writing and dyeing proves Less is More
We’re not dyeing a solid color, rather it’s more of a tint. We’ll use a “less is more” approach identical to the coffee brewed at your workplace. We’ll start with a woefully inadequate amount of coffee dye and gradually strengthen it to what’s needed. It allows us pinpoint control over the mixture because too little dye won’t color anything – and more importantly, it won’t color anything quickly.
Your starting amounts are dependent on the amount of feathers being dyed and the volume of water used. As you are likely doing a different amount start stingy, add more as I will.
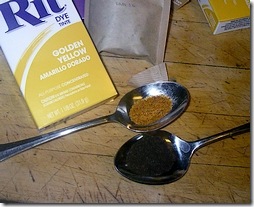 I’m starting with a tiny amount, one teaspoon of powdered RIT tan, and one of the Golden Yellow.
Mix the colors in your water and add about 1/2 cup salt as fixative, swirl until everything has dissolved cleanly. The dye bath is weak so chances are you can still see the bottom of the pot.
With the deep fry strainer, remove all the feathers from the soaking bowl and get them into the dye bath. As the feathers are pre-heated the tips won’t curl when the hot water hits them.
Pick a good reference point, and consider the Physics
The softest material of the feather will pick up the dye first, and the Physics of wet feathers means they’ll be two to three shades darker when wet than when they’re dry.
I’ll watch the duck “marabou” at the base of each feather as my initial color indicator as it will absorb color before any other element of the feather. This will be my clue that the feather portion is starting to take on color.
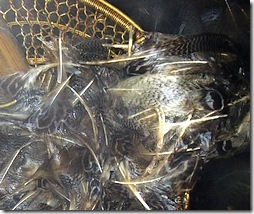 I’ll shift the color watch to the feather tips once I see the marabou start to darken, as the tip is the portion I need to match to the real duck. Once the tip starts taking color, I’ll pull all the feathers when they’re about 3 shades too dark.
Sounds pretty simple.
Start adding more dye. Add one more teaspoon of tan, and one more teaspoon of golden yellow. Keep the feathers agitated and off the bottom of the pot. Anything touching the bottom of the pot for any length of time will curl or burn, so make sure you pull the stirring spoons out of the pot when not in use.
At intervals pull the strainer through and examine the effects.
After a couple minutes with little effect, add another teaspoon of each color. Mix each addition thoroughly to ensure consistency of color, while keeping your eyes peeled on the marabou.
The picture at right, above – shows the marabou starting to take on the tan color, not the yellow. We can’t afford to add anymore tan – so we’ll match the color by adding more yellow.
Add teaspoon of yellow. Marabou still tan. Add another teaspoon of yellow, marabou shows warming trend – so we’ll add one more teaspoon of yellow, and add nothing more. This eliminates all variables save the immersion time.
The Kid’s Hammy Hands were a blur in the Noonday sun
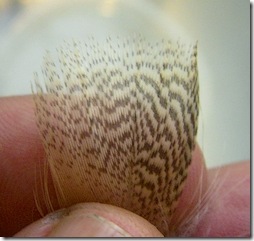 Yank a test feather from the dye bath and dry it by mashing it between paper towels, move quickly to fluff the feather out for inspection – as color is still darkening on the pot contents.
Looks good, but damp (nearly dry) feathers are one shade darker than bone dry.
We can see from the picture at left that the yellow is deepening and the tan has remained constant.
Pull another feather every minute until the nearly dry version is exactly one shade too dark. Refill the soaking pot with cold fresh water in the meantime. We’ll be yanking the feathers from the dye bath and dumping them straight into the soak bowl. The fresh water will dilute any dye remaining on the feather and they’ll cease the coloration process.
The all-important Yank and Cleanse
Kill the fire under the pot and with the deep fry strainer gather everything and immerse it into the soaking bowl. It’s critical not to chase the few feathers left in the pot, since every moment you’re fiddling the mass of feathers can be darkening. Grab the easy stuff and start the rinsing process.
Like the detergent wash, you’ll want to run about three passes of fresh clean water through the soak bowl. Agitate and squeeze the feathers until the water ceases to yellow.
Now wash one more time because salt really sucks.
Salt fixed dyes can be an irritant to the tyer if the feathers are not cleansed enough. You’re busy tying Quill Gordon’s and wipe the back of your fingers across your eyes – leaving just enough salt to irritate them. Three passes for the dye, and a fourth for salt.
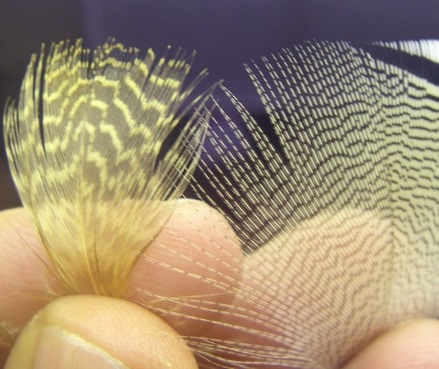
After all that pain and suffering here’s the final result. The feather on the left is damp and should lighten about one more shade when bone dry.
… and if my count is accurate the final formula was 5 teaspoons of golden yellow and 3 teaspoons of tan RIT.
Remember that each computer monitor will render a color palette differently, so I can’t promise what you’ll see. From my perspective I’m looking at a near match (once completely dry).
Dyeing your own materials is one of those final hurdles for any tyer aspiring to great things. If hurried it can also be the source of massive pocketbook destruction.
Many years ago I had the responsibility for dyeing most of the materials that the different shops stocked, and my scorched and maimed mistakes hidden in the trash where the Boss never looked. Most shops no longer do their own work, relying instead on prepackaged vendor colors instead of the fellow in a back room screaming from the dye bath emptied on his crotch.
Little wonder, that.
In the next installment we’ll cover acid dyes and animal fur, and while most of the preparation is identical there’s still a few tweaks you’ll need to know unique to hair and its coloration.
… and as this was in response to a reader request, if you have anything else you’d like me to cover, be sure to ask.
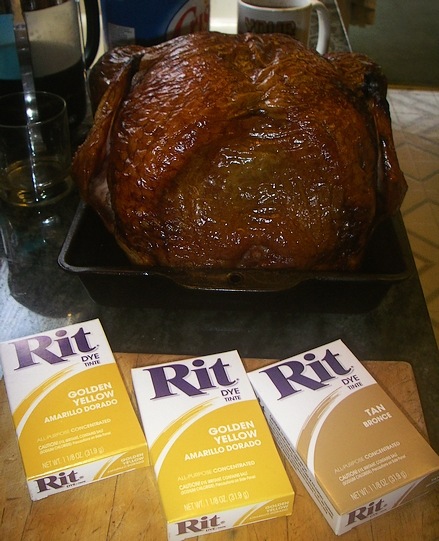
This is the “get out of Jail free” card, less you think I was emboldened to the point of invulnerability. One careless misstep with the dye bath, one slopped pot of duck feathers on the kitchen floor and the “Grim Sweeper” will come off that couch like a Thunderbolt ….
The recipe is more like 50-50 tan versus golden brown, and yields mostly dark meat – jaundiced actually, but she saw the detergent and sponges and has big stars in her eyes …
Tags: Lemon dyed Wood duck, RIT dyes, how to dye fly tying materials, how to enrage your spouse, Tintex, Teal flank, Gadwall flank, deep fat strainer, porcelain dye pots, coal tar dyes, acid dyes, pro chemical & dye, bulk fly tying materials, feather preparation, dyeing feathers

Solid, solid solid! My only concern is that you are starting to sounds like you know what you are doing….
Thanks for the post Keith, this is great stuff. Looking forward to part two on furs. I’ve got a 4′ by 6″ piece of red fox that I can’t wait to ruin!
Excellent info, Keith.
Not surprisingly Polly Rosborough had some good suggestions regarding dying.
Reference point- wet a real woodduck feather and pull your feathers when they are exactly THAT hue.
Woodduck with Rit- Polly used 2 parts Tan to one part Gold (similar to what you brew).
I’ve successfully added both cream of tartar and white vinegar as a fixative- also called a “mordant”. The word appropriately hints of alchemy.
P.S. Just checked the Rit page. They say the formula to make “Gold” is 1 pkg. Golden Yellow plus 1 1/2 tsp Tan.
You’ve got it wired.
That’s great information. Rather than guesswork over shades just wet a feather and use that as the example.
Much simpler – less mysterious. We like it.
Pingback: Part 1: The Timid Fellow's Guide to Dyeing | Singlebarbed Accident by about
Ah,yes. The excellent adventure! Considering the amount of time that both you and A.K. Best are willing to devote to preparing and dying feathers and fur, I think that I’ll stay out of the kitchen. Which I worked long and hard to provide.
Maybe, it’s just to much like work for me. Or, I just don’t care if the yellow tint is more delecate than the store bought duck feather. Perhaps, when I retire…not!
By the way, if my memory of college chem serves me well, Muriatic Acid is a 10% Hydrochloric Acid solution. It’s fairly corrosive.
I think that I’ll stick to brewing beer!
Hey K…great information…as stated by some of the others.
Question…have you experienced a differance in the dye colors when you change the material of the containers you mix in…for example…a differance in the exact dye mixture from aluminum to plastic.
Aluminum and plastic can both retain dye if not thoroughly cleaned. Salt fixed dyes can etch aluminum making them very hard to clean.
On the whole, no. But there is a higher chance of traces from your last color seeping from the pot into the current color solely due to the inability to clean them effectively.
As most dye baths are heated (not all) plastic has never been an option other than as a soaking bowl – either soaking in a cold dye, or soaking prior to going into the hot pot.
Even my porcelain bowls are showing signs of etching from salt, the bottoms are no longer smooth.
I’d stick with the tried and true.
Pingback: Part 2: The timid fellows guide to dyeing hair | Singlebarbed
Pingback: Dying materials - The North American Fly Fishing Forum
Thanks for an excellent succinct and clear article on dyeing animal hair and bird feathers.
Now I know it is not worthwhile for me to try to dye some of the animal fur I have collected.
Pingback: Dyeing the rarer forms of Blue Dun capes | Singlebarbed